
Blog
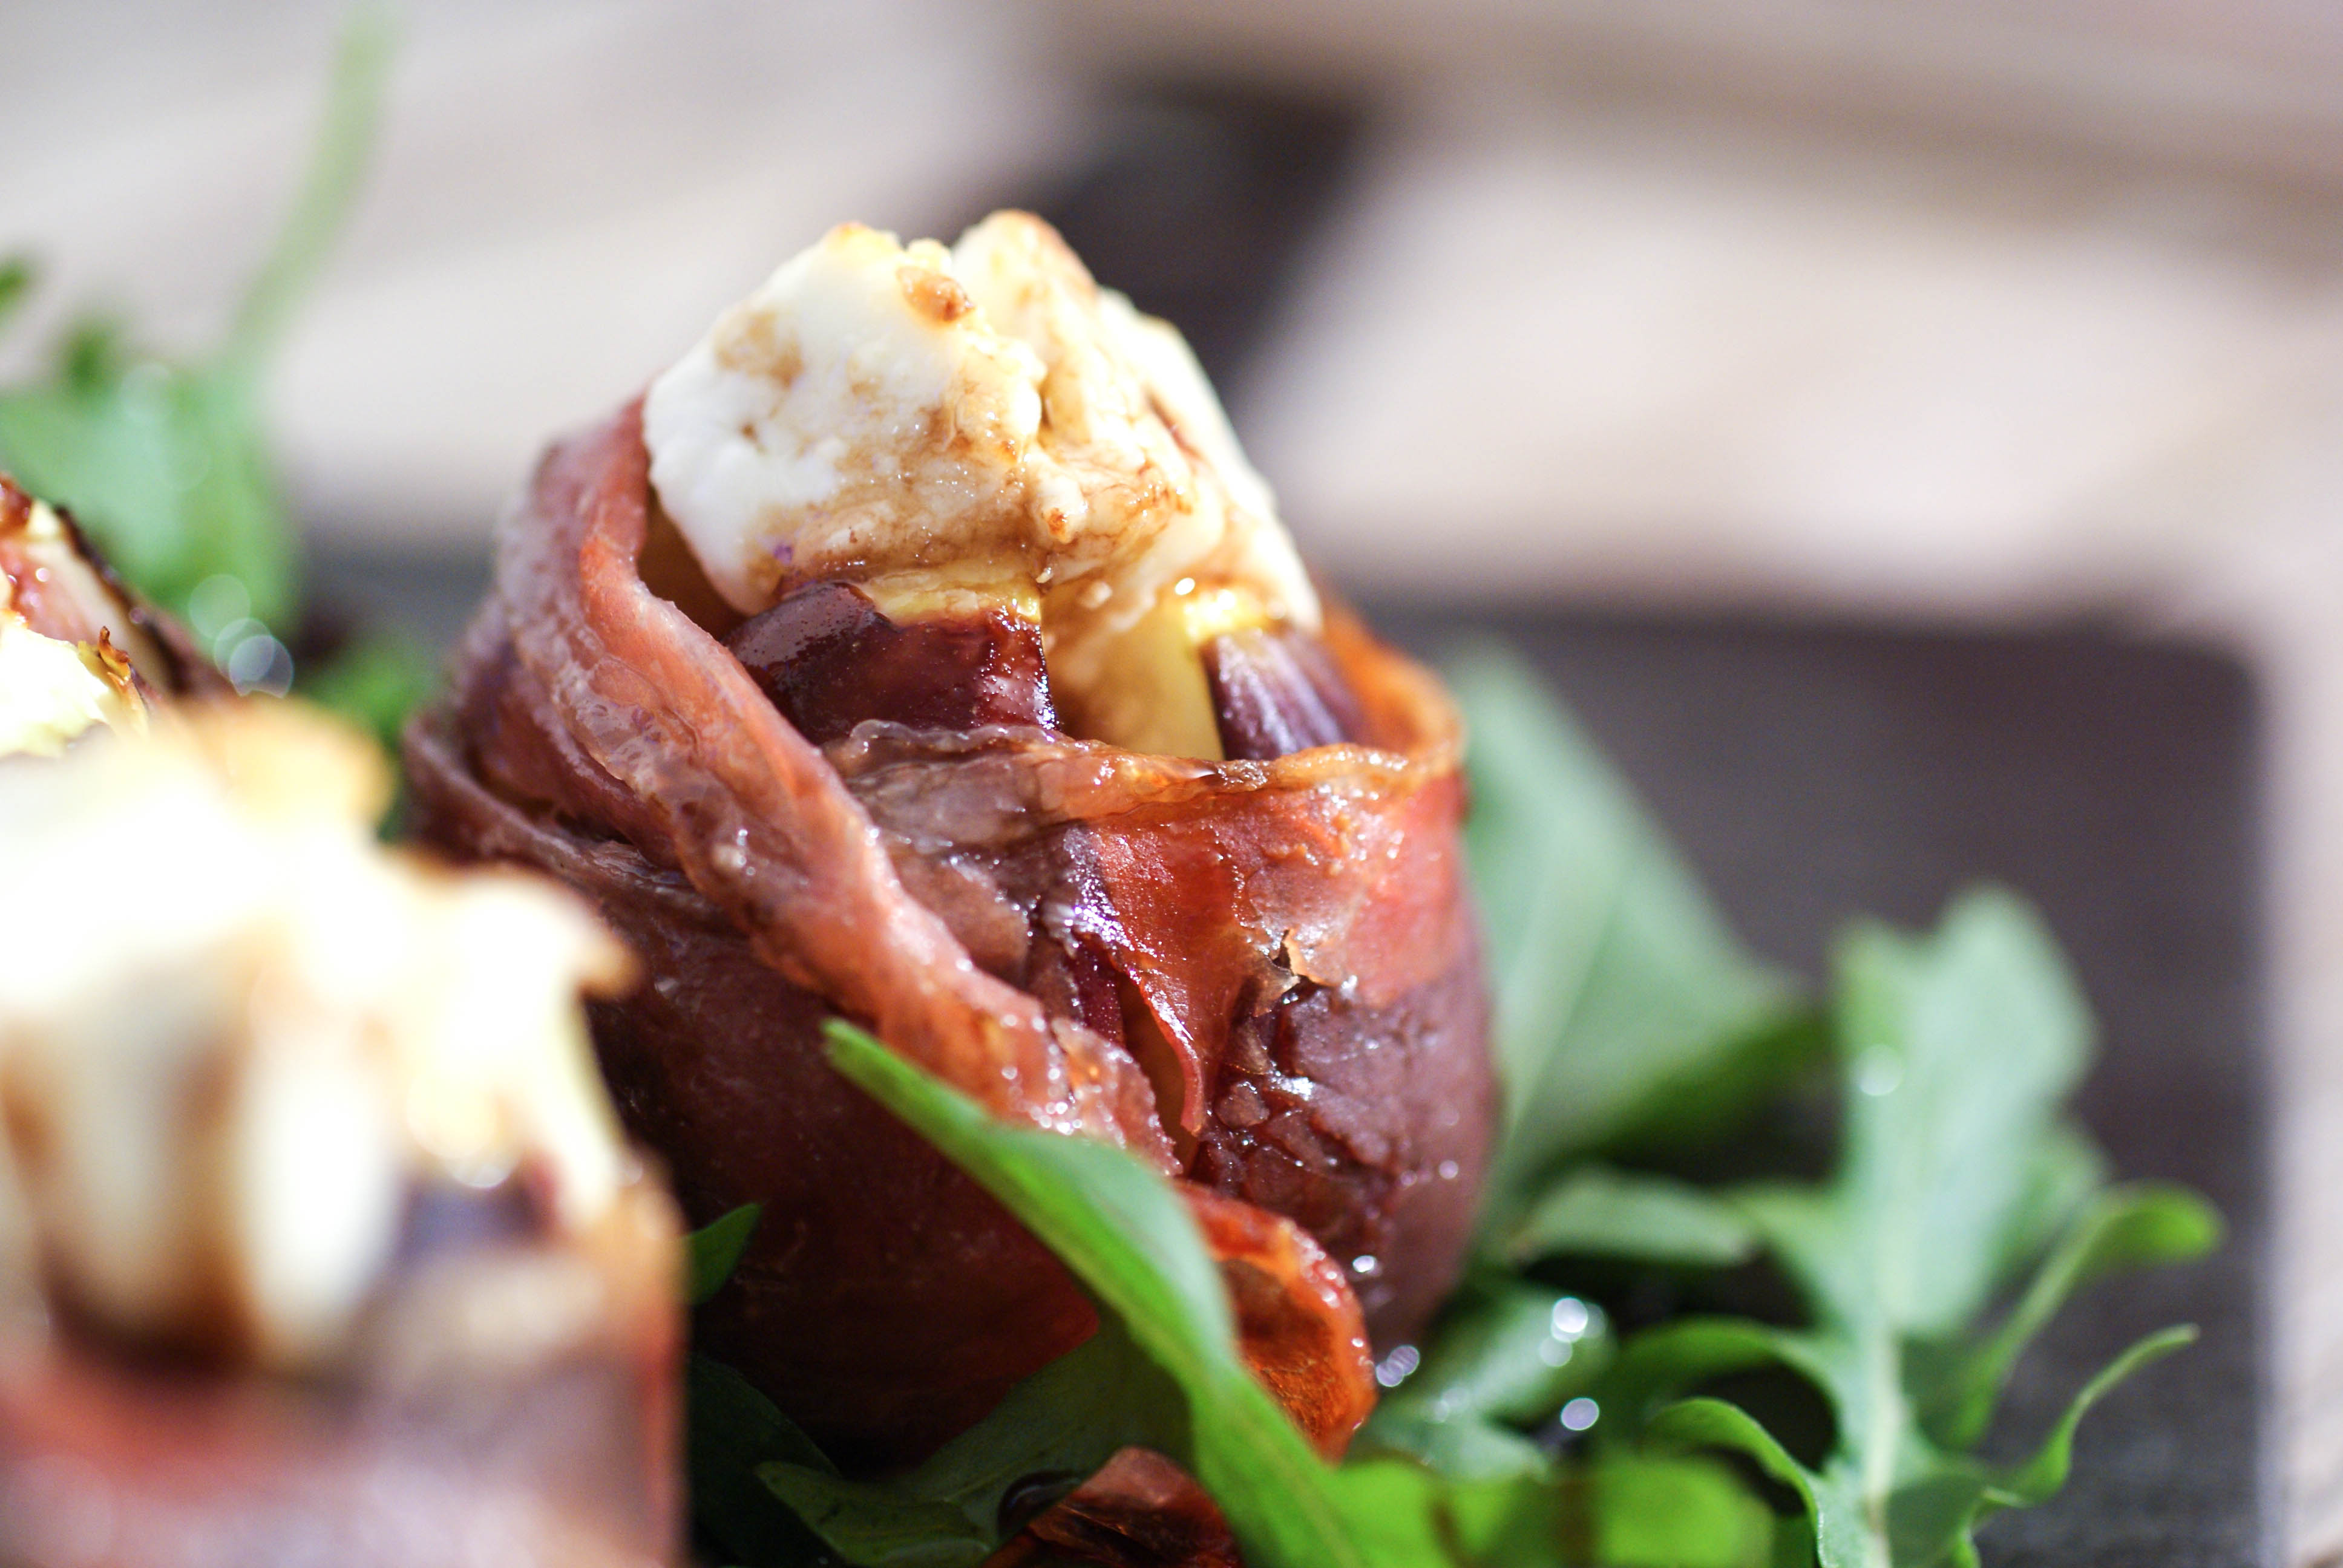
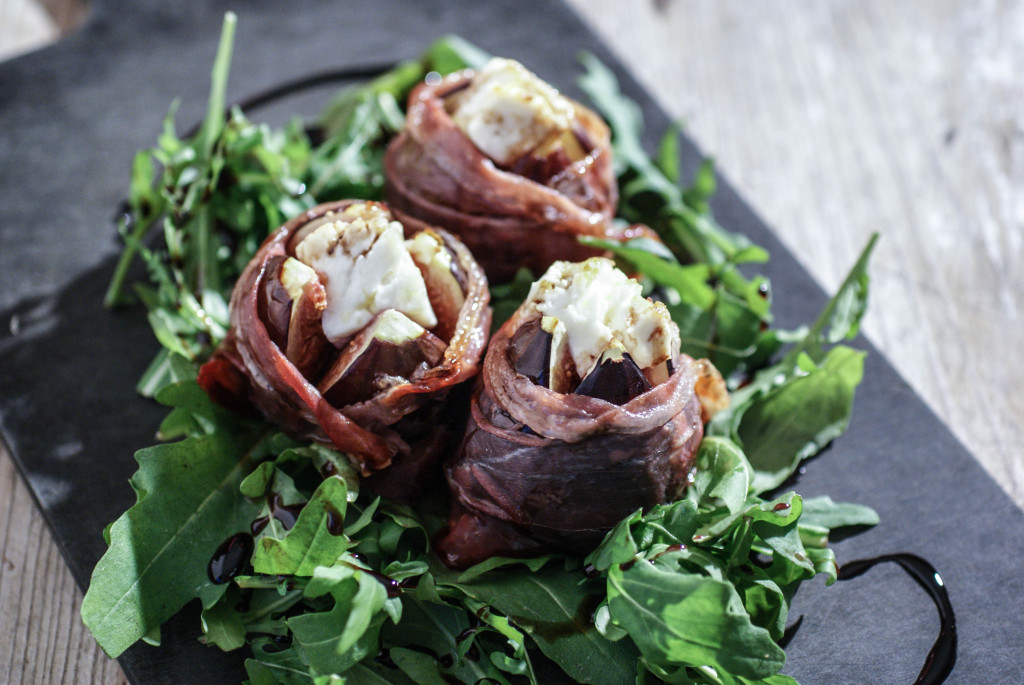
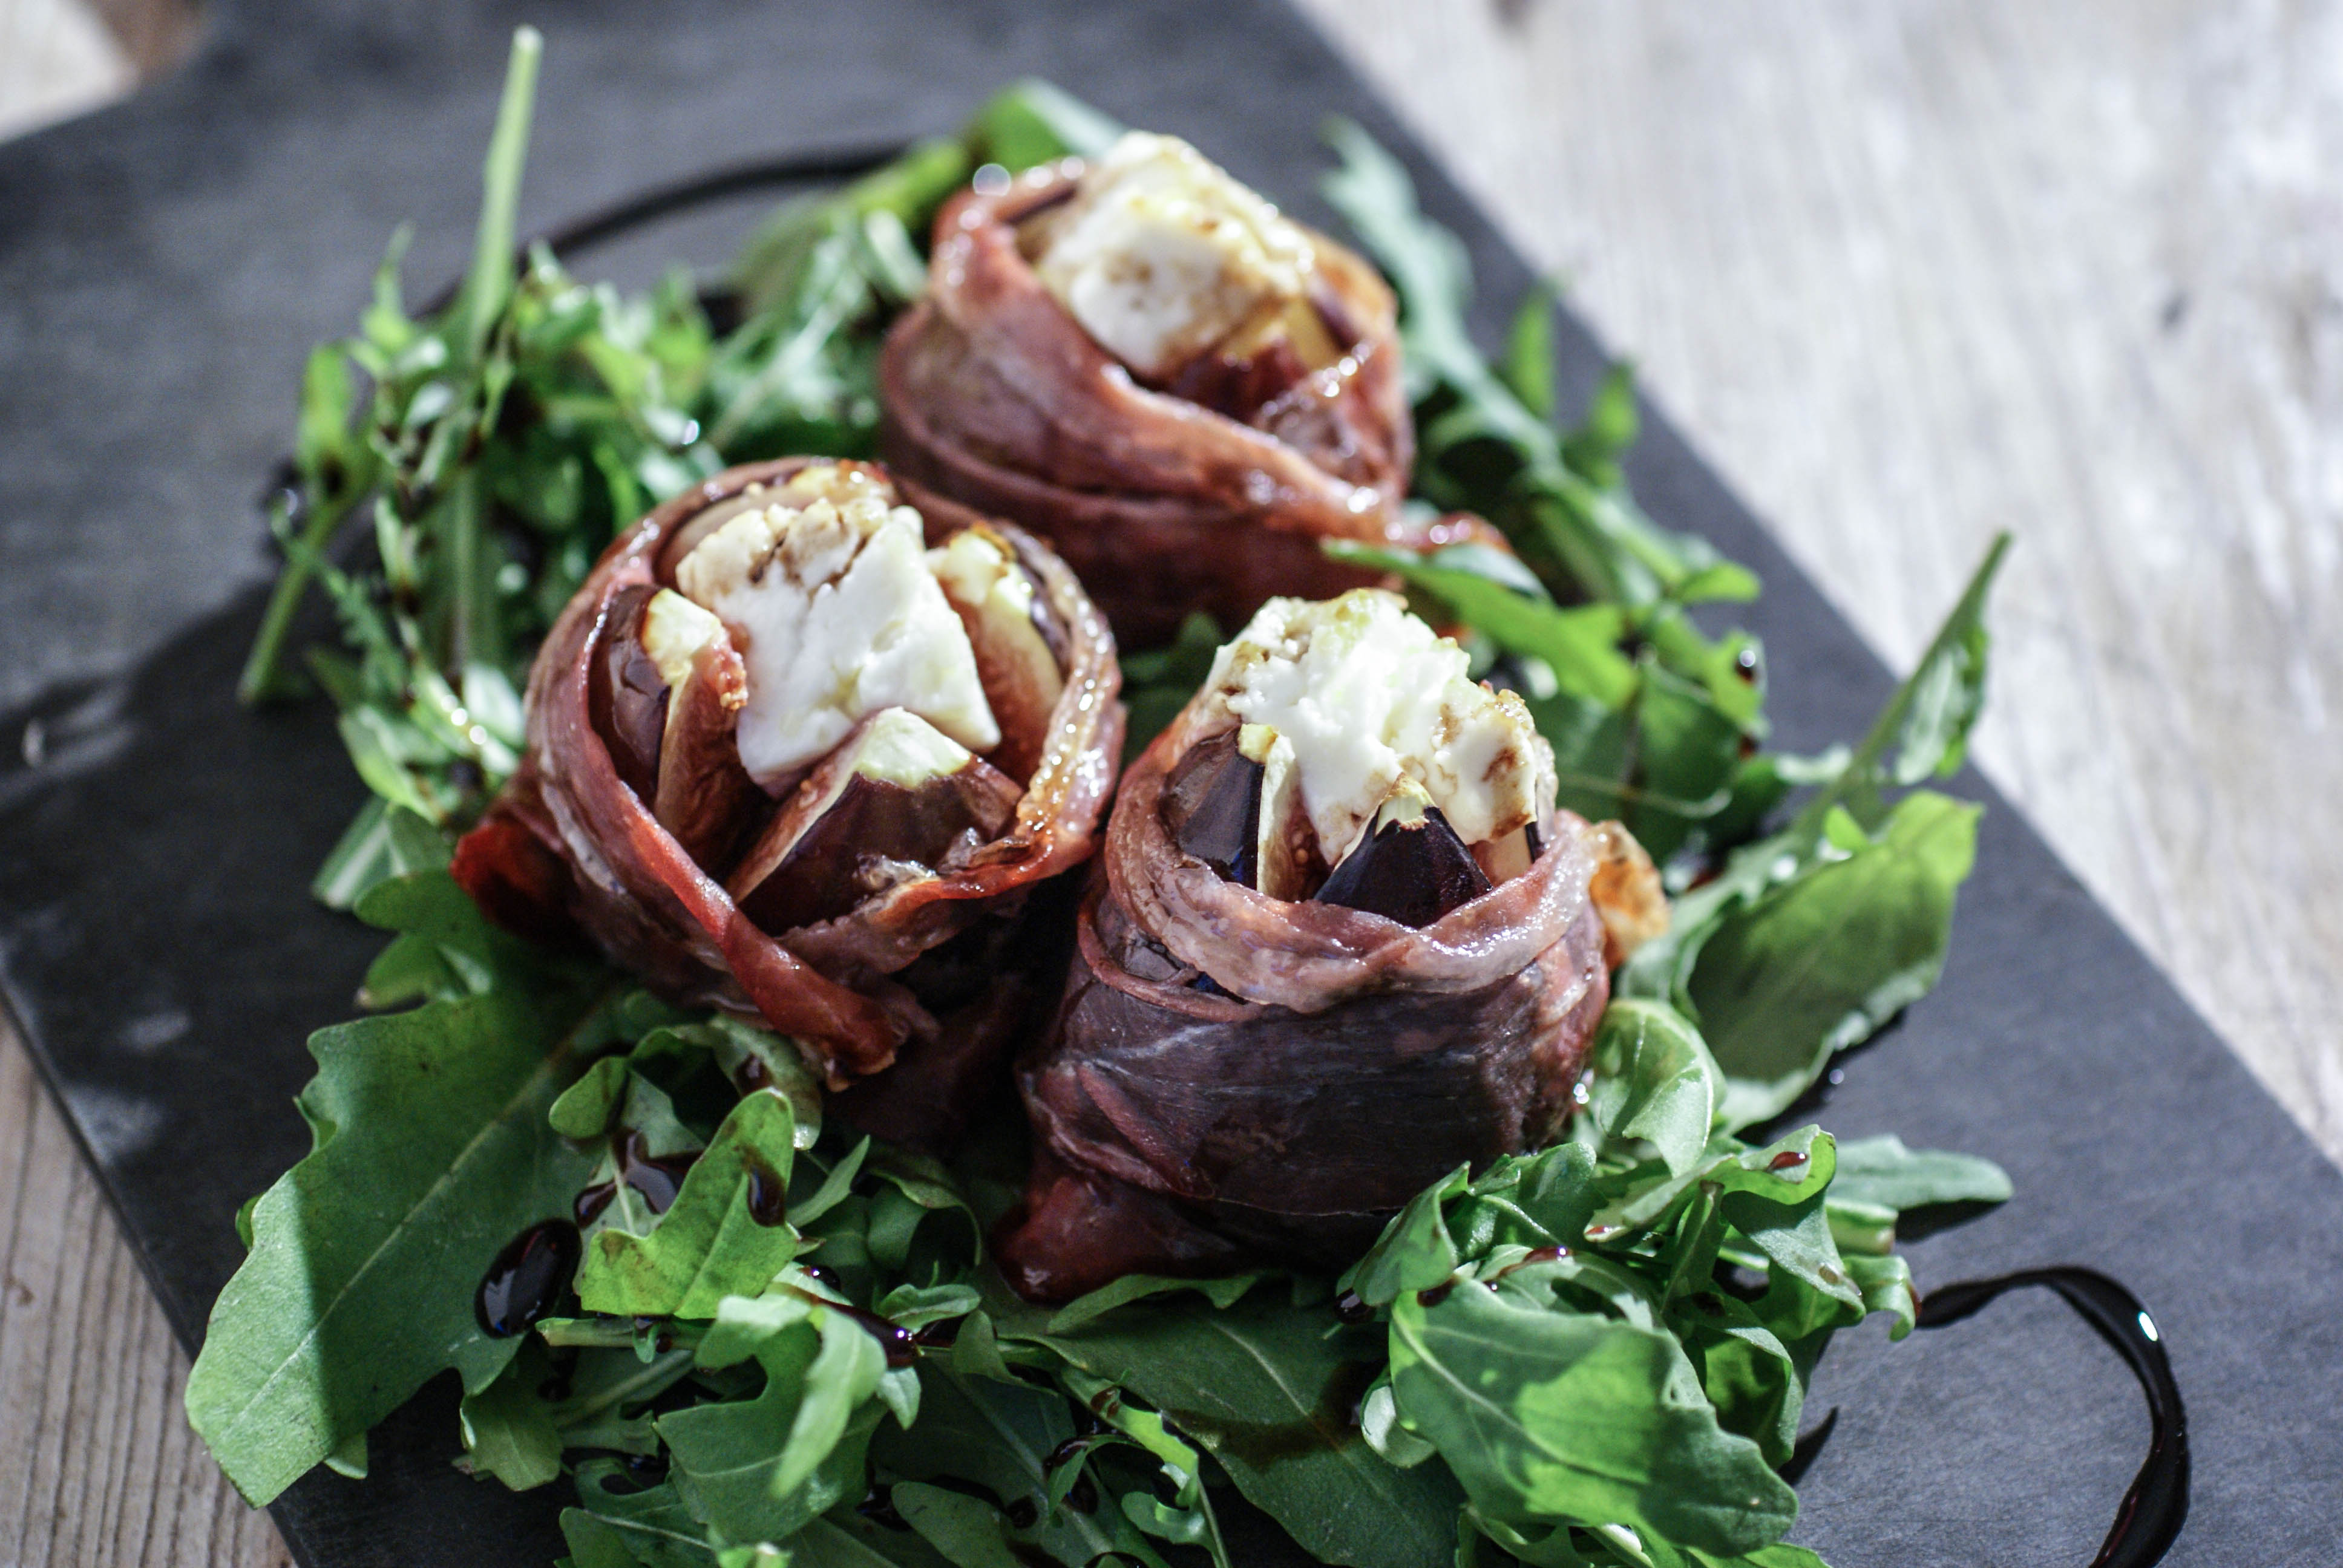
Hot Fig Appetizer

I’ve made this as a cold appetizer in the past, but this time around I made it hot and served it as a side salad. It was super delicious and now I can’t decide if I like it better hot or cold.

Simple ingredients
Hot Fig
Ingredients
- 4 fresh figs
- Prosciutto, one slice per fig
- Fresh goat cheese (or cheese of your choice, or leave it off if you don’t do any dairy)
- Fresh salad greens, I used rucola
- Balsamic vinegar
Instructions
- Start at the top pointy end of your figs and cut a cross in them. Cut about half way down and then grab the fig and squeeze it a bit to get the cross to open.
- Wrap a piece of Prosciutto around the base of the fig.
- Place a small chunk of goats cheese into the opening that was made by cutting the cross in the fig.
- Place on a baking sheet and broil for about 5 minutes or until the cheese starts to brown.
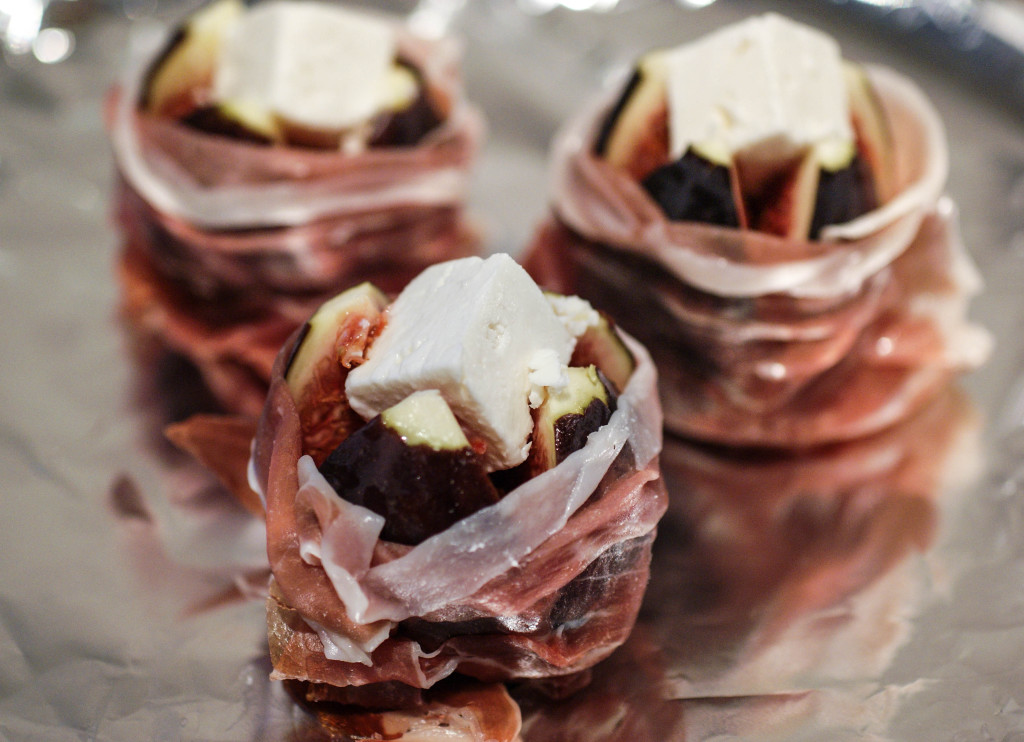
Ready for the oven
- Place on a bed of greens and drizzle with balsamic vinegar.

Ingredients
- 4 fresh figs
- Prosciutto, one slice per fig
- Fresh goat cheese (or cheese of your choice, or leave it off if you don't do any dairy)
- Fresh salad greens, I used rucola
- Balsamic vinegar
Instructions
- Start at the top pointy end of your figs and cut a cross in them. Cut about half way down and then grab the fig and squeeze it a bit to get the cross to open.
- Wrap a piece of Prosciutto around the base of the fig.
- Place a small chunk of goats cheese into the opening that was made by cutting the cross in the fig.
- Place on a baking sheet and broil for about 5 minutes or until the cheese starts to brown.
- Place on a bed of greens and drizzle with balsamic vinegar.
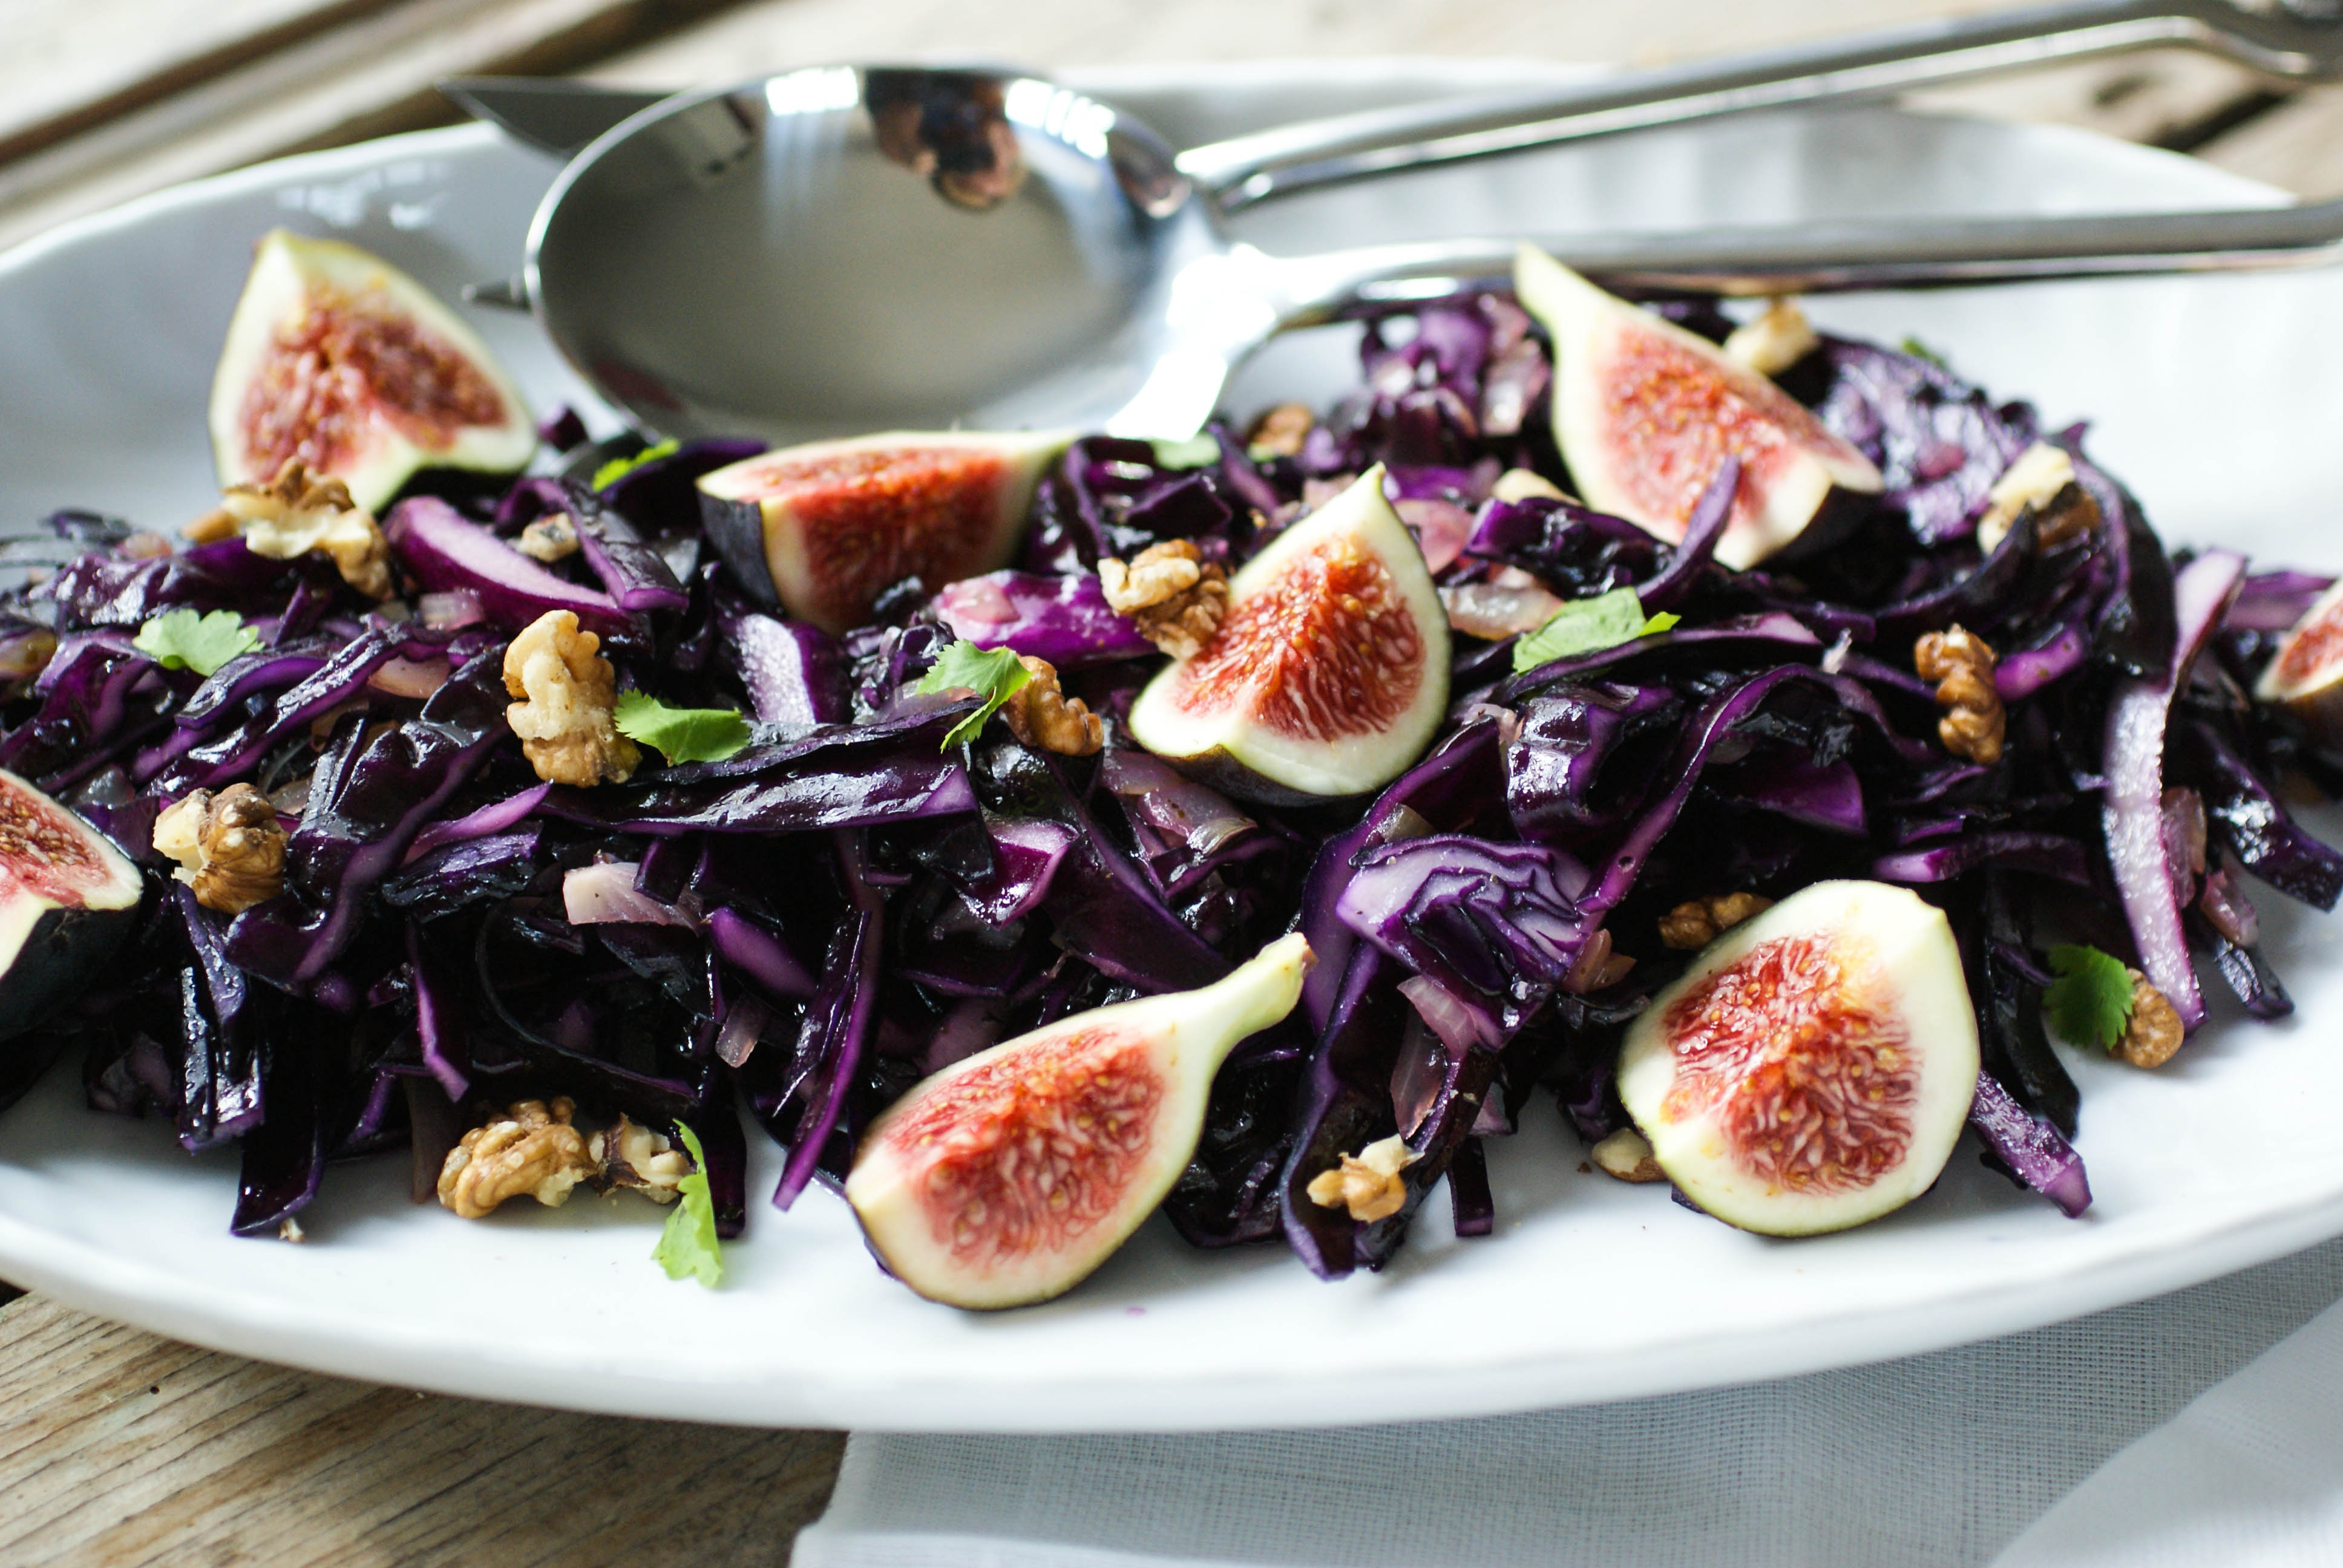
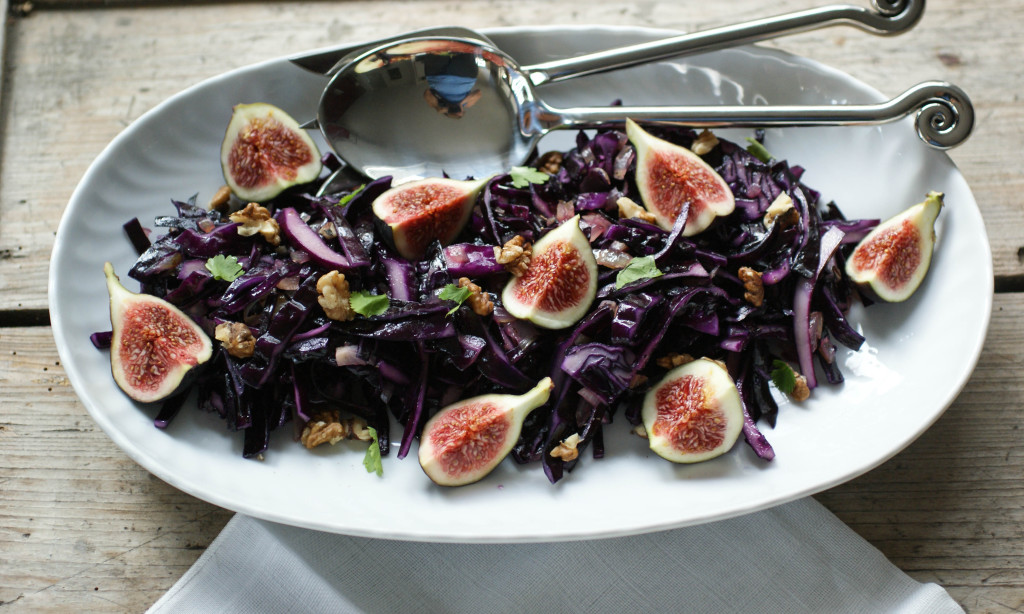
Red Cabbage and Fig Salad

Fresh figs have been in the stores for the last few weeks and I figured I’d use them in my cooking while I can since it will be a whole year before I see them again. We grilled up a pork loin for dinner and had this salad along with some roasted cauliflower for a delicious fall meal.
If you are bored while you are looking at this, you can play “Find Lisa”. I don’t have any fun photshopping software so I couldn’t erase myself from the reflection in the spoon 🙂
Perfect Fall salad
If it’s not fig season where you are, I think this cabbage salad would also be good with another fruit like sliced/diced apples or pears. You could also sprinkle some chopped dried figs if that’s all you have available.
Here is another recipe for a salad with red cabbage (it’s my all-time favorite) and you can look here, here, and here for other recipes using figs.

Love the colors in this salad
Ingredients
- Red cabbage, half a head, cored and sliced
- 1 teaspoon salt
- 2 Tablespoons olive oil, divided
- 1 onion, diced
- 1/2 teaspoon dried oregano
- 60 ml (about 1/4 cup) white balsamic vinegar*
- 1 Tablespoon honey
- Fresh ground pepper
- 2 fresh figs, cut into quarters
- Optional: handful of chopped walnuts and fresh oregano leaves to garnish
- *You could use apple cider vinegar if you don’t have white balsamic
Instructions
- Cut the head of cabbage into quarters and remove the white center core. Save 2 of the quarters for another salad or use them and double the recipe to serve 4-6 people.
- Slice the cabbage into thin strips and put in a large mixing bowl. Add the salt and then massage the cabbage (rub around with your hands…yes, they will get a bit purple!). This causes the cabbage to soften and release some of it’s water content. Set aside.
- Heat 1 Tablespoon of the olive oil in a pan over medium heat and cook the diced onion until translucent.
- Add in the balsamic vinegar and dried oregano and cook until the vinegar reduces down (about 5 minutes).
- Remove from heat and add in the honey and a few grinds of fresh pepper.
- Add the onion mixture to the cabbage and toss well. Drizzle with the remaining tablespoon of olive oil.
- Remove to a serving platter and garnish with the quartered figs and walnuts.
Red cabbage and figs

Ingredients
- Red cabbage, half a head, cored and sliced
- 1 teaspoon salt
- 2 Tablespoons olive oil, divided
- 1 onion, diced
- 1/2 teaspoon dried oregano
- 60 ml (about 1/4 cup) white balsamic vinegar*
- 1 Tablespoon honey
- Fresh ground pepper
- 2 fresh figs, cut into quarters
- Optional: handful of chopped walnuts and fresh oregano leaves to garnish
- *You could use apple cider vinegar if you don't have white balsamic
Instructions
- Cut the head of cabbage into quarters and remove the white center core. Save 2 of the quarters for another salad or use them and double the recipe to serve 4-6 people.
- Slice the cabbage into thin strips and put in a large mixing bowl. Add the salt and then massage the cabbage (rub around with your hands...yes, they will get a bit purple!). This causes the cabbage to soften and release some of it's water content. Set aside.
- Heat 1 Tablespoon of the olive oil in a pan over medium heat and cook the diced onion until translucent.
- Add in the balsamic vinegar and dried oregano and cook until the vinegar reduces down (about 5 minutes).
- Remove from heat and add in the honey and a few grinds of fresh pepper.
- Add the onion mixture to the cabbage and toss well. Drizzle with the remaining tablespoon of olive oil.
- Remove to a serving platter and garnish with the quartered figs and walnuts.
Amazing Chicken Wings

Mr. Swiss Paleo is an amazing cook. He’s actually much better at it than I am so, of course, I let him do a lot of the cooking. We might both starve if he didn’t 🙂 The other night he cooked up these incredible chicken wings based on a recipe he had seen in the food section of the New York Times. We both decided that next time (and there will be a next time), we need to double this recipe because it was just so good. Sadly, I had no left overs for my lunch the next day.
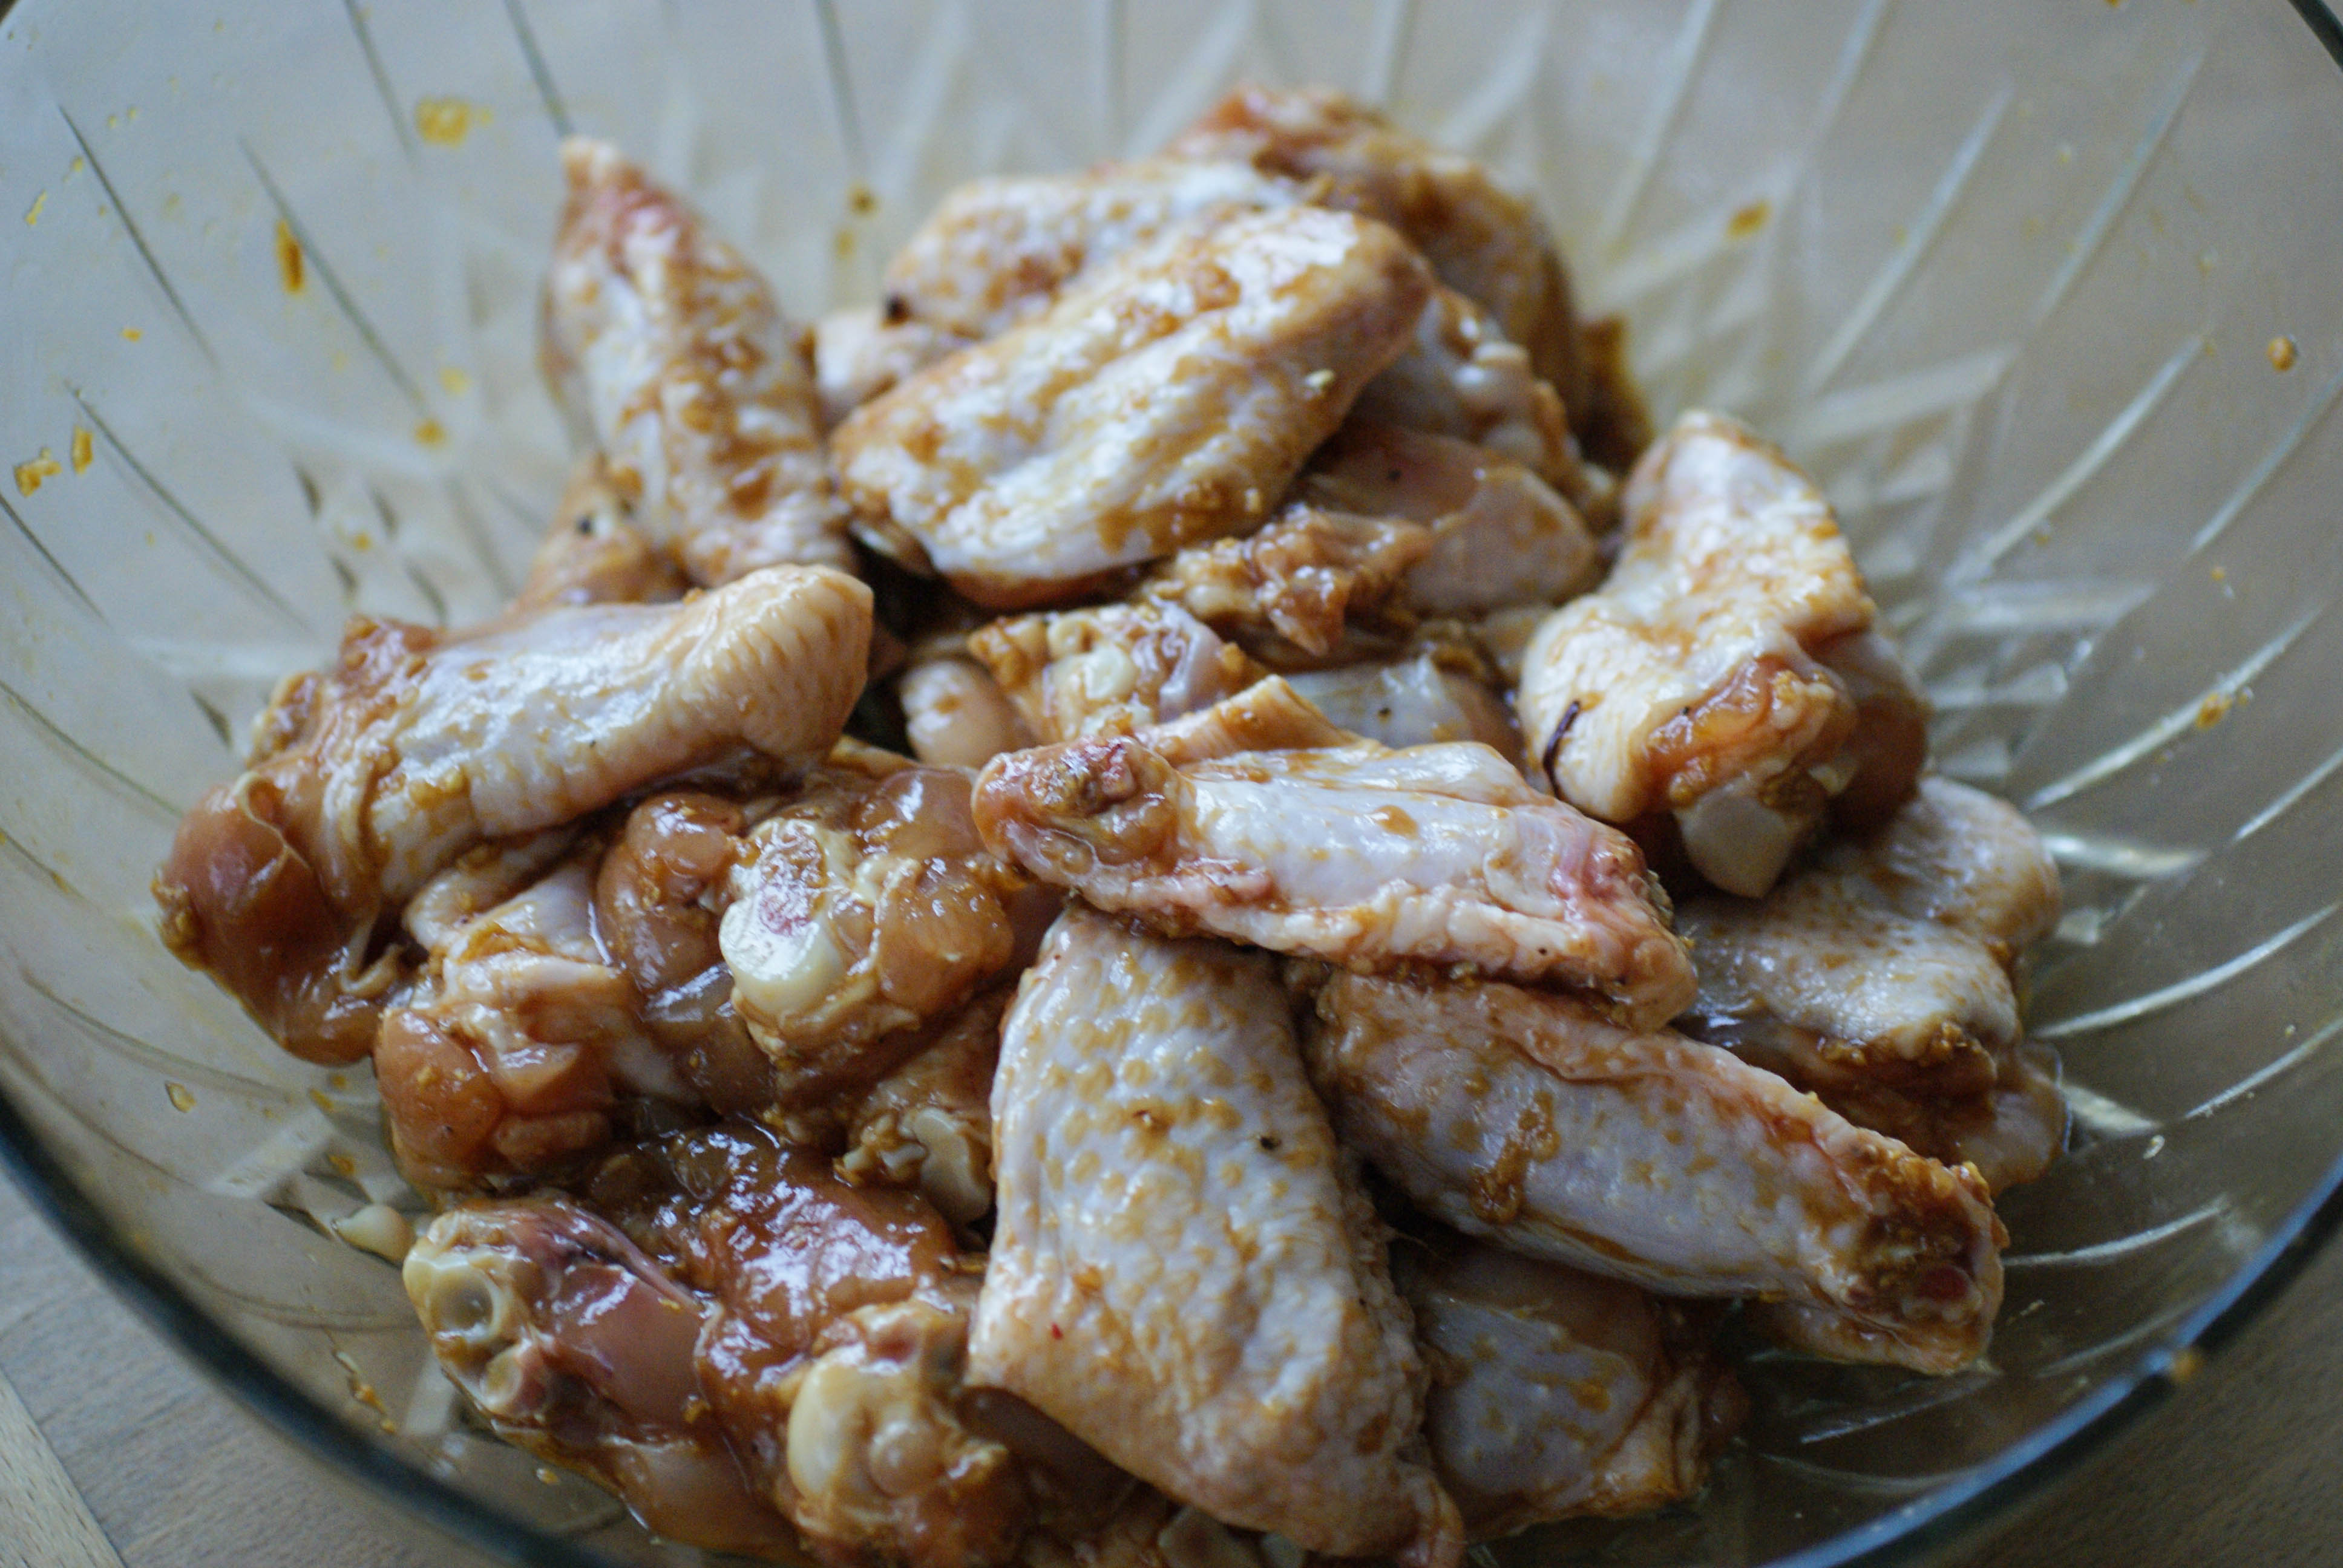
These are really easy to make, but you need to plan ahead to marinate the wings for several hours or overnight.

Amazing Chicken Wings
Ingredients
For the Marinade
- 3 pounds (1.3 kg) chicken wings
- 1 large garlic clove, minced
- 1.5 inch (thumb size) piece fresh ginger, grated
- 2 Tablespoons coconut aminos (or gluten free tamari sauce)
- 1 Tablespoon fish sauce (Red Boat is the brand we use)
- 1 Tablespoon olive oil
- 1/2 teaspoon Marsala wine*
- 1/2 teaspoon salt
- 1/2 teaspoon black pepper
For the Glaze
- 1 cup Marsala wine
- 2 Tablespoons coconut aminos (or gluten free tamari sauce)
- 1 Tablespoon fish sauce
- 1 teaspoons chili powder
- 2 teaspoons fresh lemon juice
- 1 teaspoon lemon zest
- 1/2 teaspoon black pepper
- 1 teaspoon garlic, minced
- 1 Teaspoon sesame seeds for garnish
- Spring onion, chopped for garnish
*The sweetness in this recipe comes from the Marsala wine. If you need to make a substitution, the only other wine that would give you similar results would be Mirin which is a Japanese sweet rice wine.
Instructions
- Mix everything together for the marinade and toss in the chicken wings. Mix the wings all around to get them well coated with the marinade.

Marinating the wings
- Marinate the wings for a few hours or overnight in the fridge.
- When you are ready to start cooking, mix all of the ingredients for the glaze(except the sesame seeds and spring onions) together and heat in a sauce pan. Simmer over low heat for about 20 minutes until it starts to look glazey and saucey.
- Lay your wings out on a baking sheet and turn your oven broiler to high.
- Broil for 12 minutes, flipping the wings over half way through. They are finished when they are golden and crispy.
- Remove the wings from the oven and toss them with the glaze in a mixing bowl.
- Sprinkle on sesame seeds and garnish with chopped spring onions.
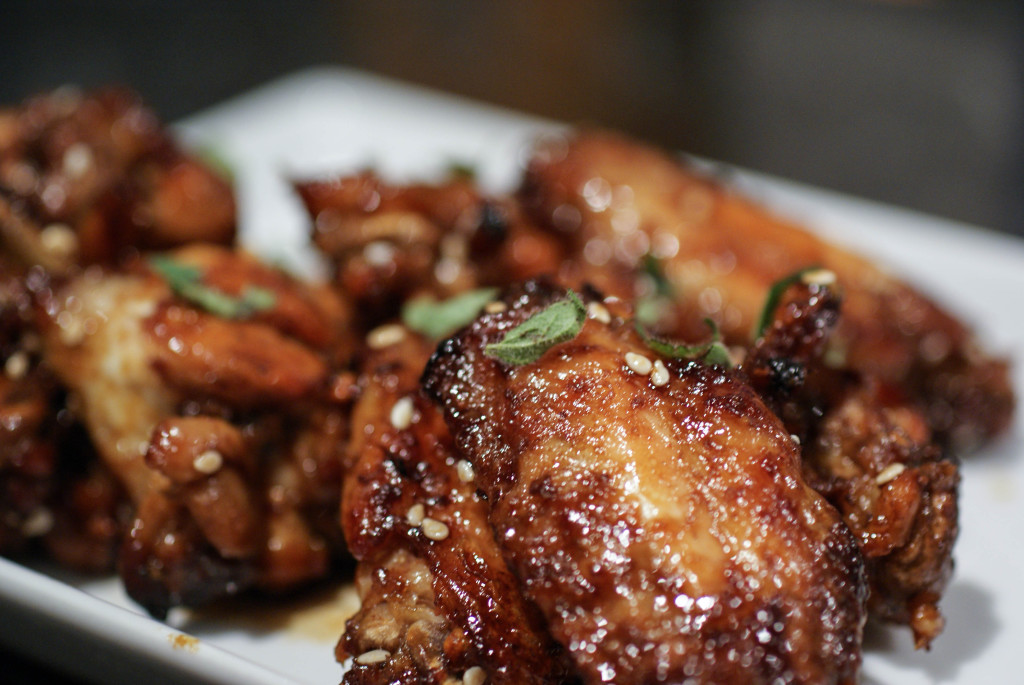
Delicious!

Ingredients Instructions Notes The sweetness in this recipe comes from the Masala wine. Any other kind of wine won't give you the same results. You could, however, use Mirin which is a sweet Japanese rice wine.
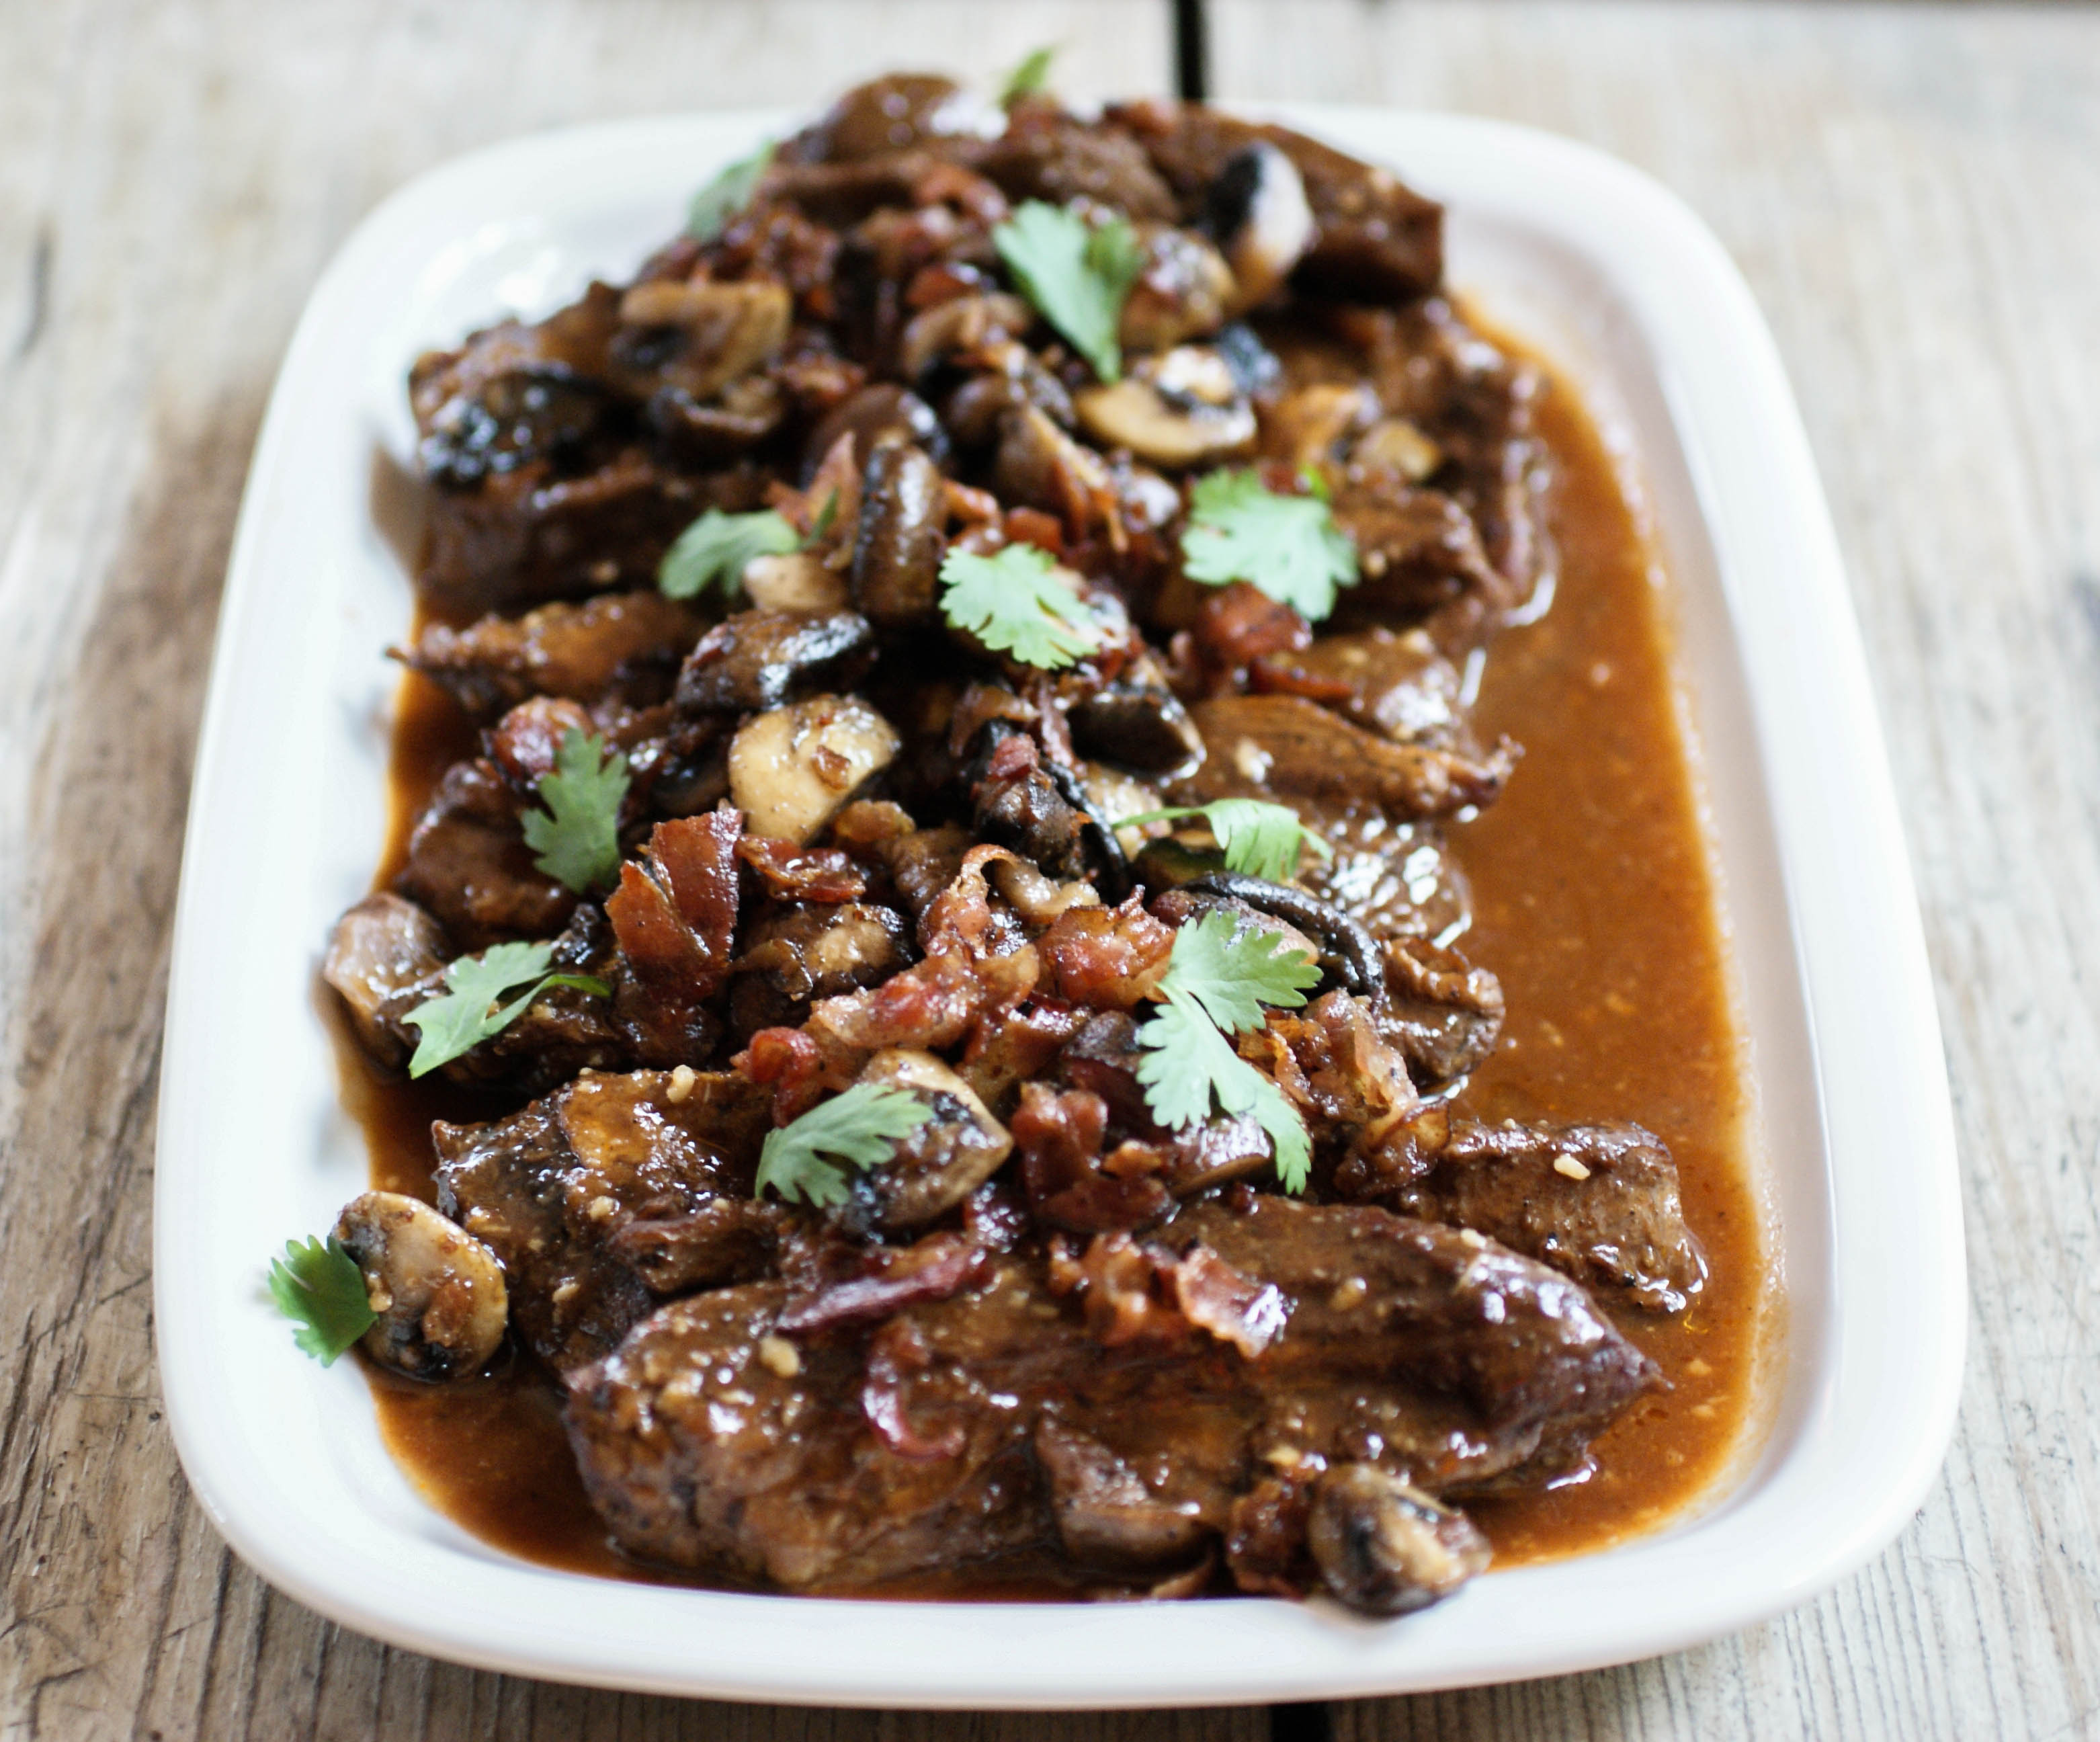
Slow Cooked Beef Short Ribs with Bacon and Mushrooms

I love cooking shows. I even love a show from the BBC that’s all about baking. The things they make are all full of gluten and sugar, but it’s fun to watch just the same. The other day, I came across a cooking show and the featured recipe was for these slow cooked beef short ribs. I tried to pay close attention so that I could re-create it in my own kitchen. We did a few things differently, but man oh man was it ever delicious.

So rich and delicious
Ingredients
- 1 kg (2 pounds) beef short ribs (but we actually used a cut here called siedfleisch)
- Oil of choice for frying (coconut, lard, olive oil)
- 1 large head of garlic, cut in half horizontally
- 2 Tablespoons tomato puree
- 1 cup of red wine
- 2 cups of bone broth
- 150 grams (5 oz) bacon, chopped
- 250 grams (9 oz) mushrooms, sliced into quarters
- salt and pepper to taste
- Fresh parsley to garnish
Instructions
- Pre-heat the oven to 350 F (170 C).
- Heat a large roasting tray or pan on the stove and add a few glugs of oil.
- Salt and pepper your meat and add it to the pan to brown it well on all sides (about 15 minutes).
- Add the halved garlic heads to the pan cut side down.
- Add in the tomato puree and the wine, scraping up the bits at the bottom.
Before going in the oven
- Bring to a boil and cook for 10-15 minutes until the liquid is reduced by half.
- Now add in the bone broth and bring to a boil again, basting the meat with the juices.
- Cover with foil and put it in the pre-heated oven and bake for 3-4 hours. It’s done when it’s falling off the bone or falling apart.
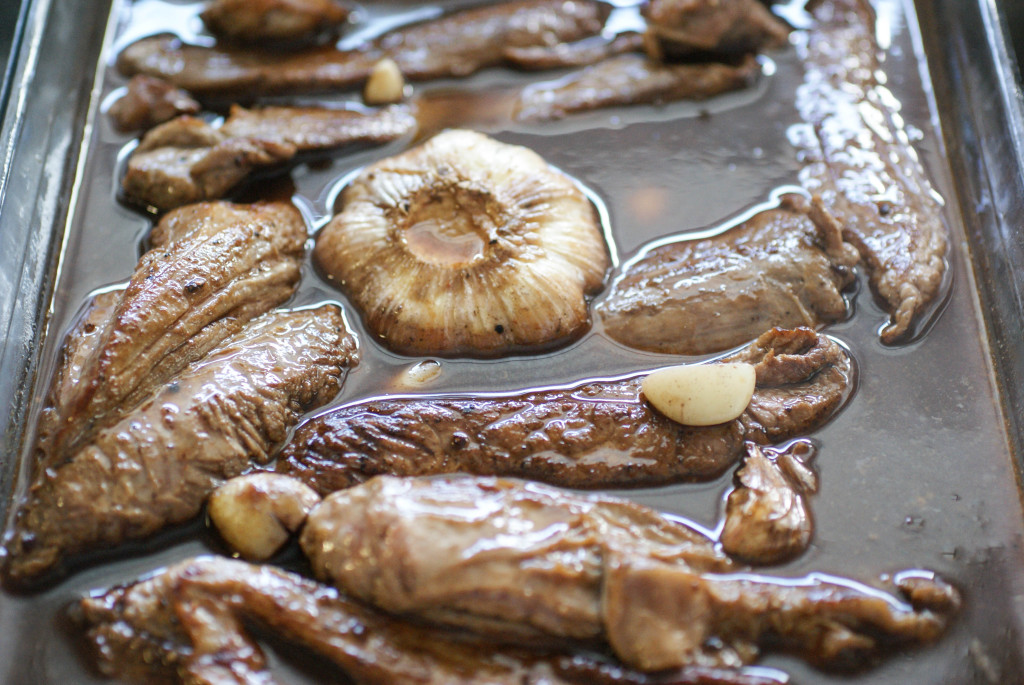
- When your meat is about 15 minutes from being finished, fry up the bacon until crisp and add the mushrooms and cook until tender (about 5 minutes).
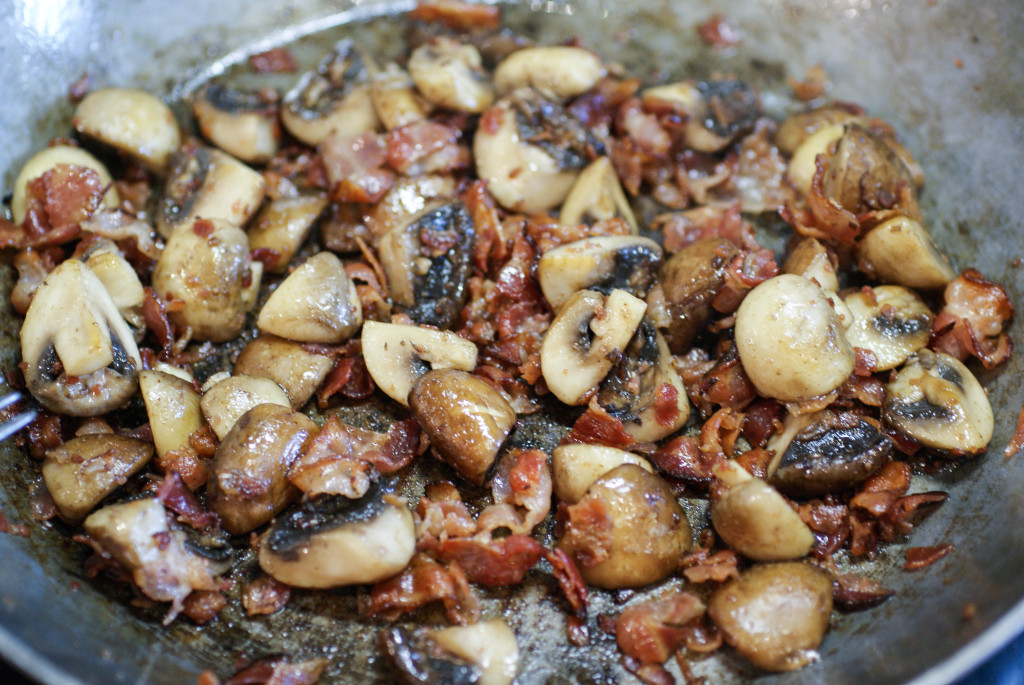
Bacon makes everything better
- When the meat is ready, remove it from the oven and put it on a serving dish.
- Take the two garlic head halves and squeeze the garlic into a metal sieve and mash it through into a bowl.
- Now pour the meat juices from the pan through the sieve and add to the garlic. If the sauce seems too thin, you can reduce it down on the stove top.
- Pour the sauce over the meat on the serving tray and top with the bacon and mushrooms.
- Yes, you will want to lick the sauce off your plate!

Ready to eat!


Ingredients
- 1 kg (2 pounds) beef short ribs (but we actually used a cut here called siedfleisch)
- Oil of choice for frying (coconut, lard, olive oil)
- 1 large head of garlic, cut in half horizontally
- 2 Tablespoons tomato puree
- 1 cup of red wine
- 2 cups of bone broth
- 150 grams (5 oz) bacon, chopped
- 250 grams (9 oz) mushrooms, sliced into quarters
- salt and pepper to taste
- Fresh parsley to garnish
Instructions
- Pre-heat the oven to 350 F (170 C).
- Heat a large roasting tray or pan on the stove and add a few glugs of oil.
- Salt and pepper your meat and add it to the pan to brown it well on all sides (about 15 minutes).
- Add the halved garlic heads to the pan cut side down.
- Add in the tomato puree and the wine, scraping up the bits at the bottom.
- Bring to a boil and cook for 10-15 minutes until the liquid is reduced by half.
- Now add in the bone broth and bring to a boil again, basting the meat with the juices.
- Cover with foil and put it in the pre-heated oven and bake for 3-4 hours. It's done when it's falling off the bone or falling apart.
- When your meat is about 15 minutes from being finished, fry up the bacon until crisp and add the mushrooms and cook until tender (about 5 minutes).
- When the meat is ready, remove it from the oven and put it on a serving dish.
- Take the two garlic head halves and squeeze the garlic into a metal sieve and mash it through into a bowl.
- Now pour the meat juices from the pan through the sieve and add to the garlic. If the sauce seems too thin, you can reduce it down on the stove top.
- Pour the sauce over the meat on the serving tray and top with the bacon and mushrooms.
- Yes, you will want to lick the sauce off your plate!
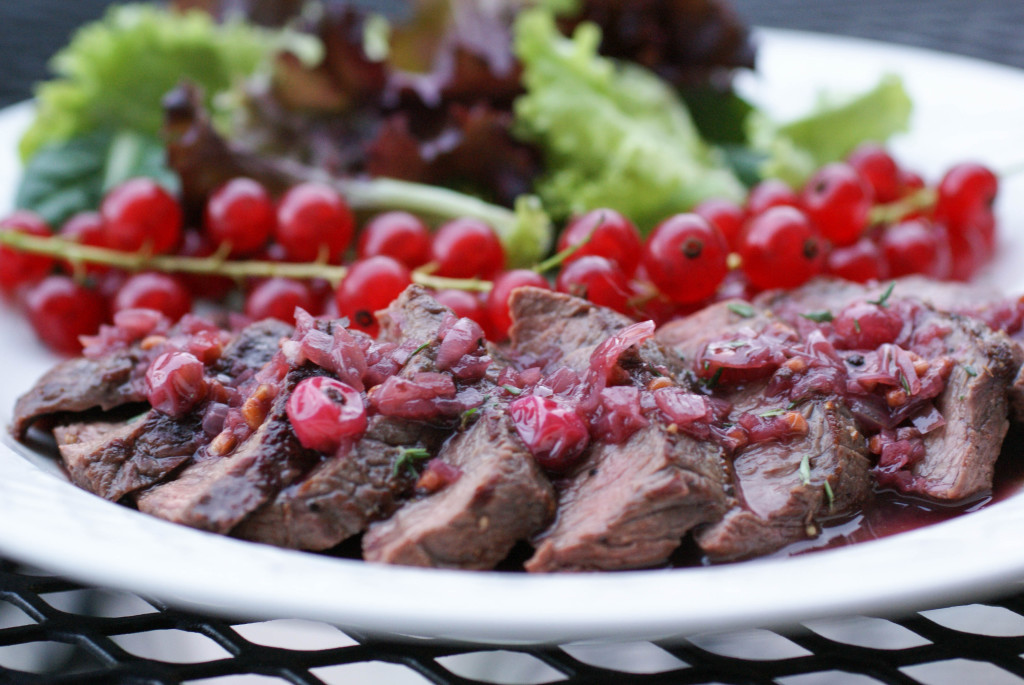
Venison with Red Currant Sauce
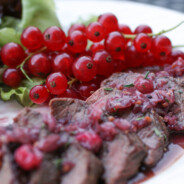
It’s “wild” season here again in Switzerland. “Wild” means game meat, so things like venison and wild boar start showing up on menus and in the grocery store. It’s also red currant season. What a happy coincidence! We paired the two together for a delicious dinner.
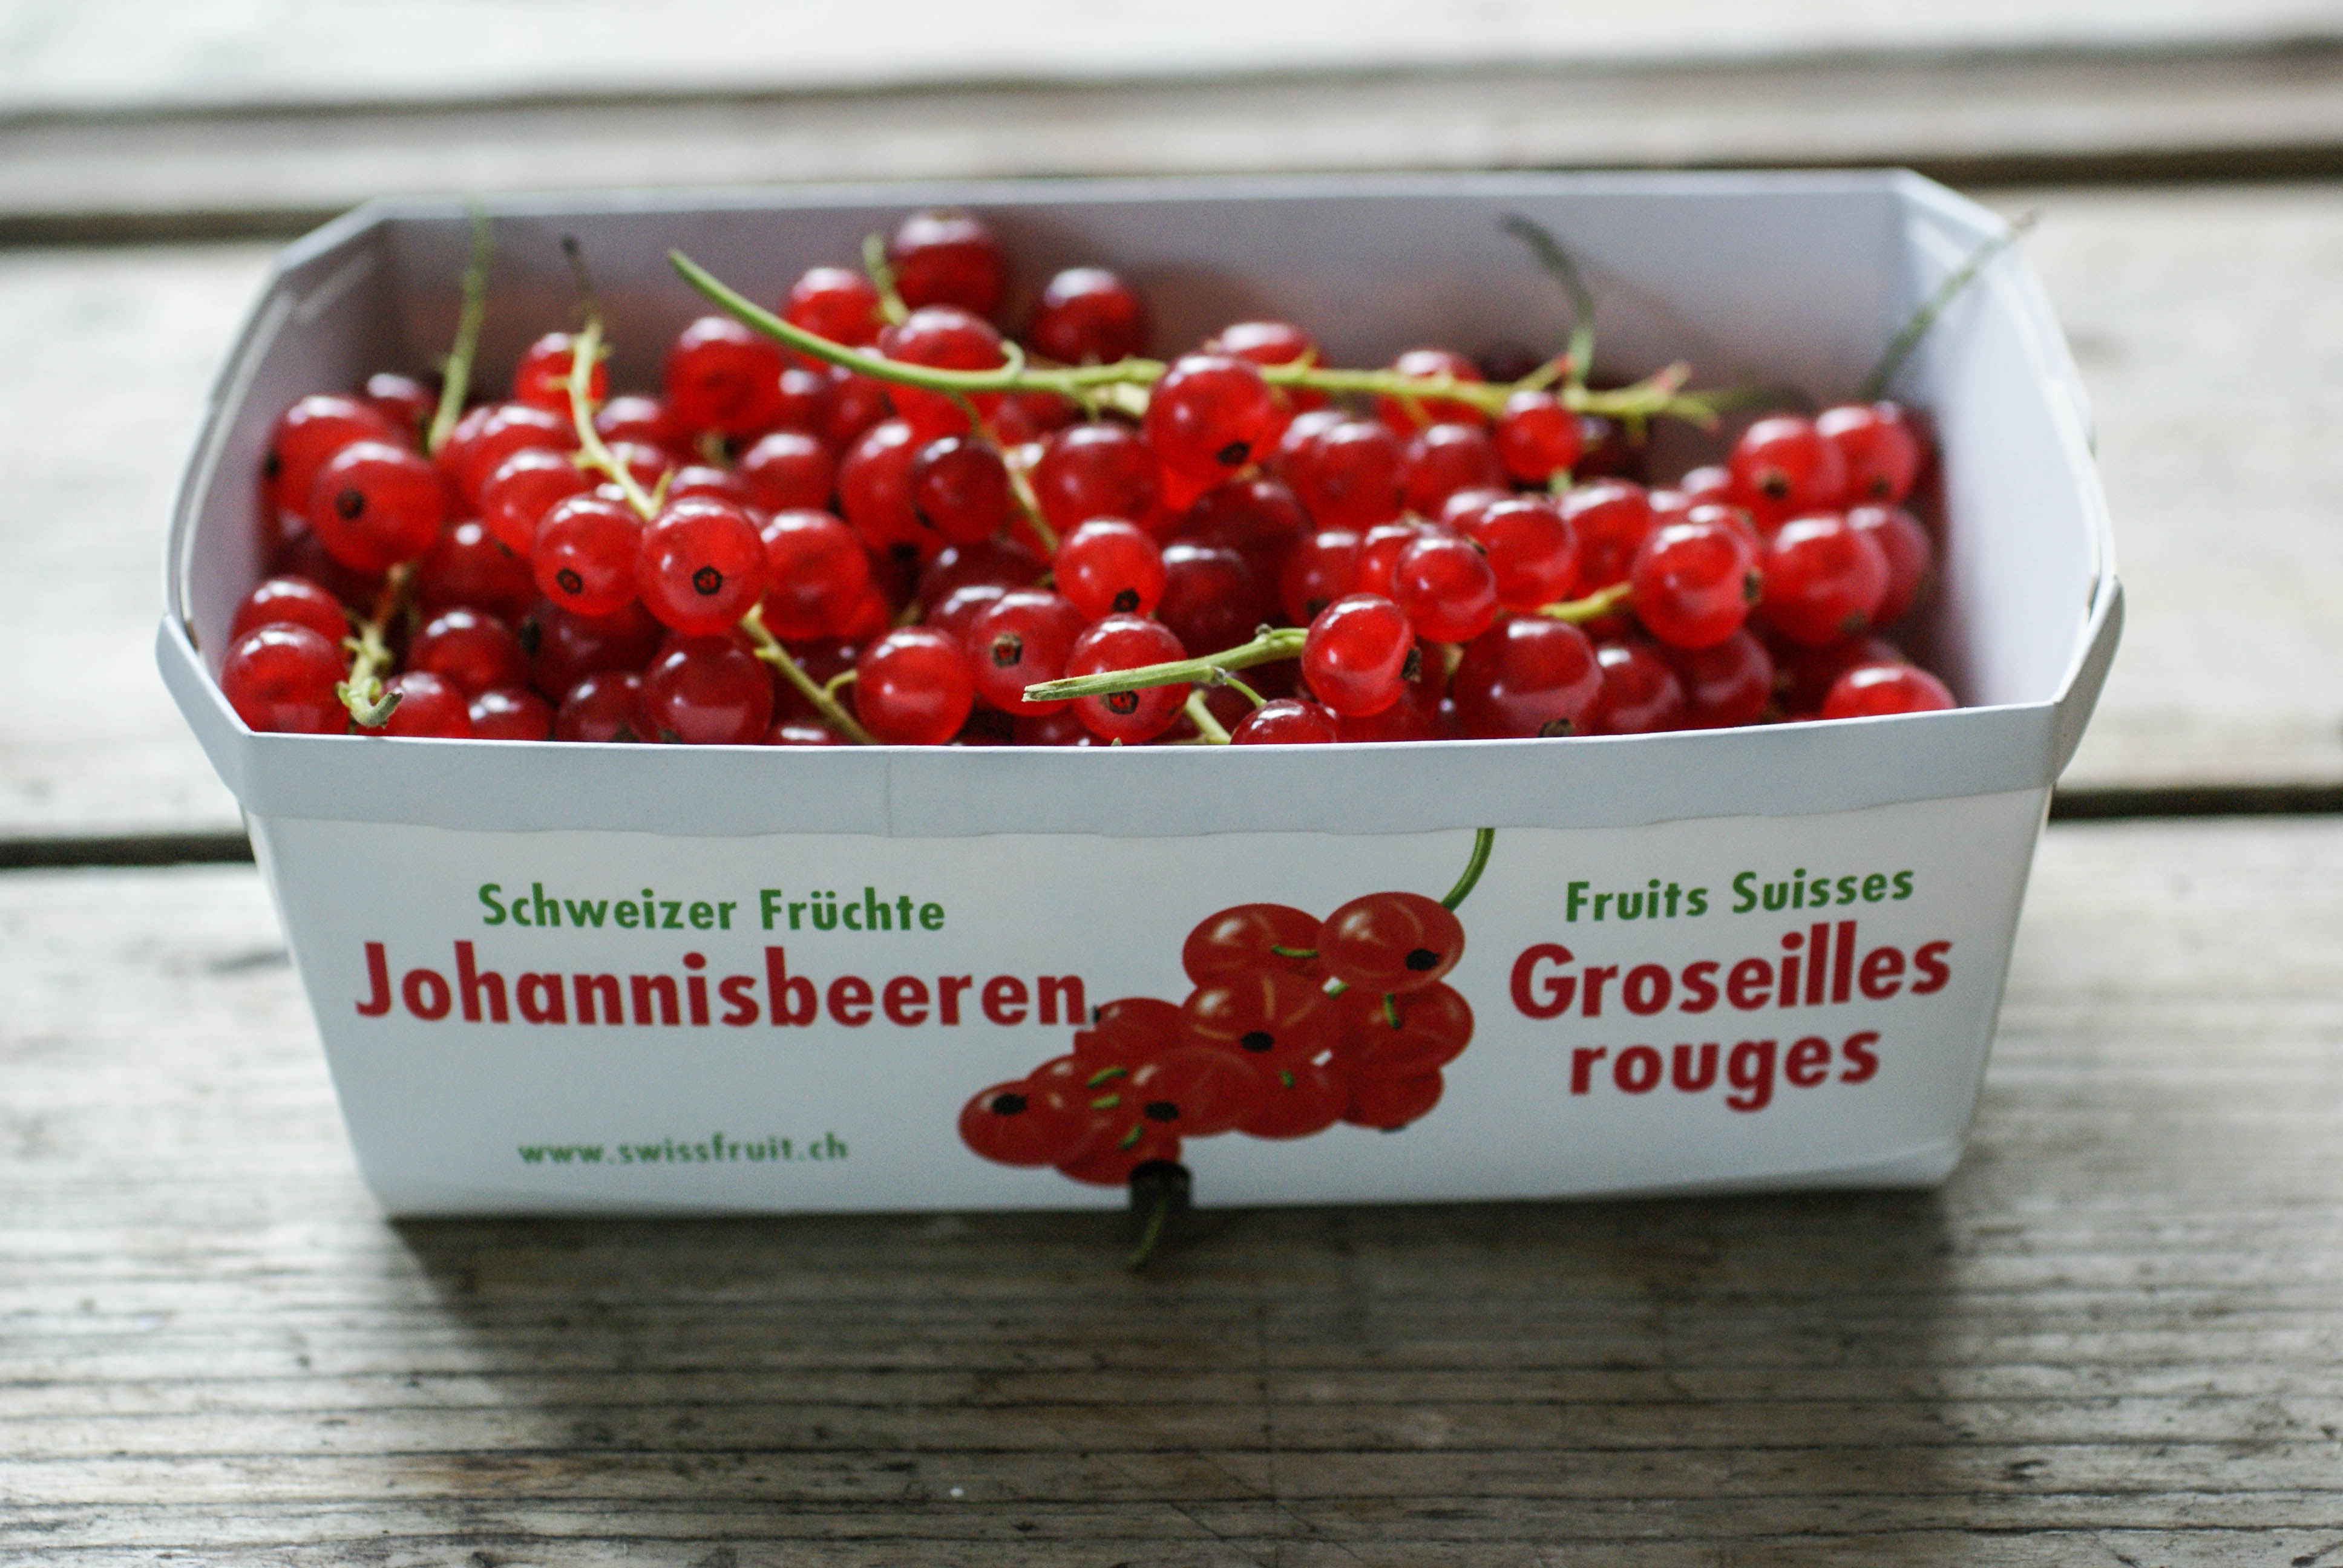
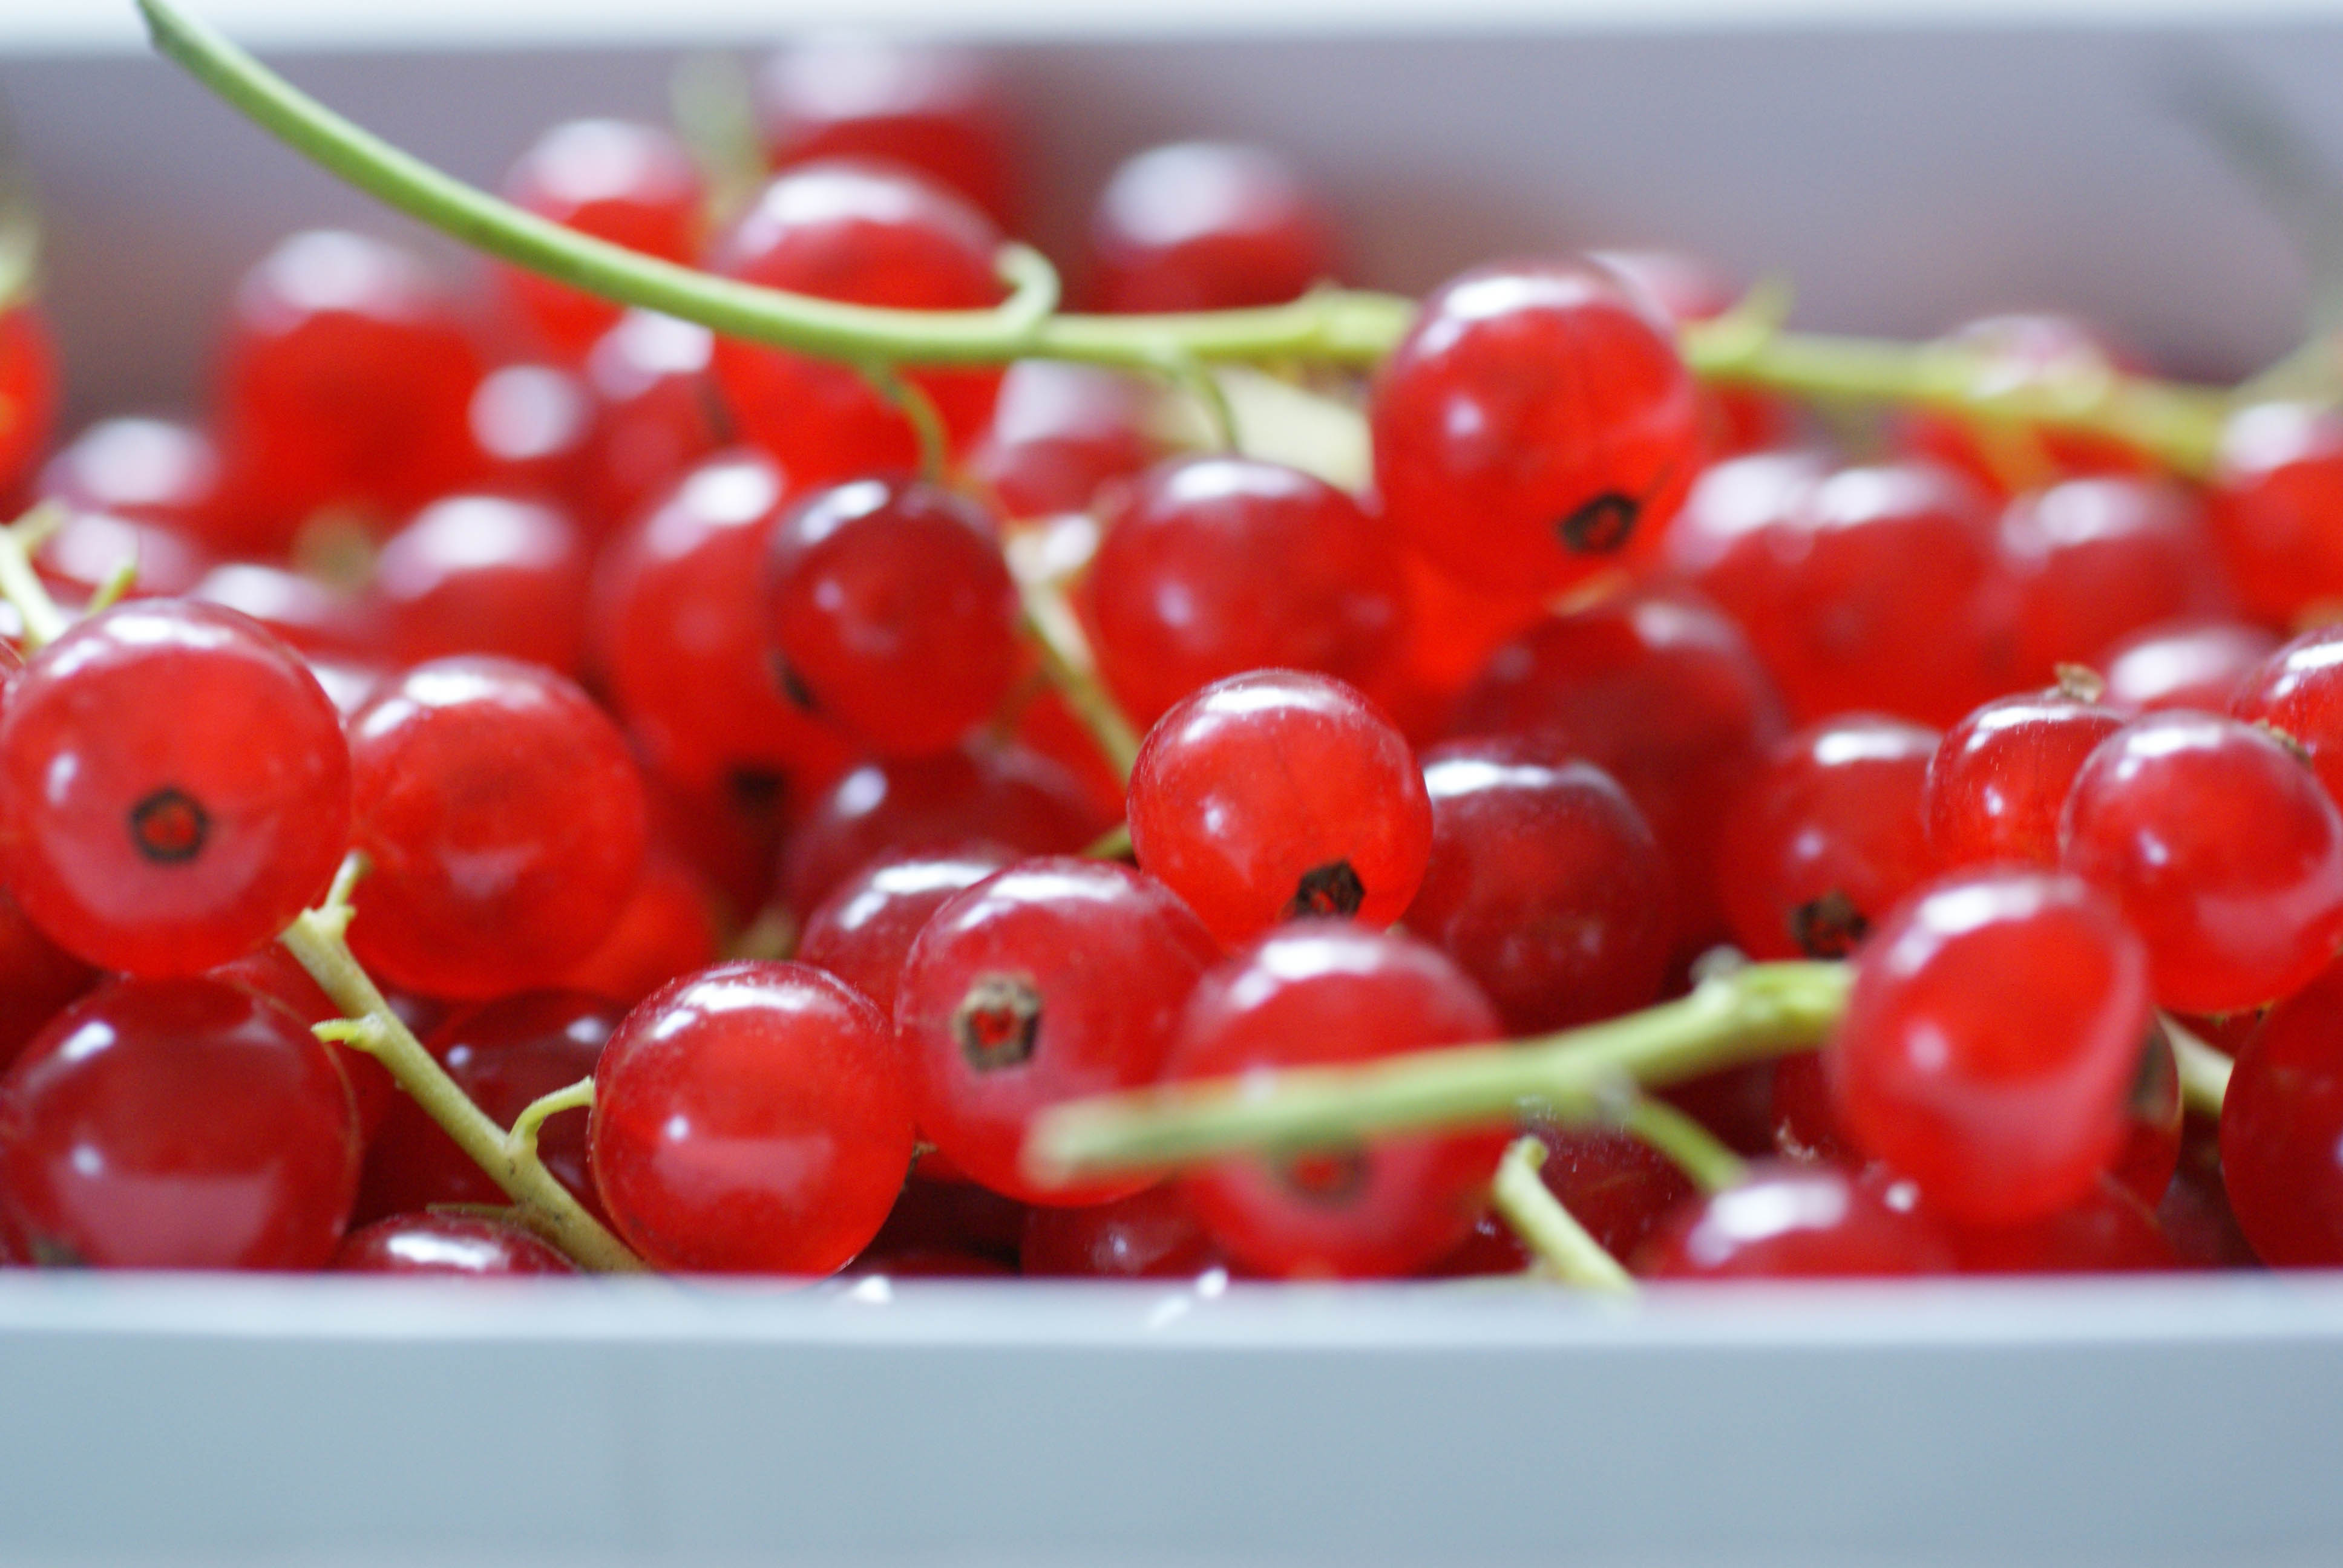
Red Currants
Have you ever cooked with red currants before? I had never even tried them. Mr. Swiss Paleo picked them up at the store not knowing what they were, but eager to try them out. They are super sour, so I wouldn’t probably suggest just eating them like other berries, but I do think you could make a deliciously tart jelly from them or add them into muffins or scones. See how easily my mind wanders to treats and baked goods?
Beautiful

Venison with Red Currant Sauce
Ingredients
- 500 grams (about a pound) of venison or steak
- 1 cup bone broth
- 200 grams (7 oz) red currants
- 3/4 cup red wine
- 1 Tablespoon maple syrup or honey
- 2 sprigs of fresh thyme
- 1 medium onion, minced
- 1 Tablespoon butter or ghee
- Salt and pepper to taste
Instructions
- Heat the wine and bone broth in a sauce pan over medium high heat until it is reduced by half.
- Meanwhile, in another pan, saute the onions in the butter or ghee until translucent.
- Add the reduced wine and broth mixture and the maple syrup to the onions and bring to a boil.
- Then add in the berries and thyme and simmer for 15 minutes. Add salt and pepper to taste.
- At this point, you can spoon the sauces as is over your sliced, cooked venison steaks (as shown in our pictures). However, after taking the pictures, we used an immersion blender to puree the sauce and it really thickened it up nicely.
Served with a green salad

Ingredients
- 500 grams (about a pound) of venison or steak
- 1 cup bone broth
- 200 grams (7 oz) red currants
- 3/4 cup red wine
- 1 Tablespoon maple syrup or honey
- 2 sprigs of fresh thyme
- 1 medium onion, minced
- 1 Tablespoon butter or ghee
- Salt and pepper to taste
Instructions
- Heat the wine and bone broth in a sauce pan over medium high heat until it is reduced by half.
- Meanwhile, in another pan, saute the onions in the butter or ghee until translucent.
- Add the reduced wine and broth mixture and the maple syrup to the onions and bring to a boil.
- Then add in the berries and thyme and simmer for 15 minutes. Add salt and pepper to taste.
- At this point, you can spoon the sauces as is over your sliced, cooked venison steaks (as shown in our pictures). However, after taking the pictures, we used an immersion blender to puree the sauce and it really thickened it up nicely.
Pumpkins Everywhere!

We have a local farm that we’ve been going to for 18 years. The farm is in an absolutely stunning location, overlooking a beautiful little lake.

Beautiful location (click to embiggen)
We found Jucker Farm long ago in our search for an American style Halloween pumpkin. We used to be able to drive right up to the farm and park in front of their chicken coop, but these days, the place is so popular that you can no longer even drive on the road leading to the farm. You have to park about a mile away or take a shuttle to it from the nearest train station.
This is the place to go if you want to pick your own fruit. Depending on what’s in season, you can pick strawberries, raspberries, blackberries, blueberries, cherries or apples.
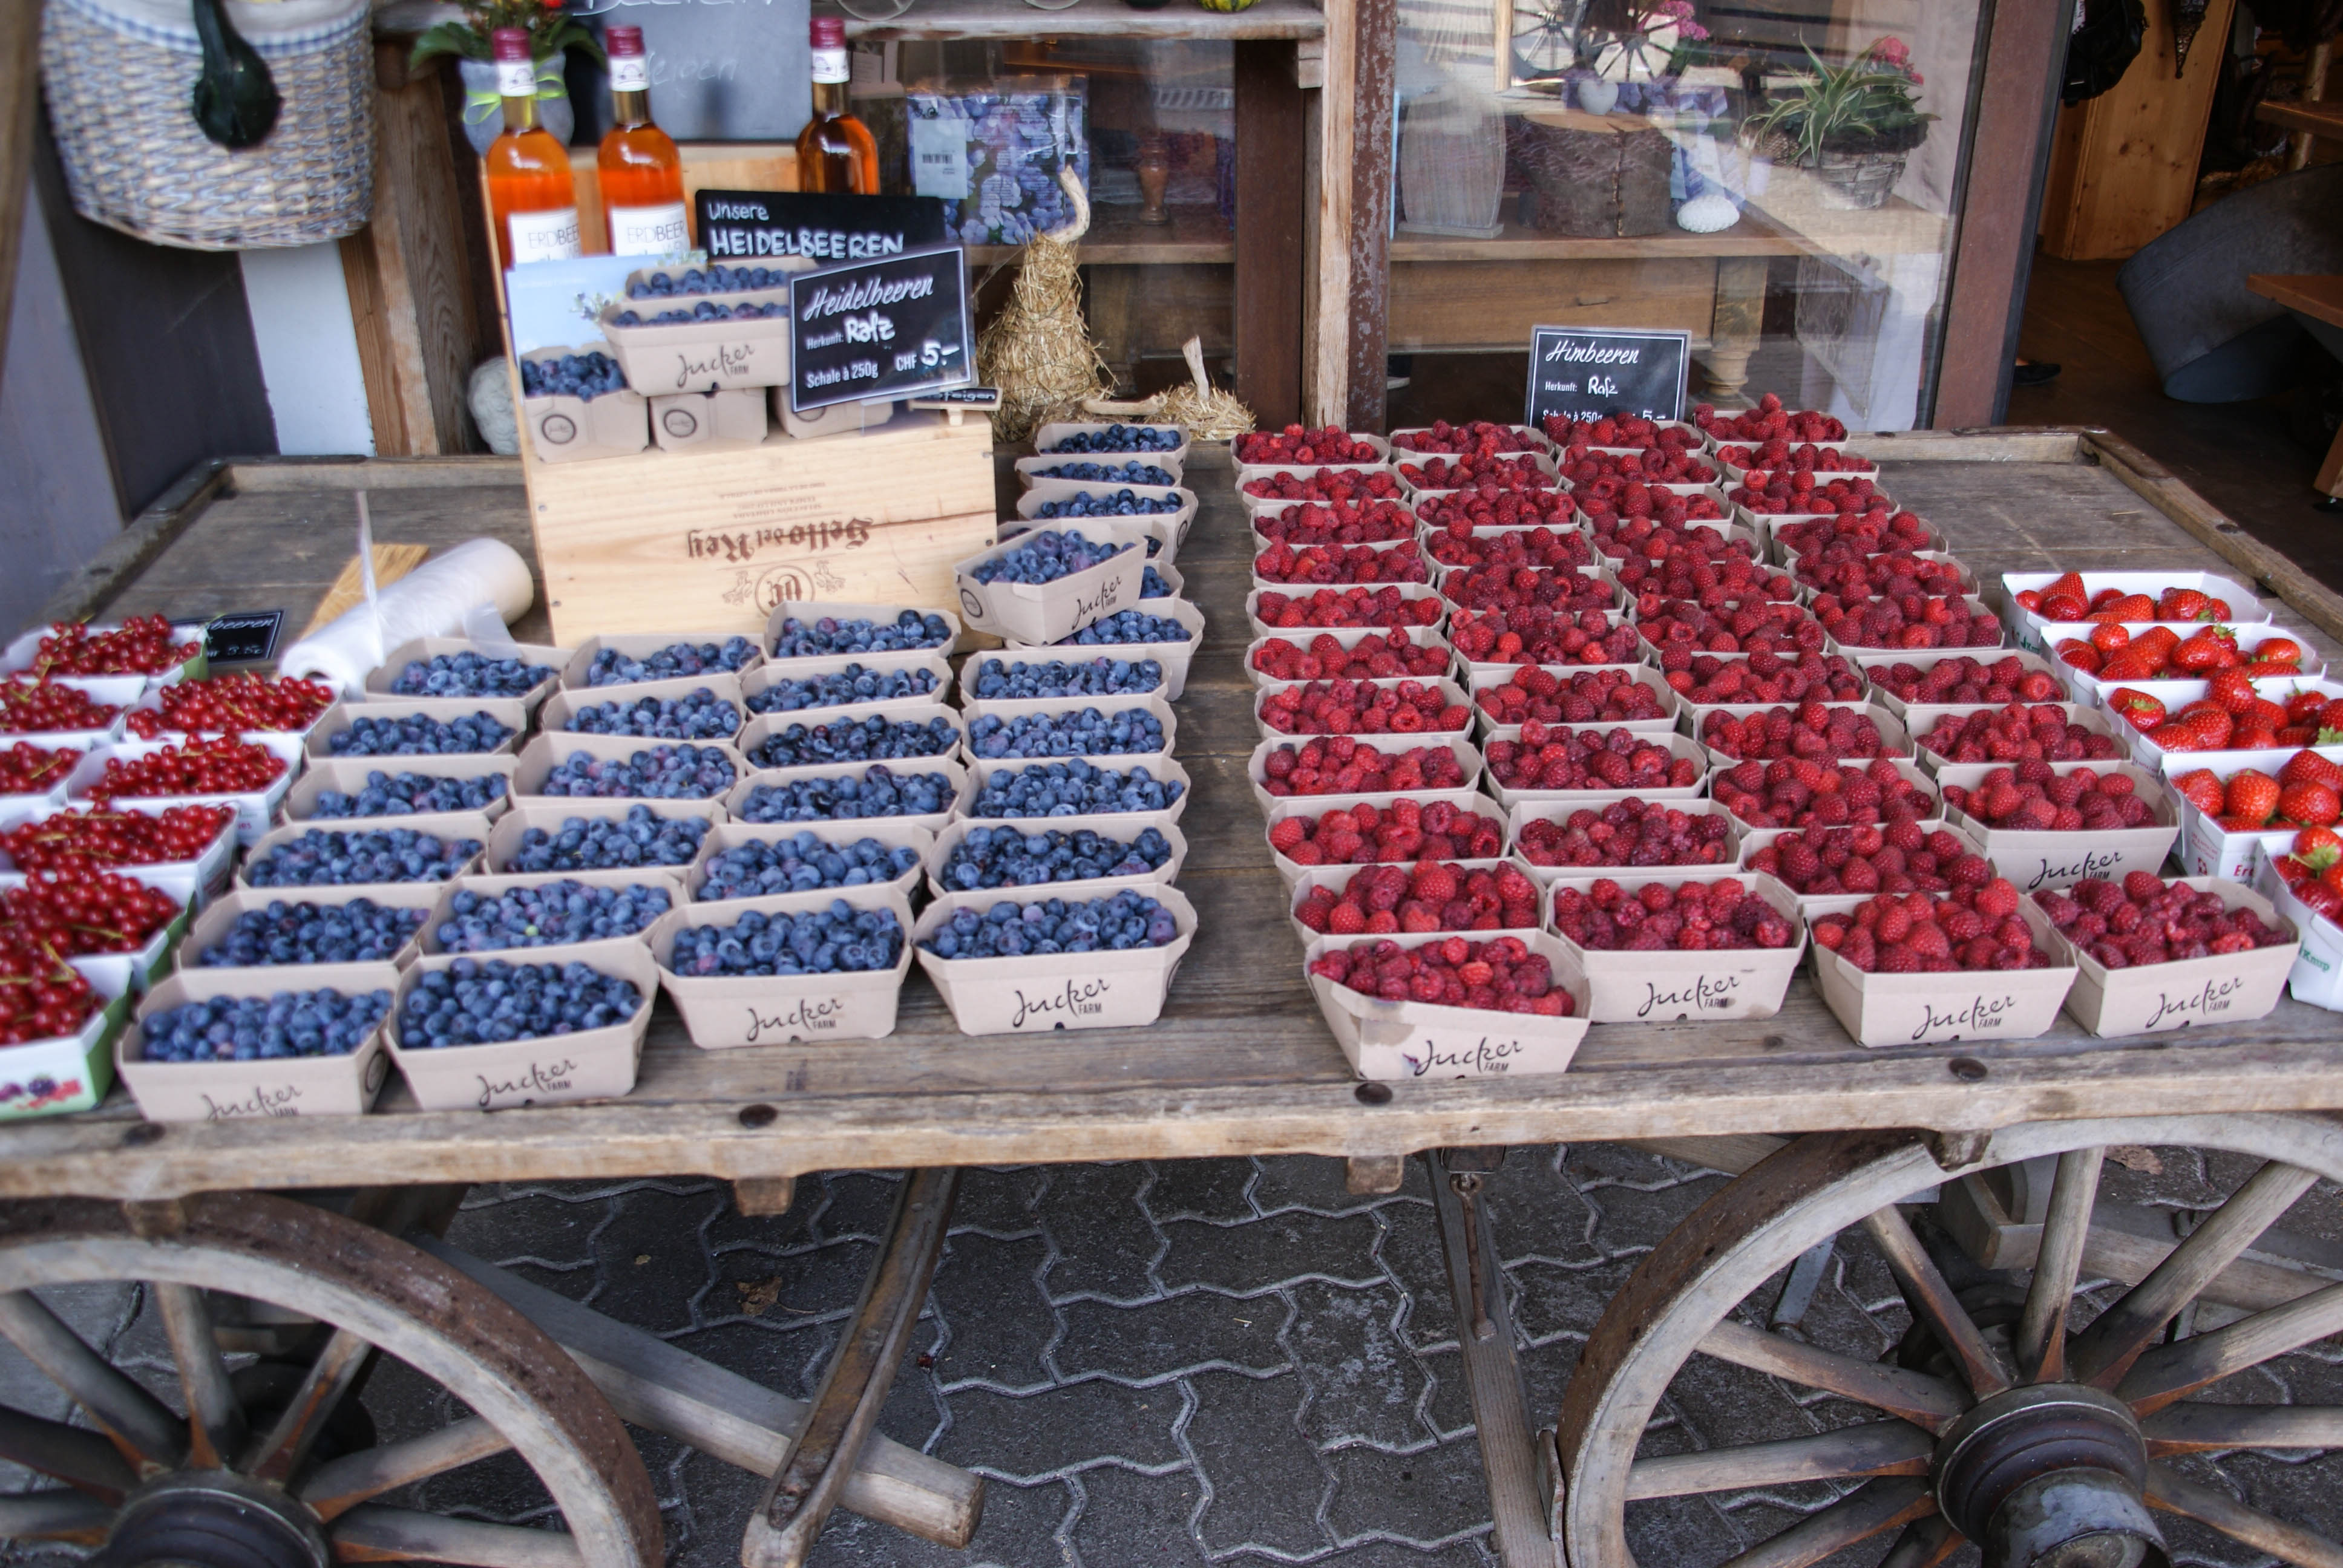
Berries!
They also have gorgeous produce.
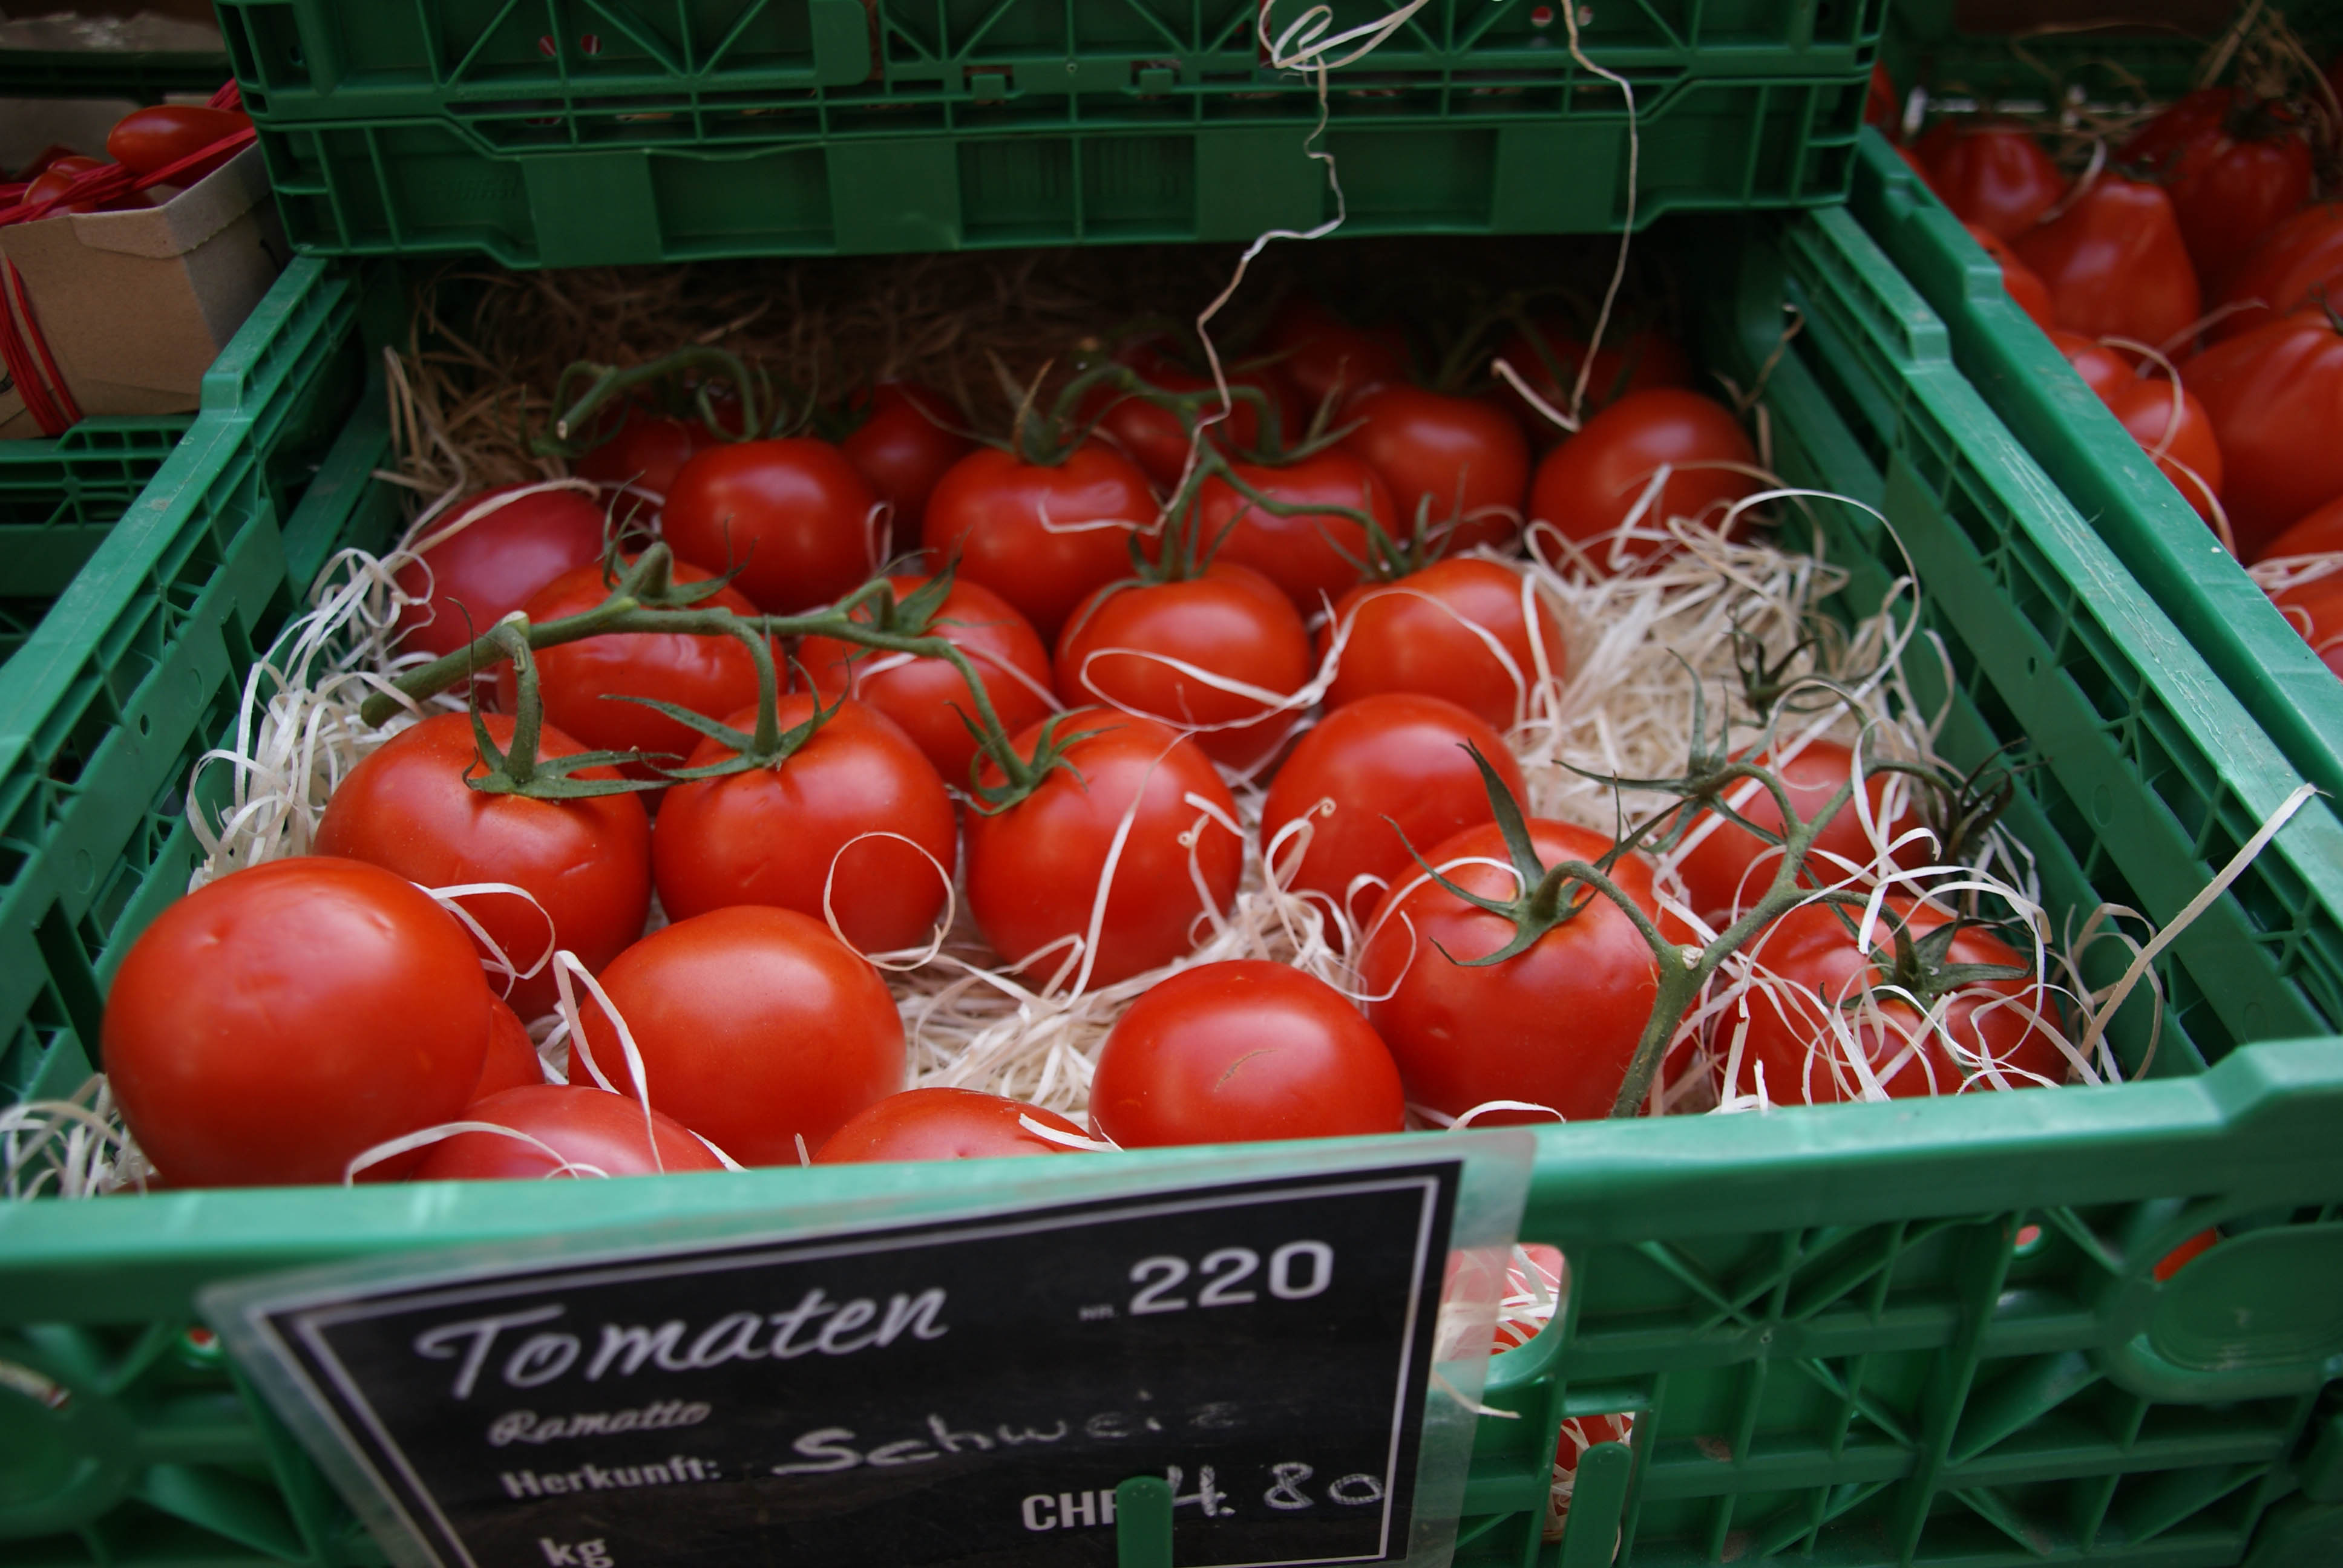
Vine ripened
I don’t drink juice, but I make an exception for their fresh pressed apple juice. Hands down, the best juice I’ve ever had.

Fresh pressed apple juice (click to embiggen)
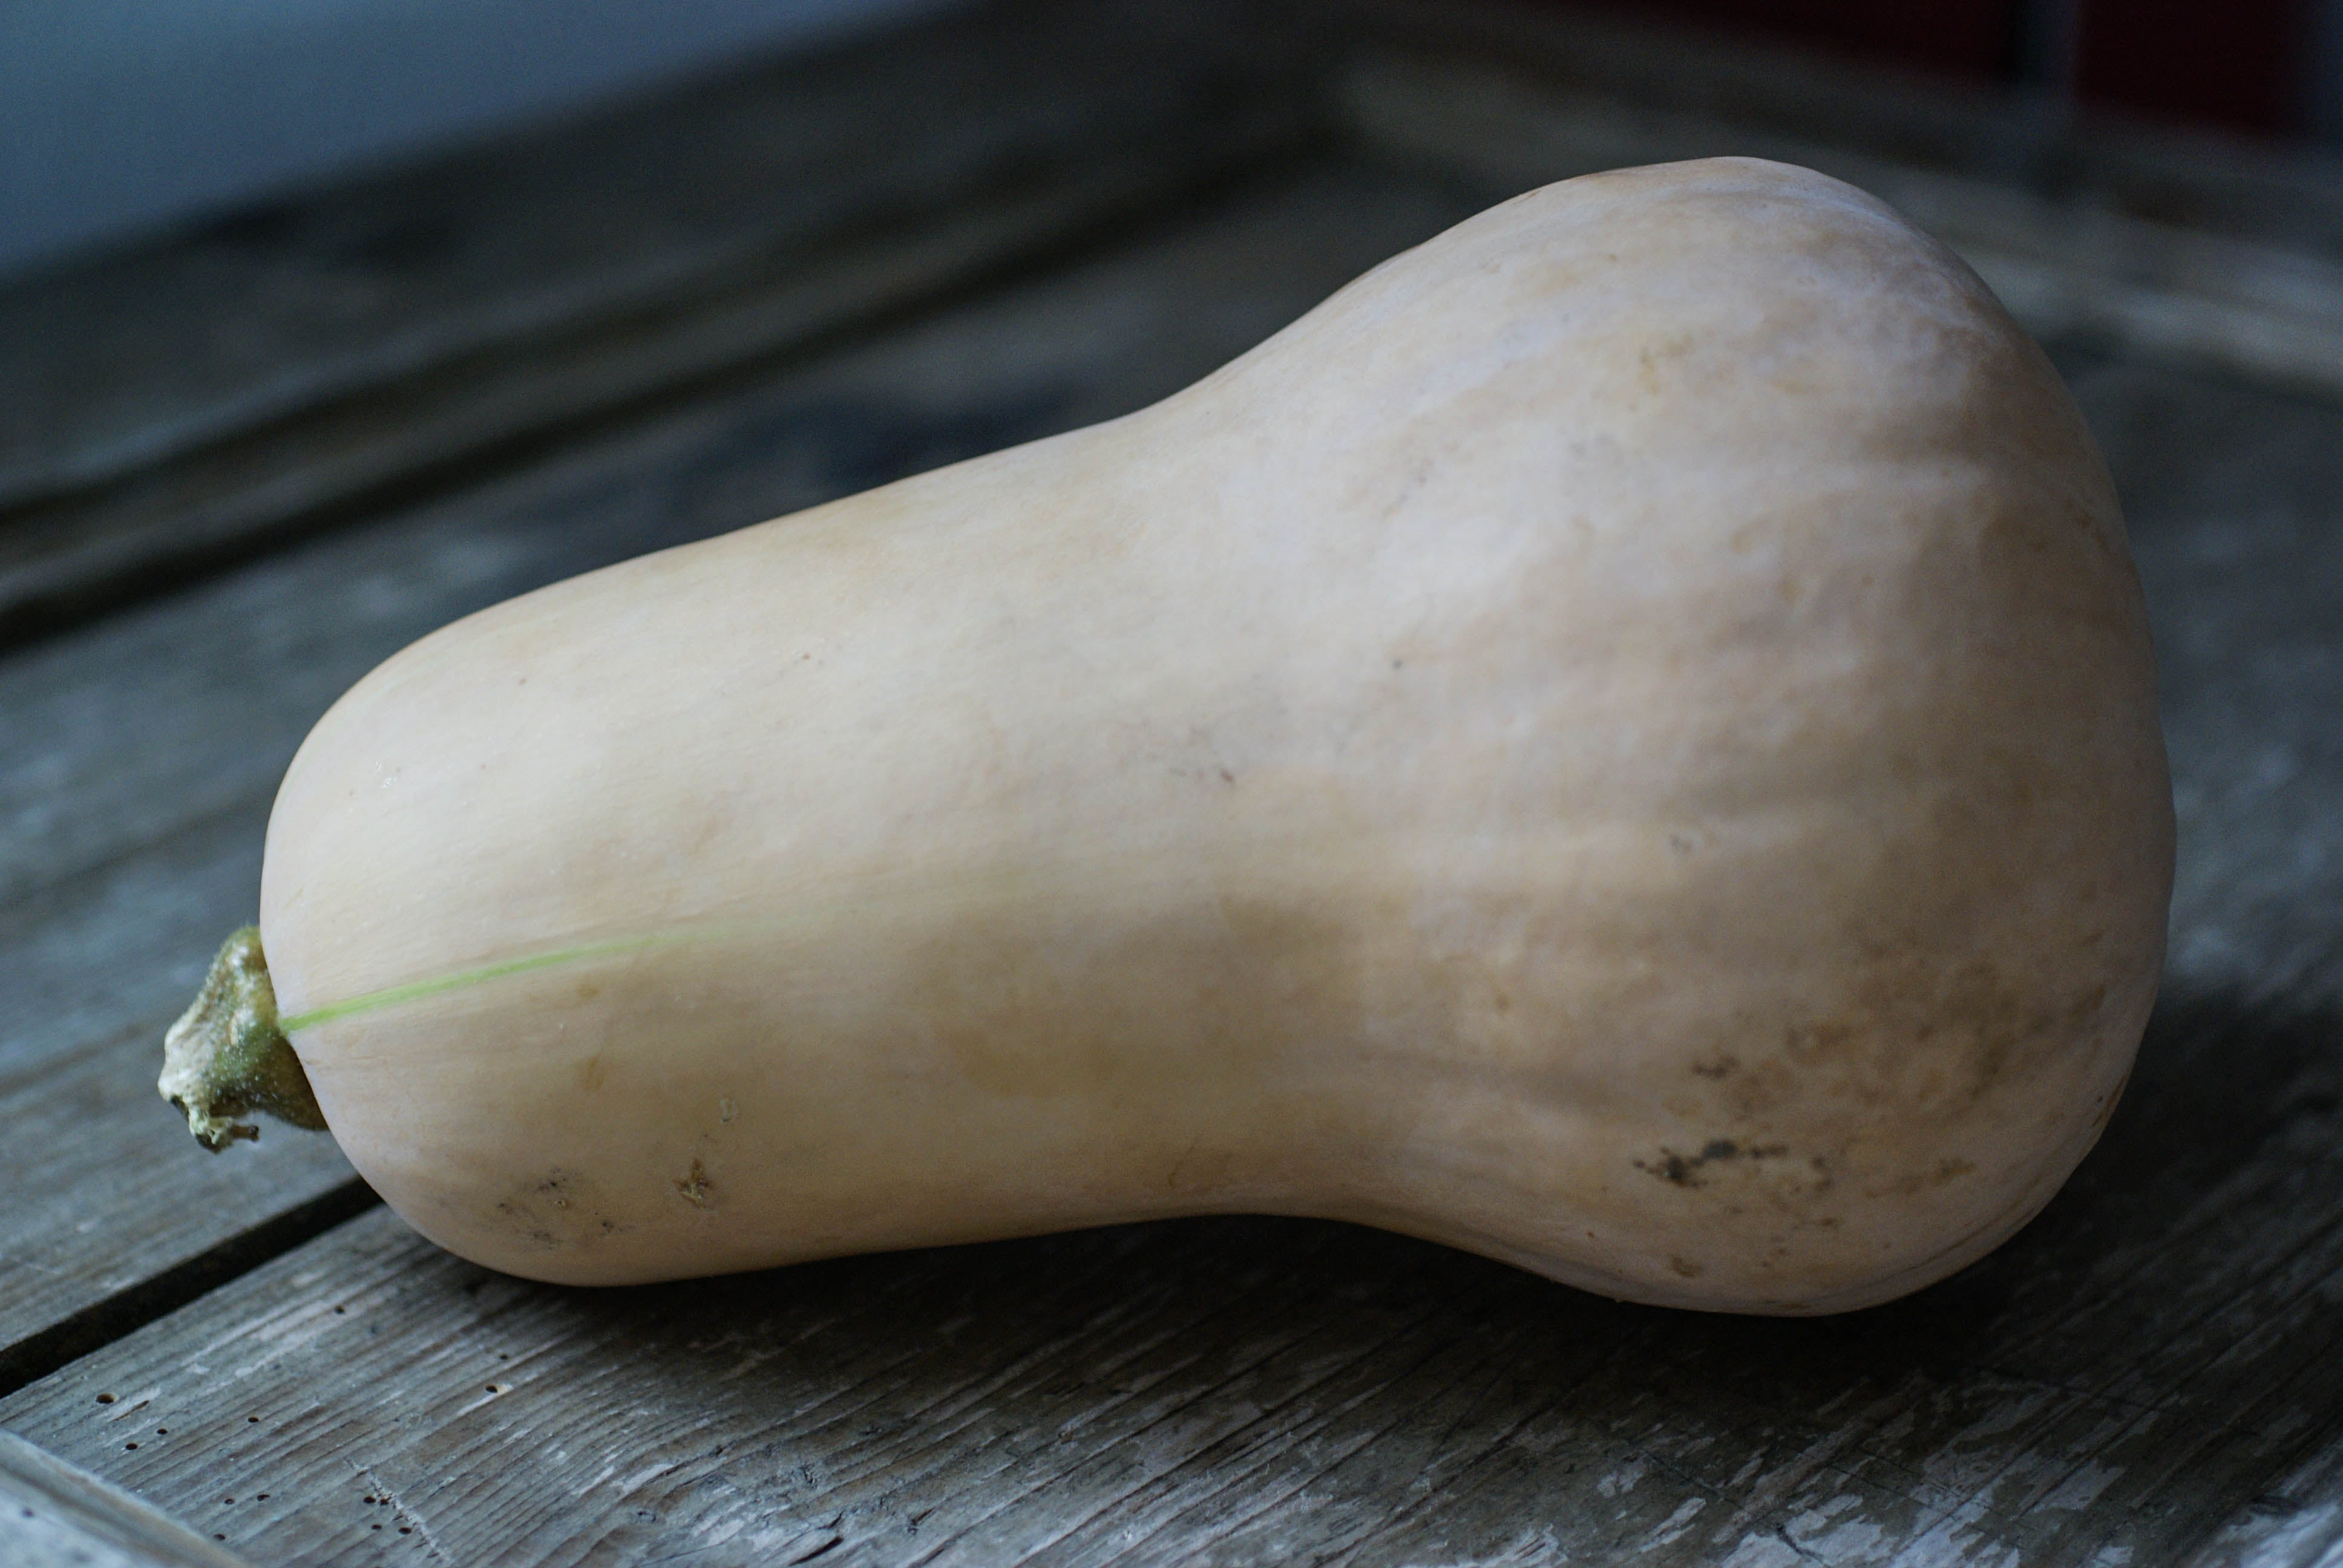
And did I mention that they have a few pumpkins? This is one of the few places I have ever found spaghetti squash locally. This is also where I got my butternut squash for this recipe.
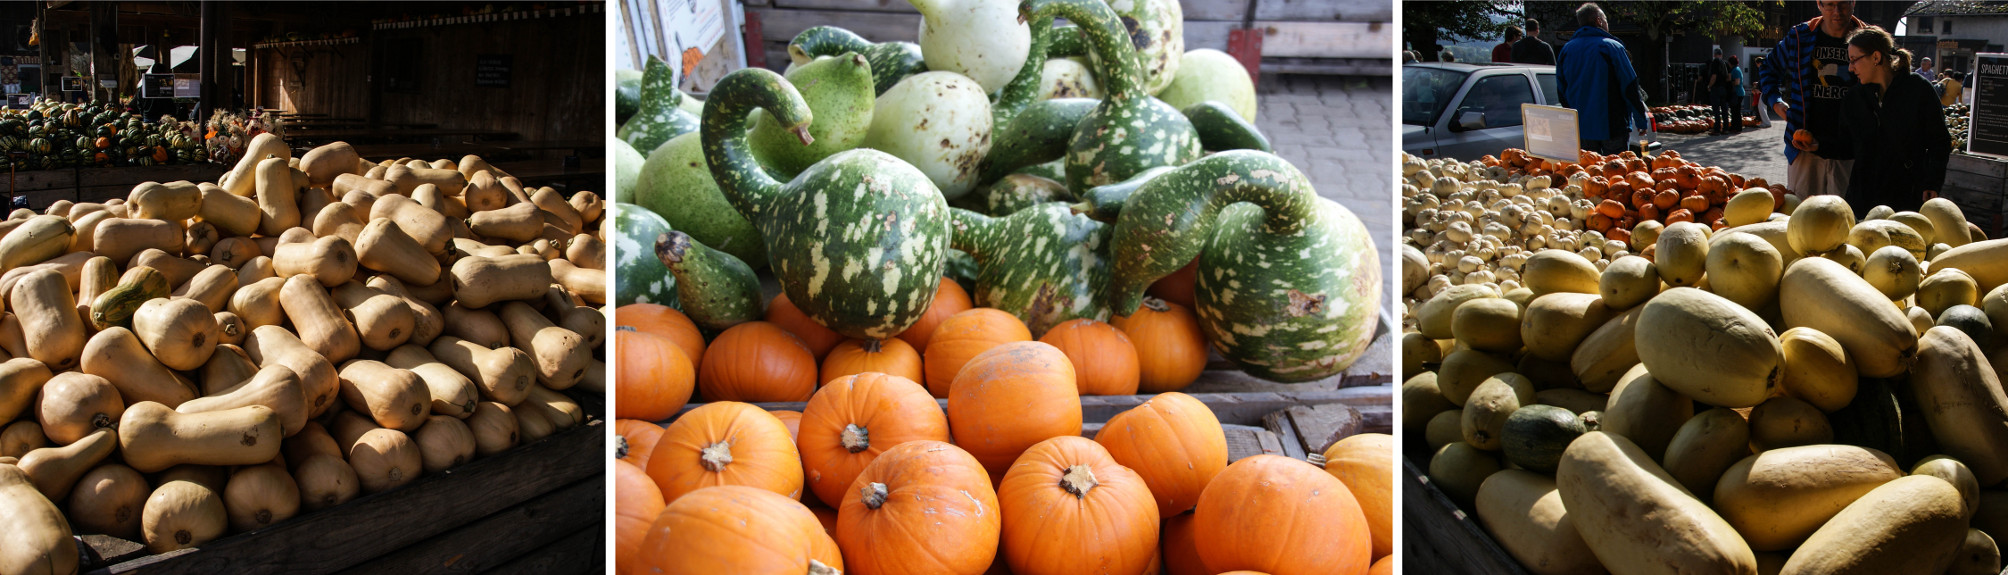
Squash! (click to embiggen)
Got lots of pumpkins? Well, why not make a few sculptures? Every year they come up with new and creative displays.

So creative and fun (click to embiggen)
Jucker Farm has a farm store with all sorts of pumpkin products. Pumpkin seed oil, sweet and sour pumpkin preserves, all kinds of fruit jams and spreads, homemade pickles, etc…
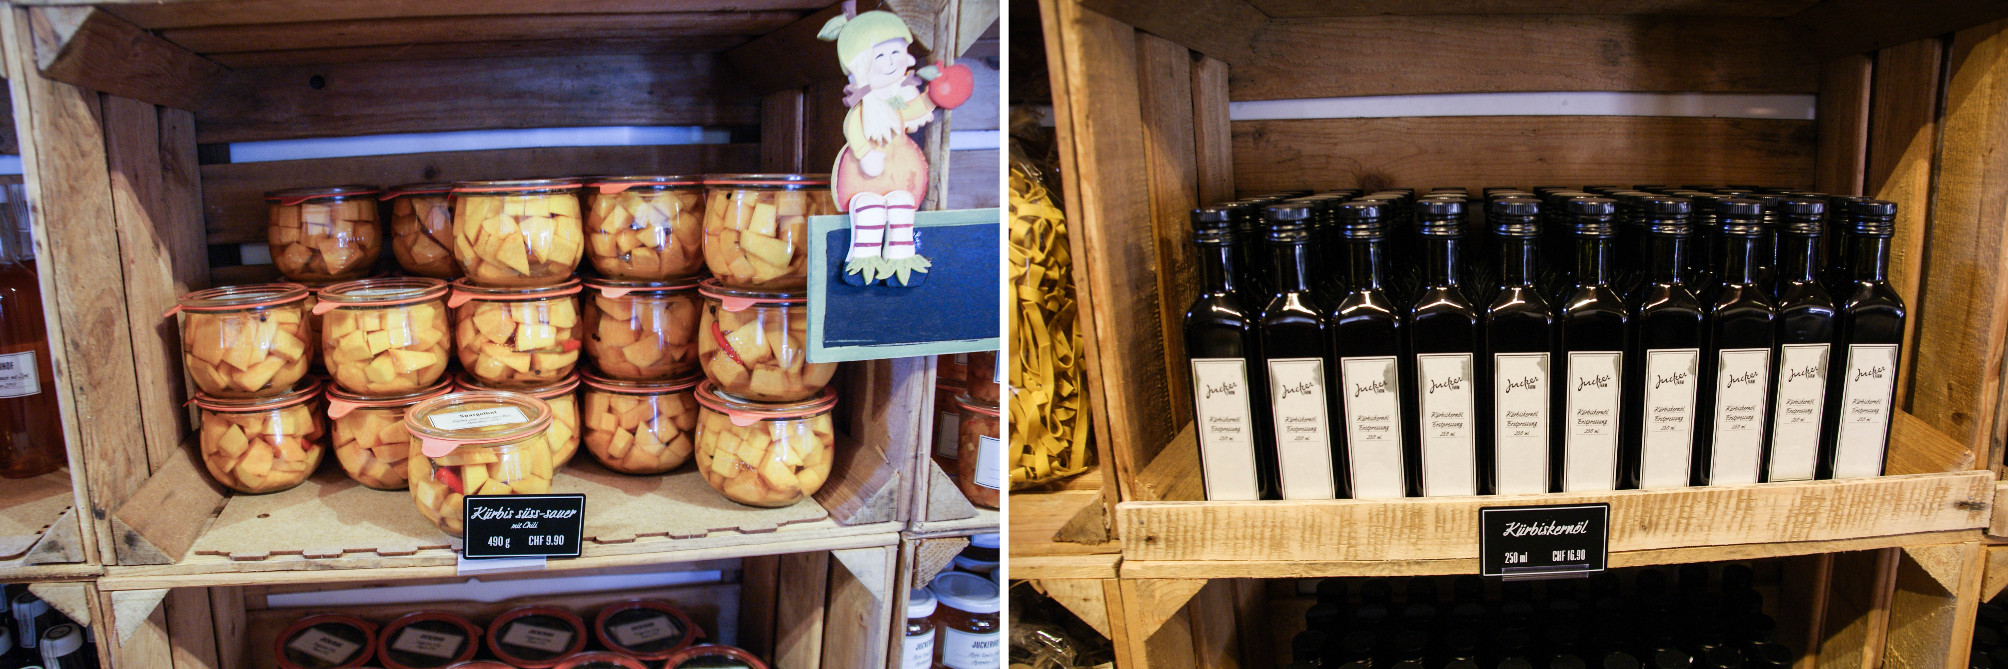
Fancypants farm products (click to embiggen)
They serve up a Sunday brunch every weekend. You can also get bratwursts with pumpkin seeds or hot pumpkin soup cooked over a wood fire.
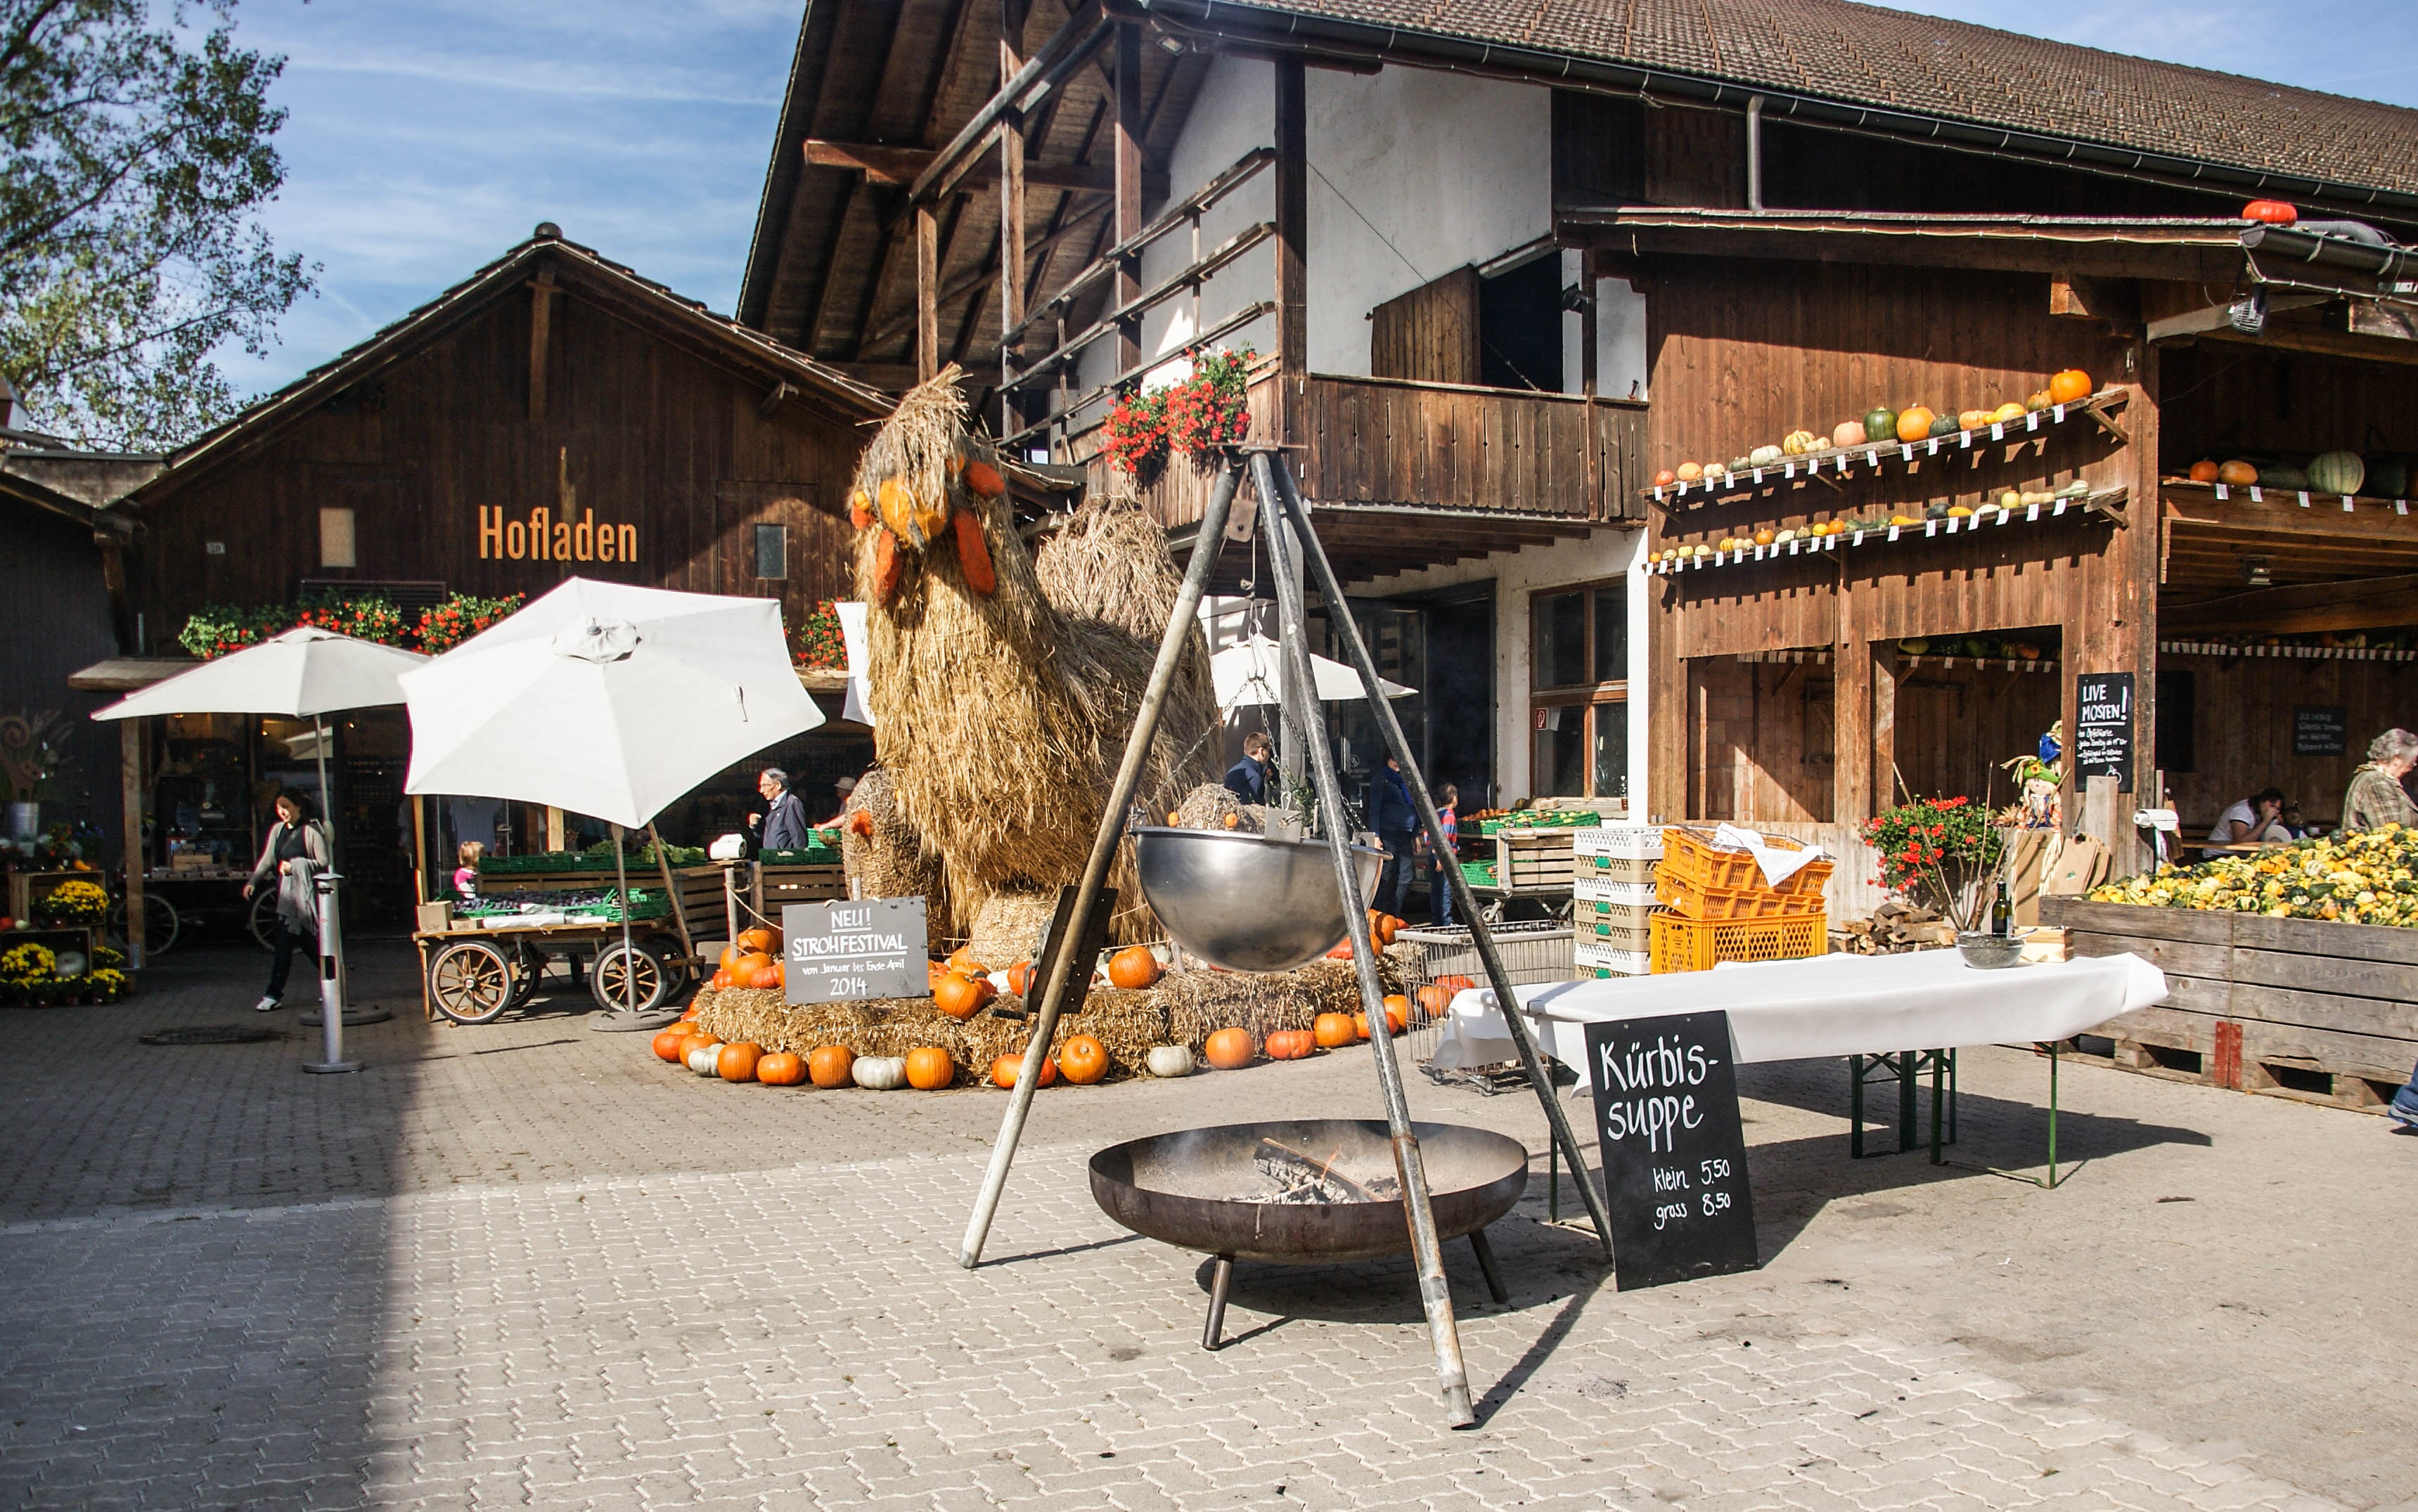
Pumpkin Soup
There is a lovely little restaurant and you can take your food and eat it outside at a picnic table in the orchards.
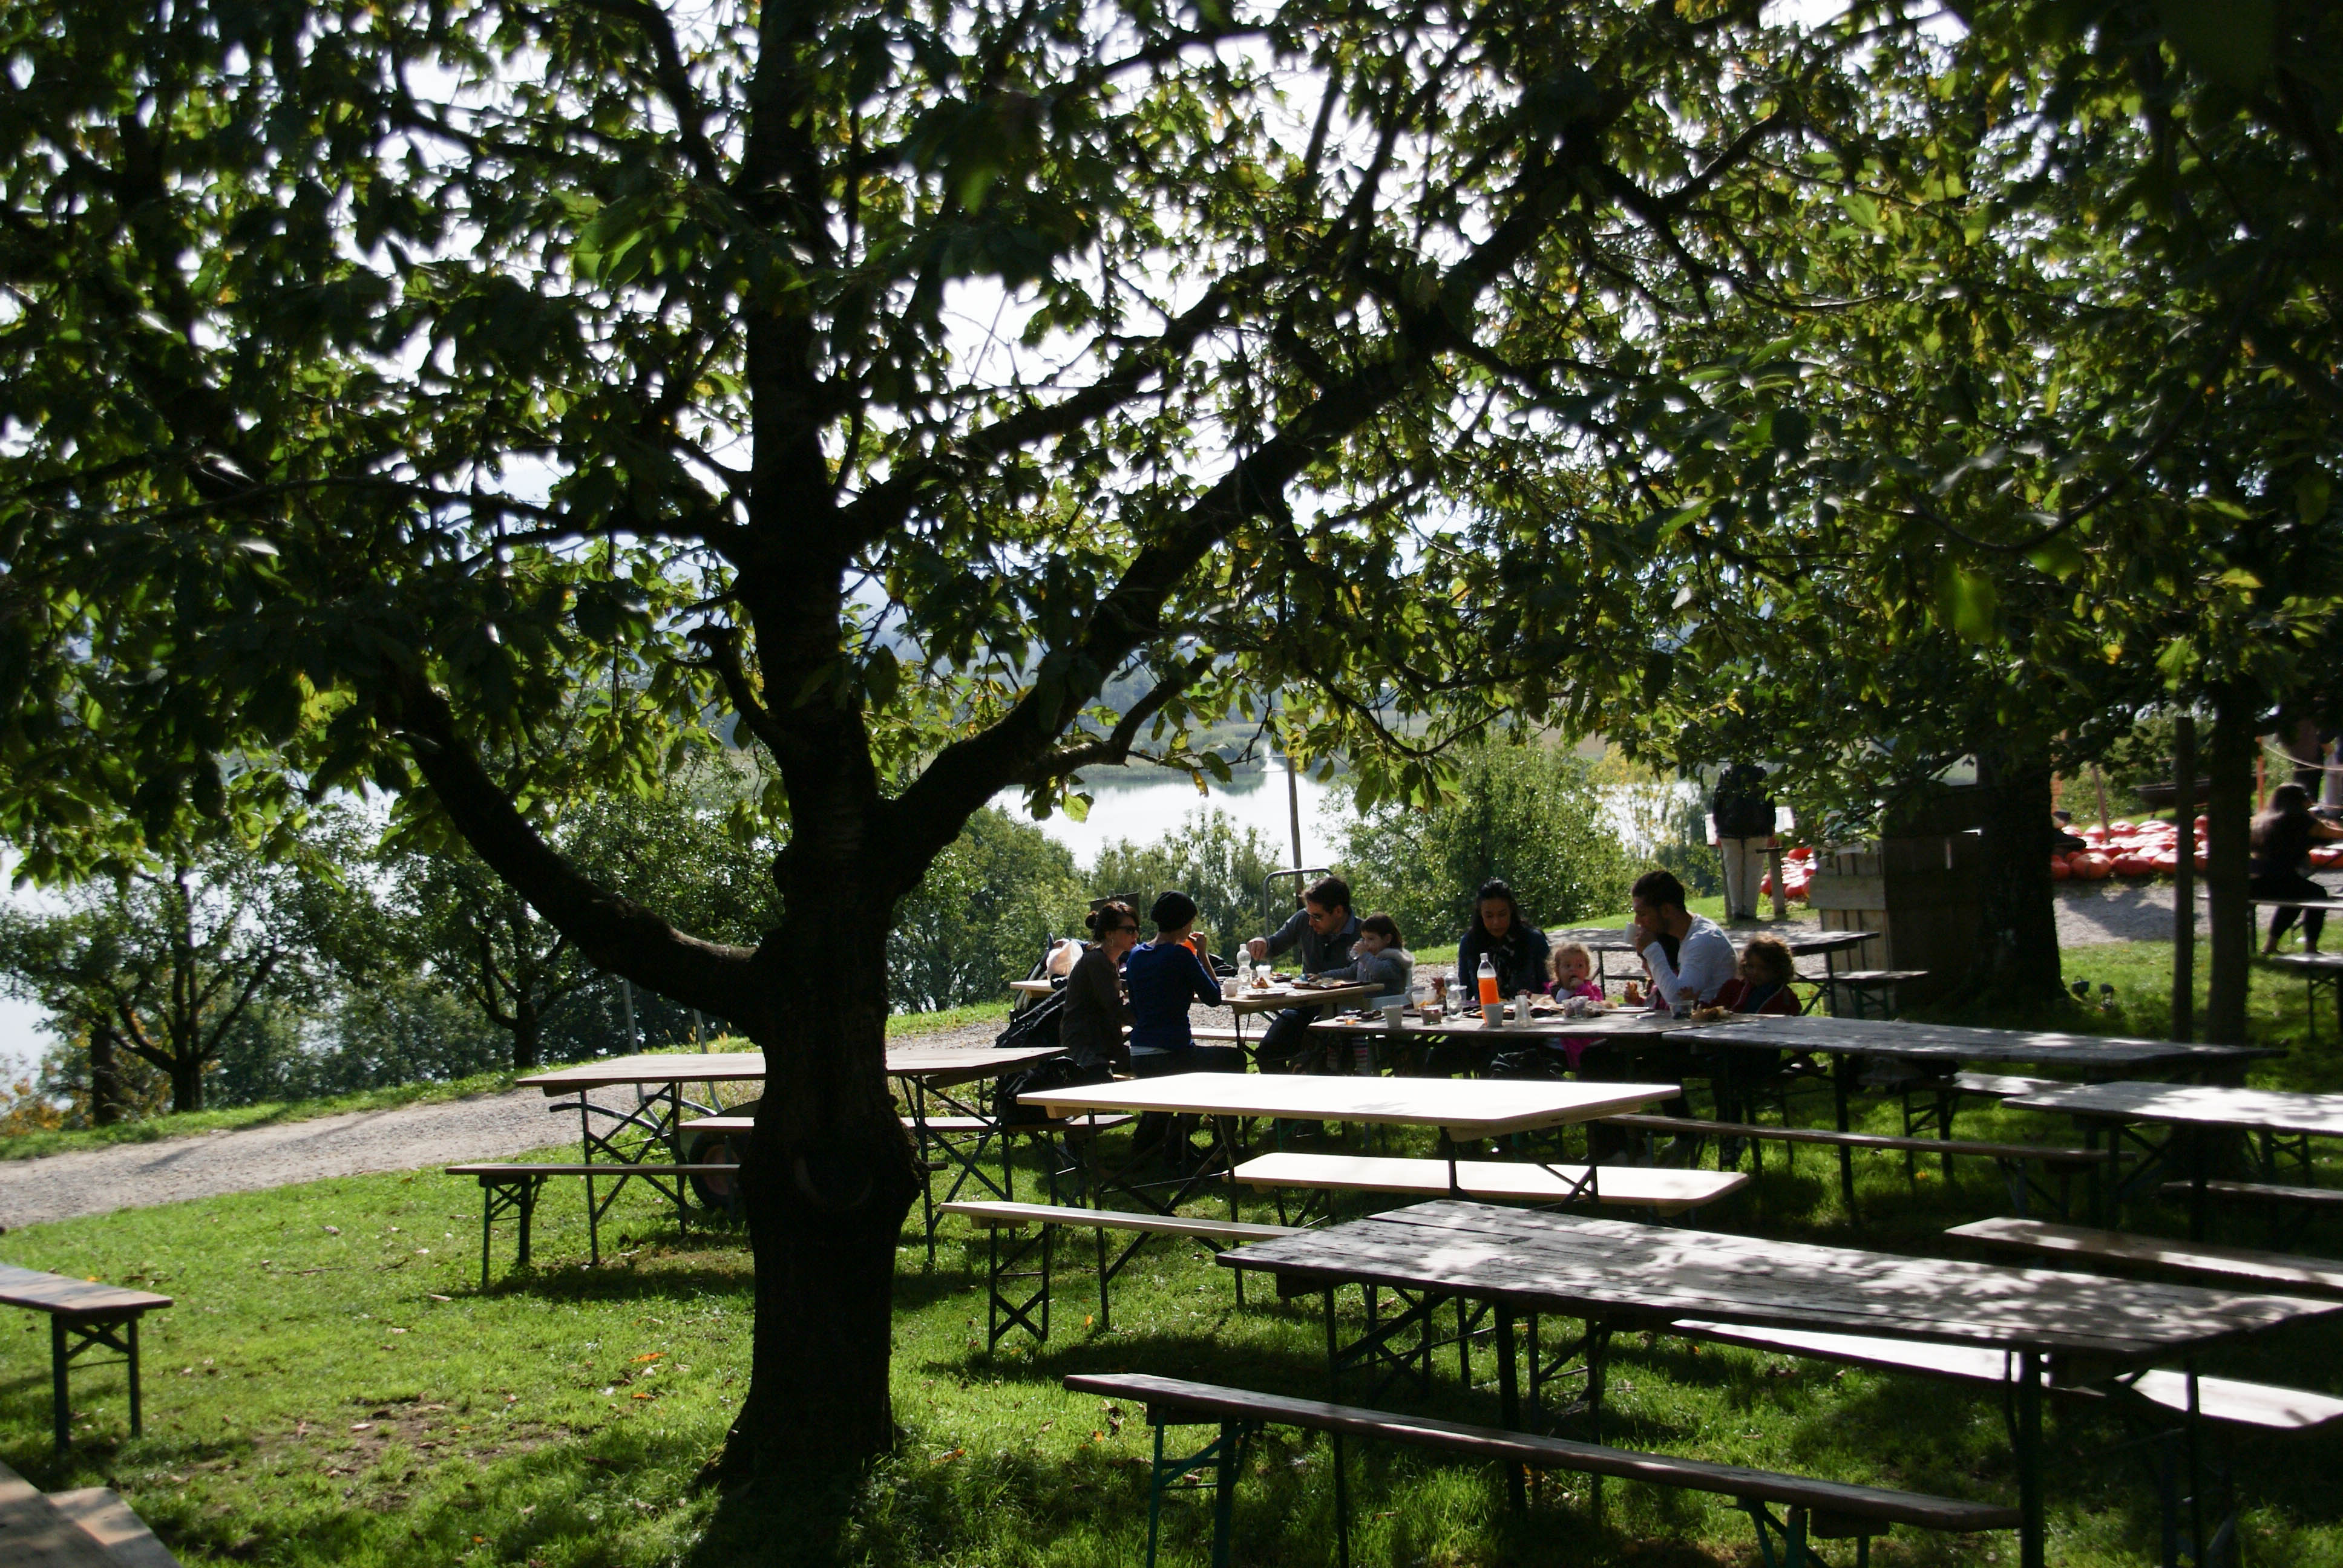
Great place for a picnic
This place is a huge hit for families with kids. There’s an apple tree labyrinth, an area of swinging hammocks in the orchards, a huge climbing area made of hay stacks, and a place to hang out and pet goats.

Cute goats (click to embiggen)
Jucker Farm is open 365 days a year and they have long opening hours. If you happen to live in Switzerland, you know how unusual this is. If you decide to head out for a visit on a Sunday (because it’s one of the few things open), just keep in mind that lots of other people have the same idea and it tends to get a bit crowded.
For details about the farm, have a look at their web page (in English).
Elvis has left the building (and gone to the farm). What are you waiting for? Head on out to your local farm!

Elvis visits the farm!
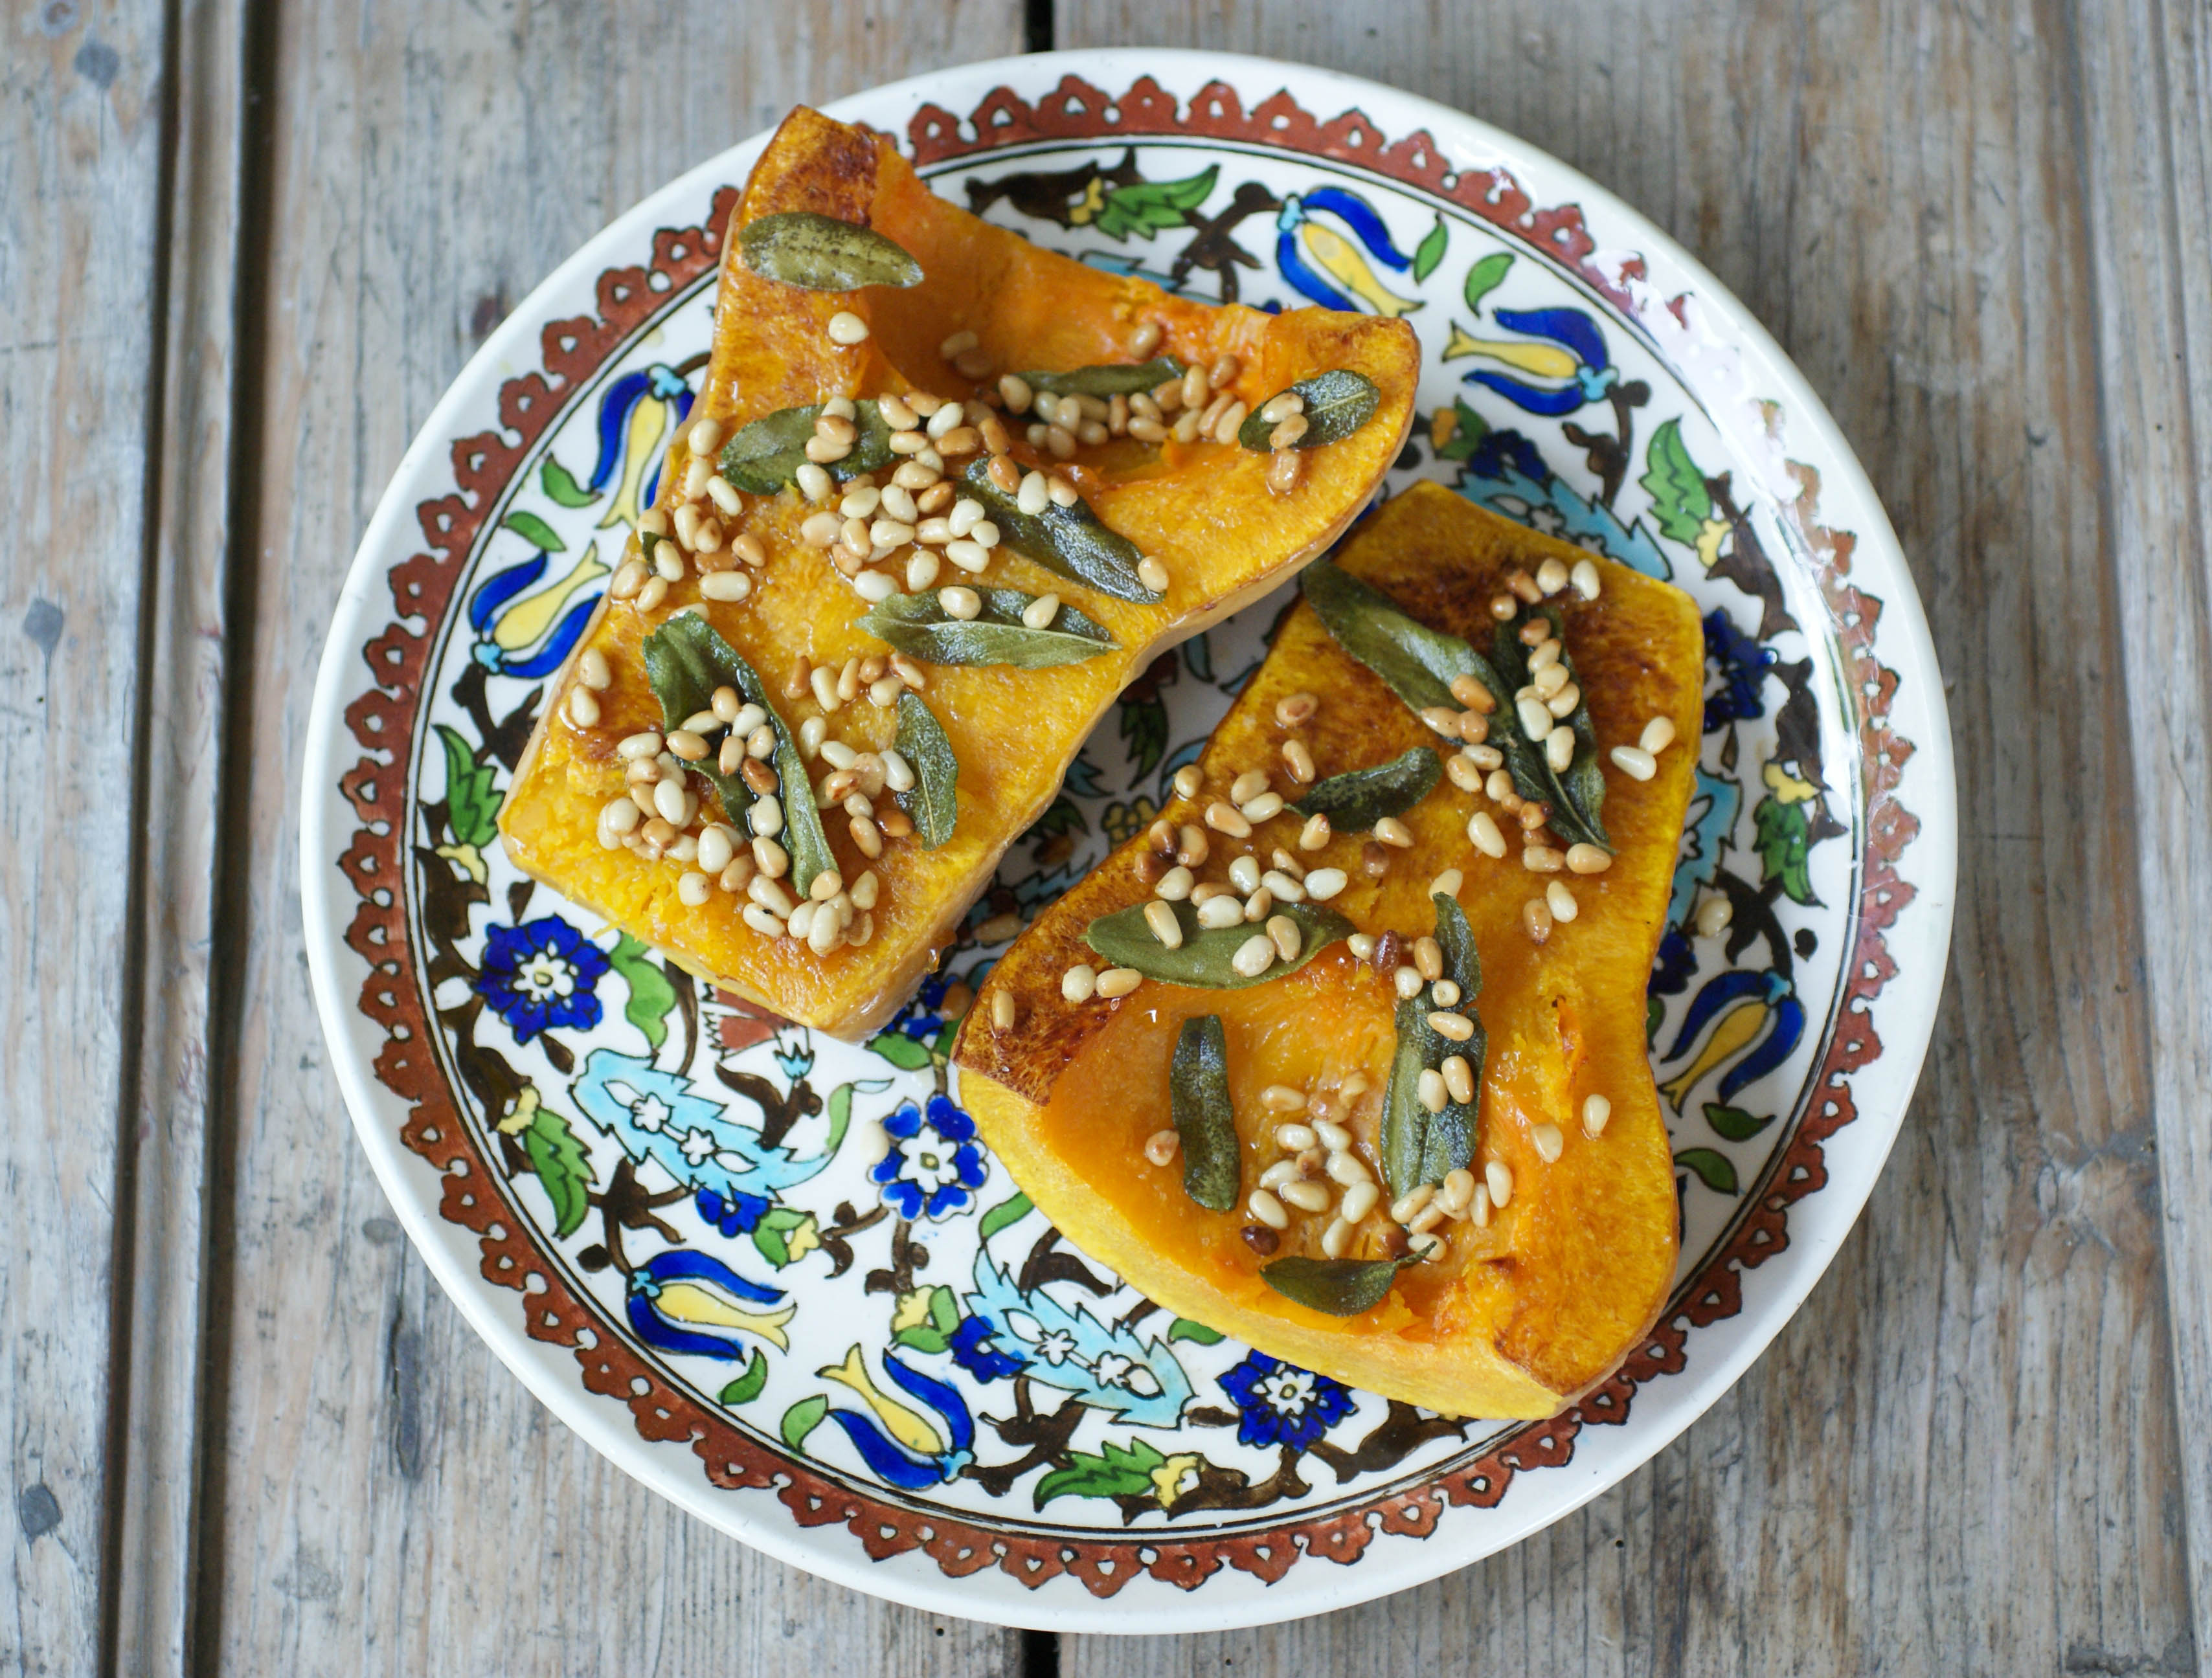
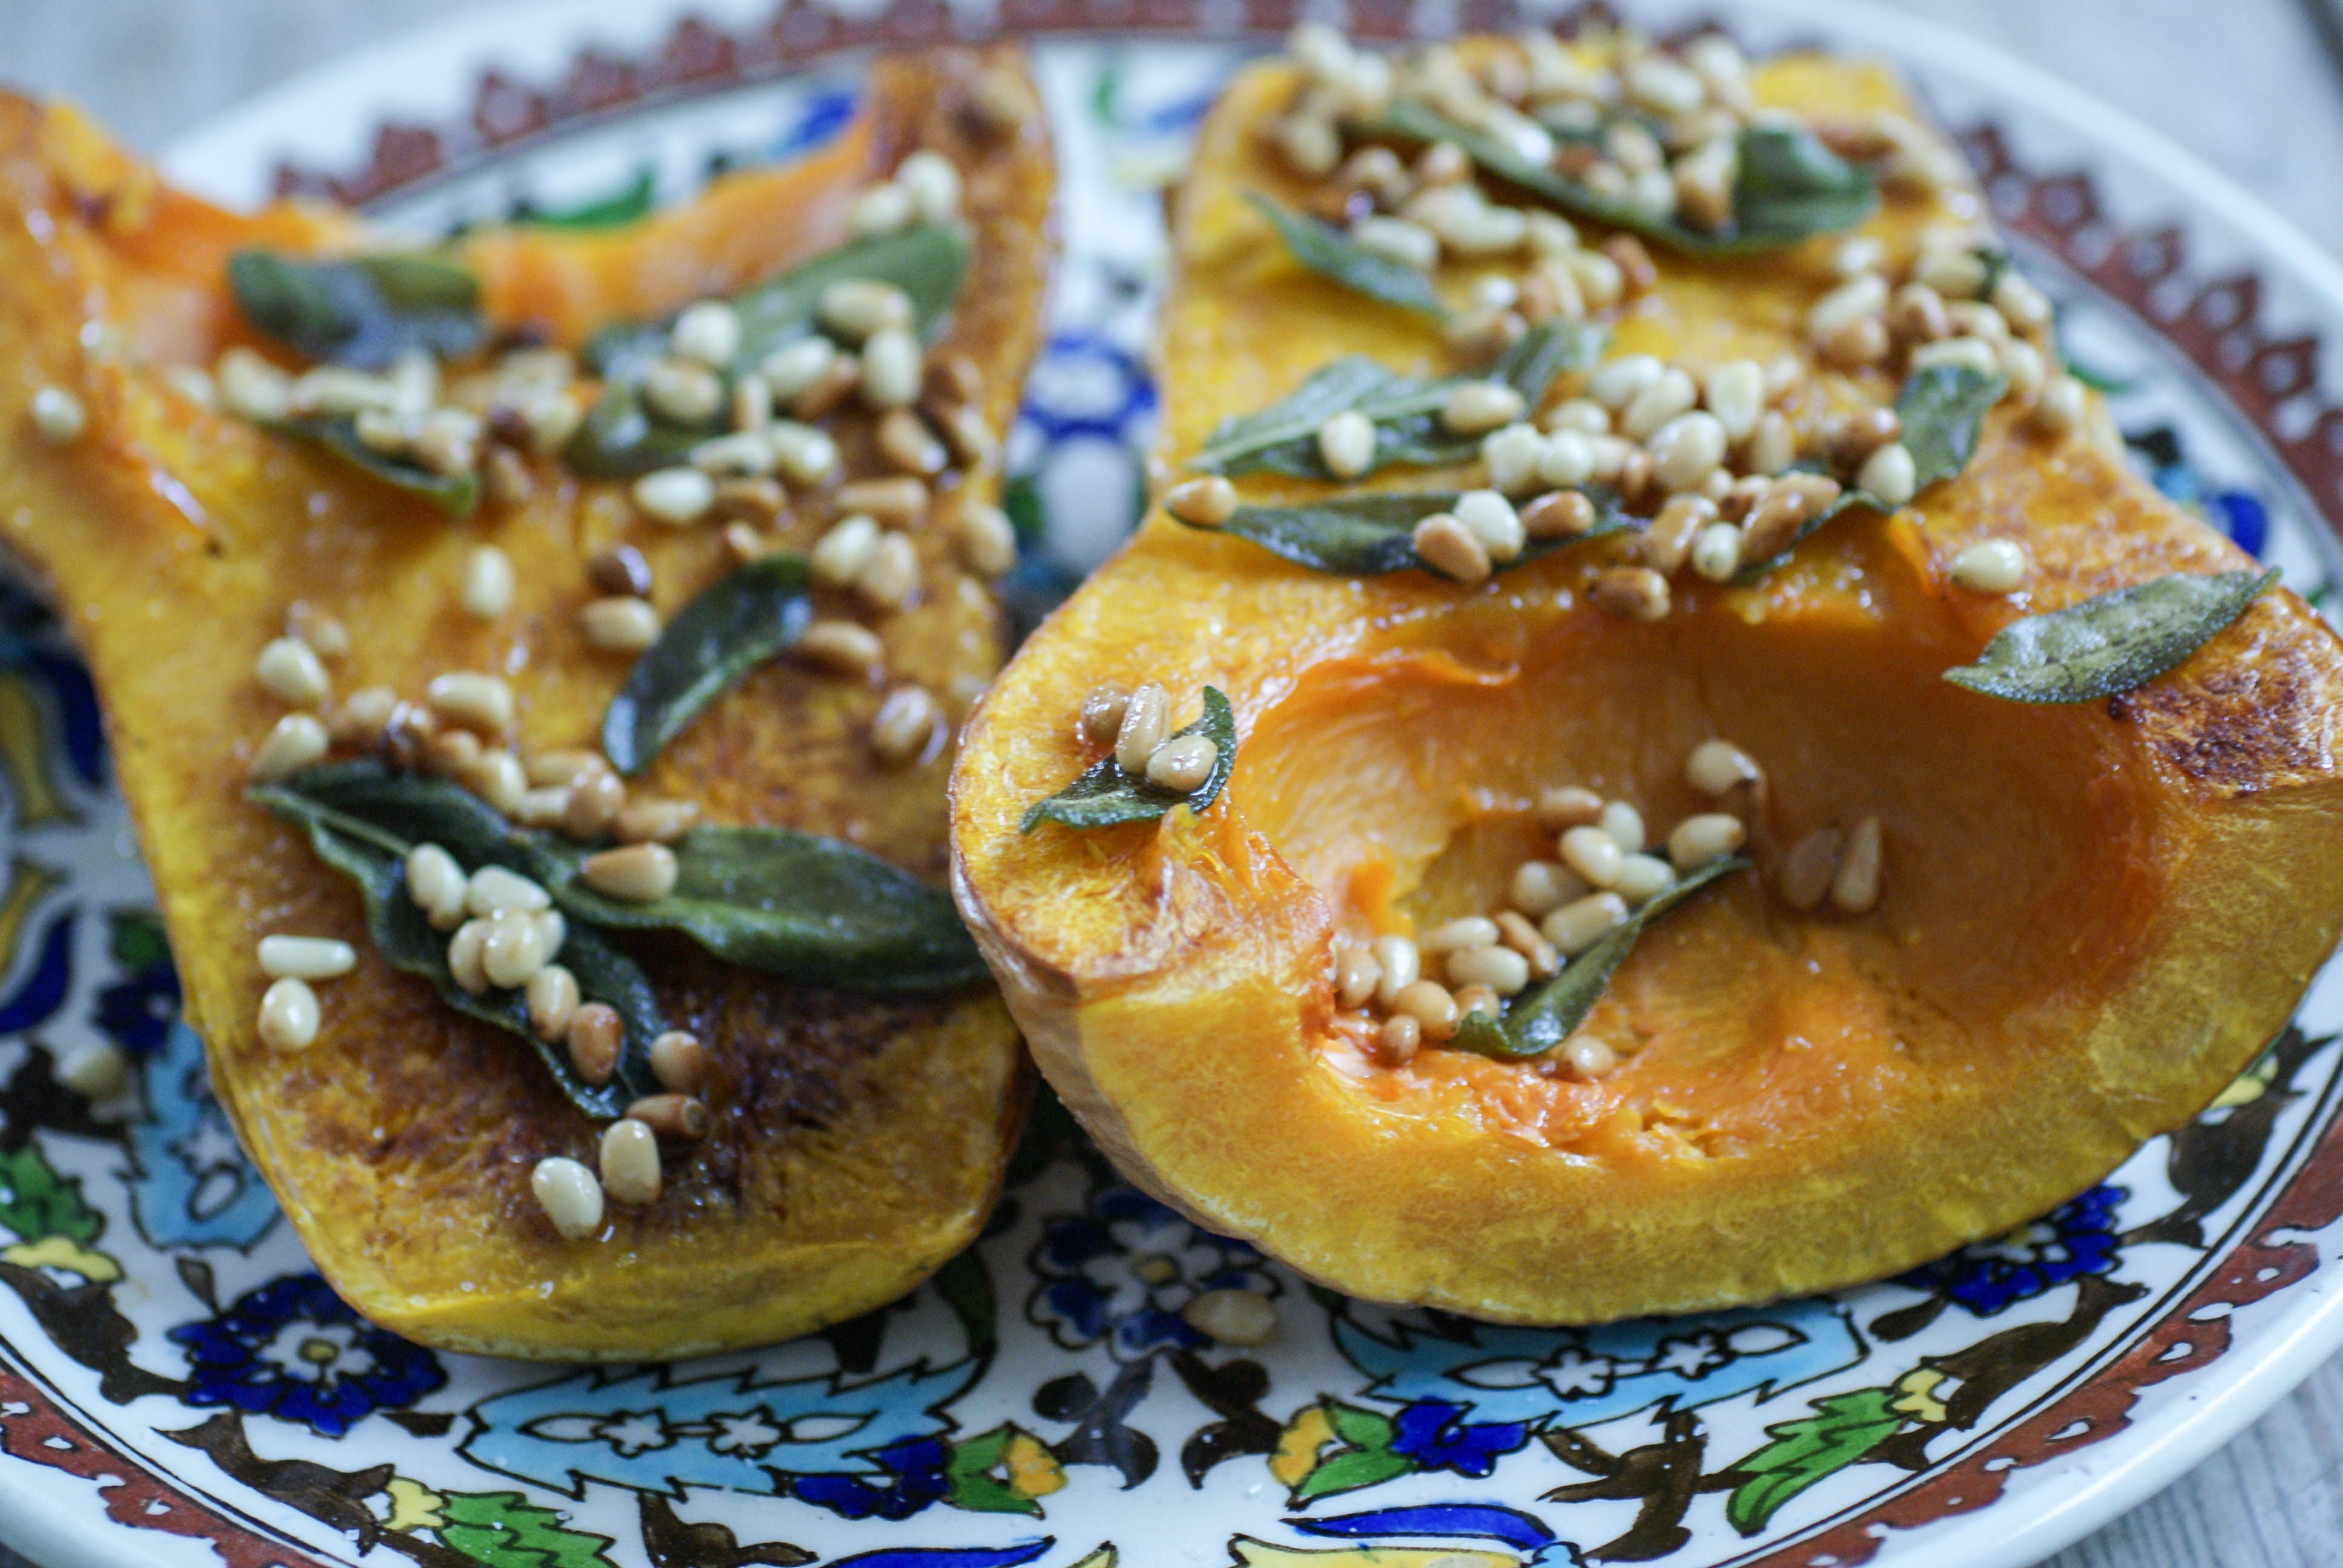
Butternut Squash with Sage and Roasted Pine Nuts

I’m so happy it’s squash season here again.
Butternut squash
Fruits and vegetables are very seasonal (in terms of availability) here in Switzerland. If you want Brussels sprouts, squash or kale in the spring or summer….well, that’s just too bad. You have to wait. We headed out to one of our favorite farms last week and picked up several varieties of squash. We got 4 spaghetti squash because we can never find them in stores here, and we also picked up a few butternut squash.
It’s even pretty
We had the butternut squash last night served with lamb chops and it was so delicious. I ate the leftovers cold out of the fridge today as my post workout meal. Yum!
Butternut Squash
Ingredients
- 1 butternut squash
- 1-2 Tablespoons olive oil
- Salt to taste
- Fresh sage leaves (about a handful)
- 1-2 Tablespoons ghee or grass fed butter
- 2 Tablespoons pine nuts
Instructions
- Cut the ends of your squash off. Hopefully you have better knife skills than I do. I have a heck of time cutting straight!
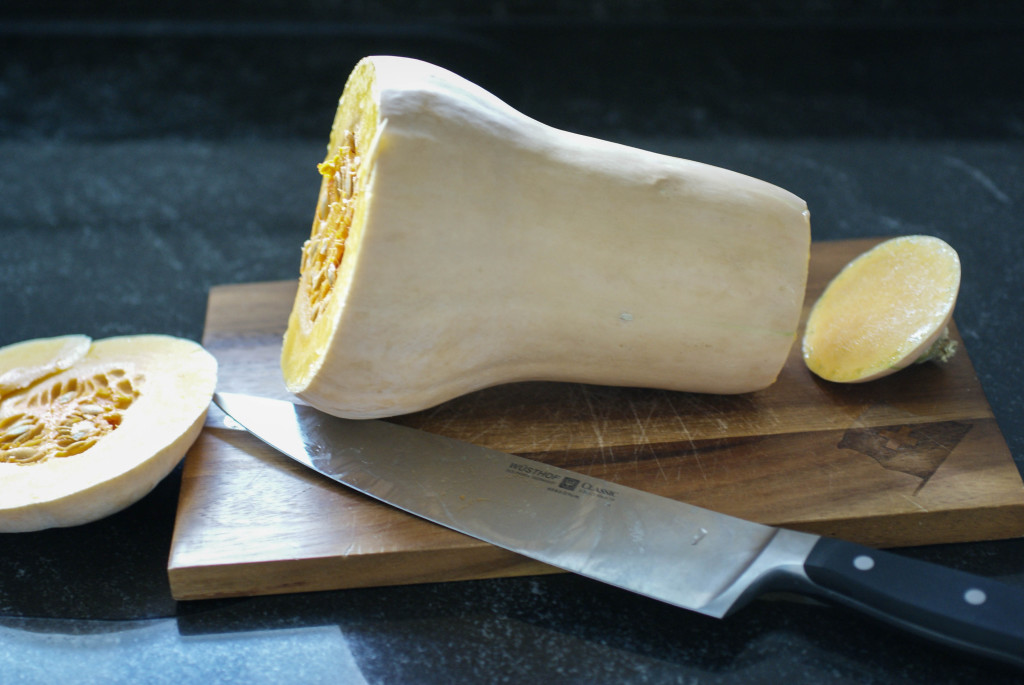
Requires some knife skills
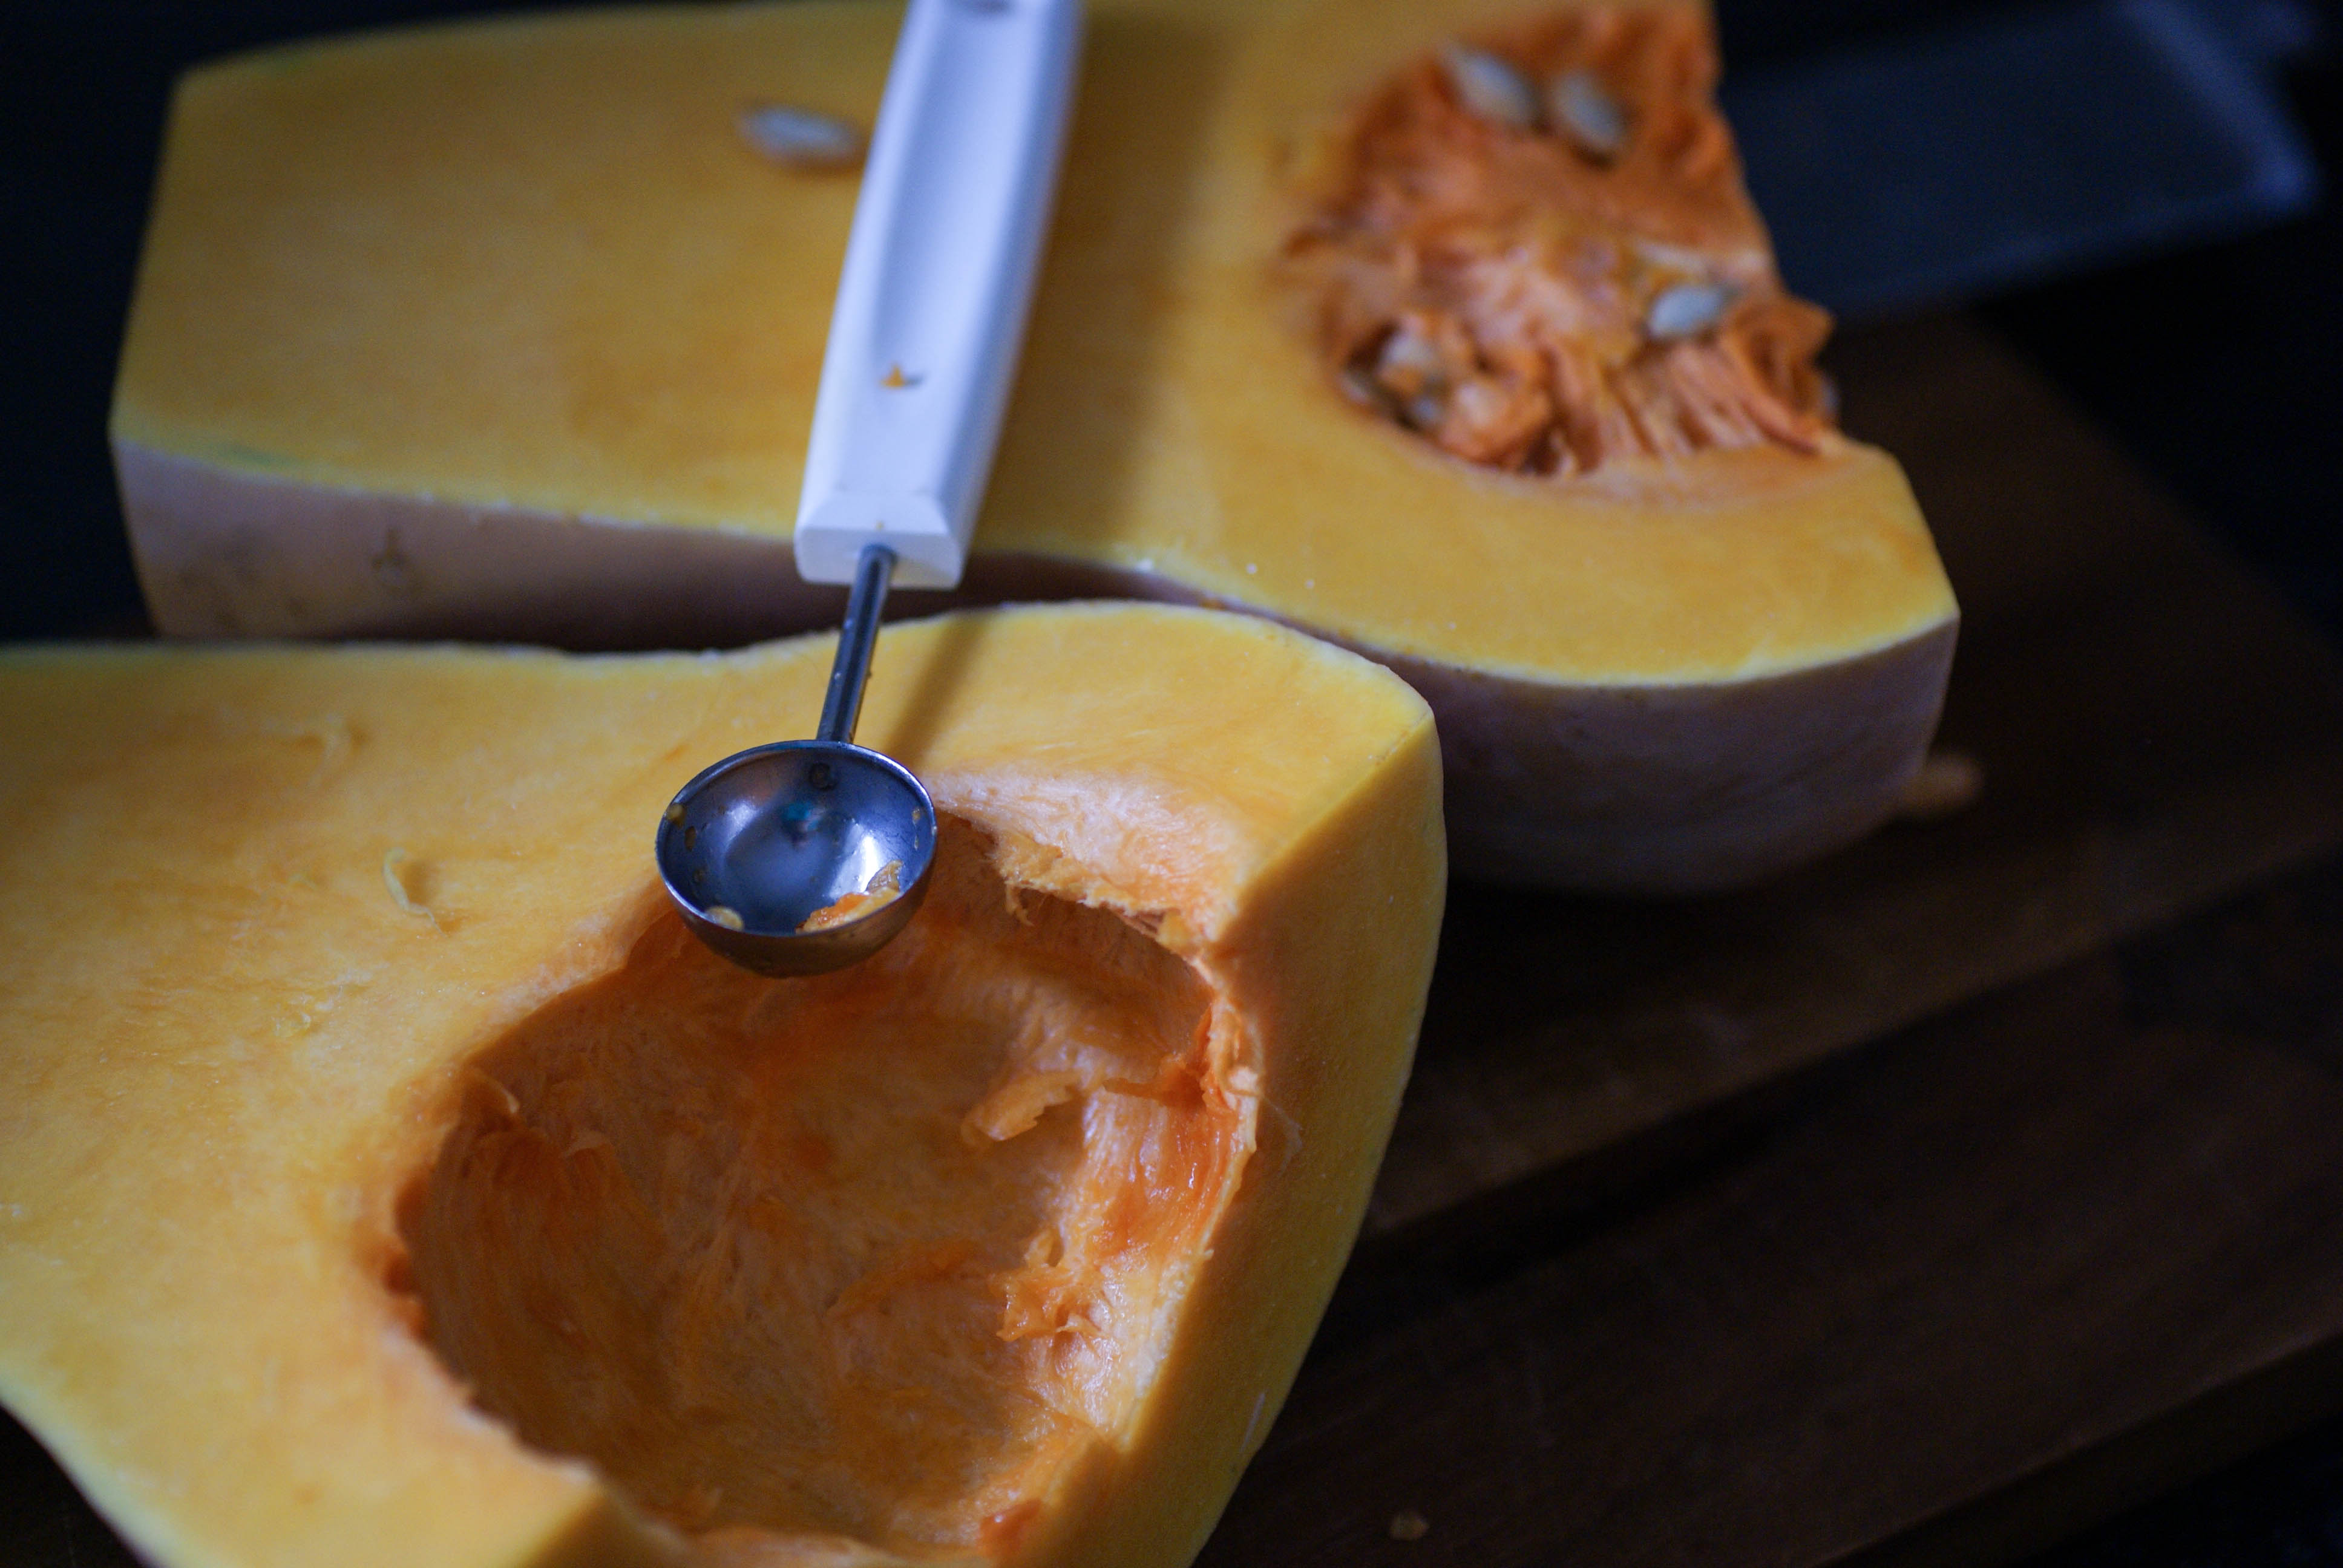
- Scoop out the seeds with a melon baller or a spoon. You can roast them like pumpkin seeds if you want.

You can roast the seeds
- Apply olive oil with a brush (or your hands) to all of the exposed squash and then salt to taste. Place the squash on a baking tray flesh side down.
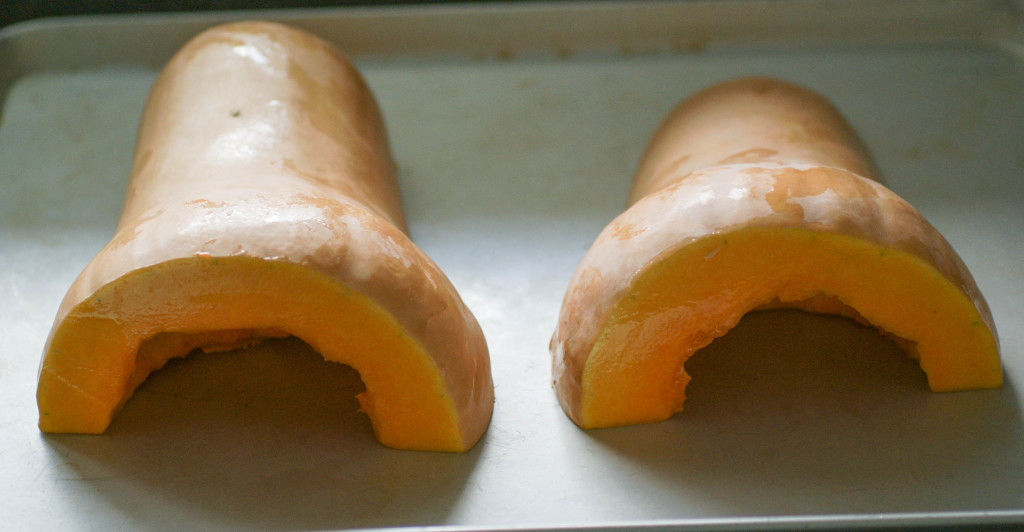
Skin side up
- Bake the squash in a pre-heated 350 F (175 C) oven for 1 hour. Start checking for doneness at about 45 minutes. It’s done when the skin is browned and starting to look a little blistery and the flesh is soft all the way through when poked with a fork.
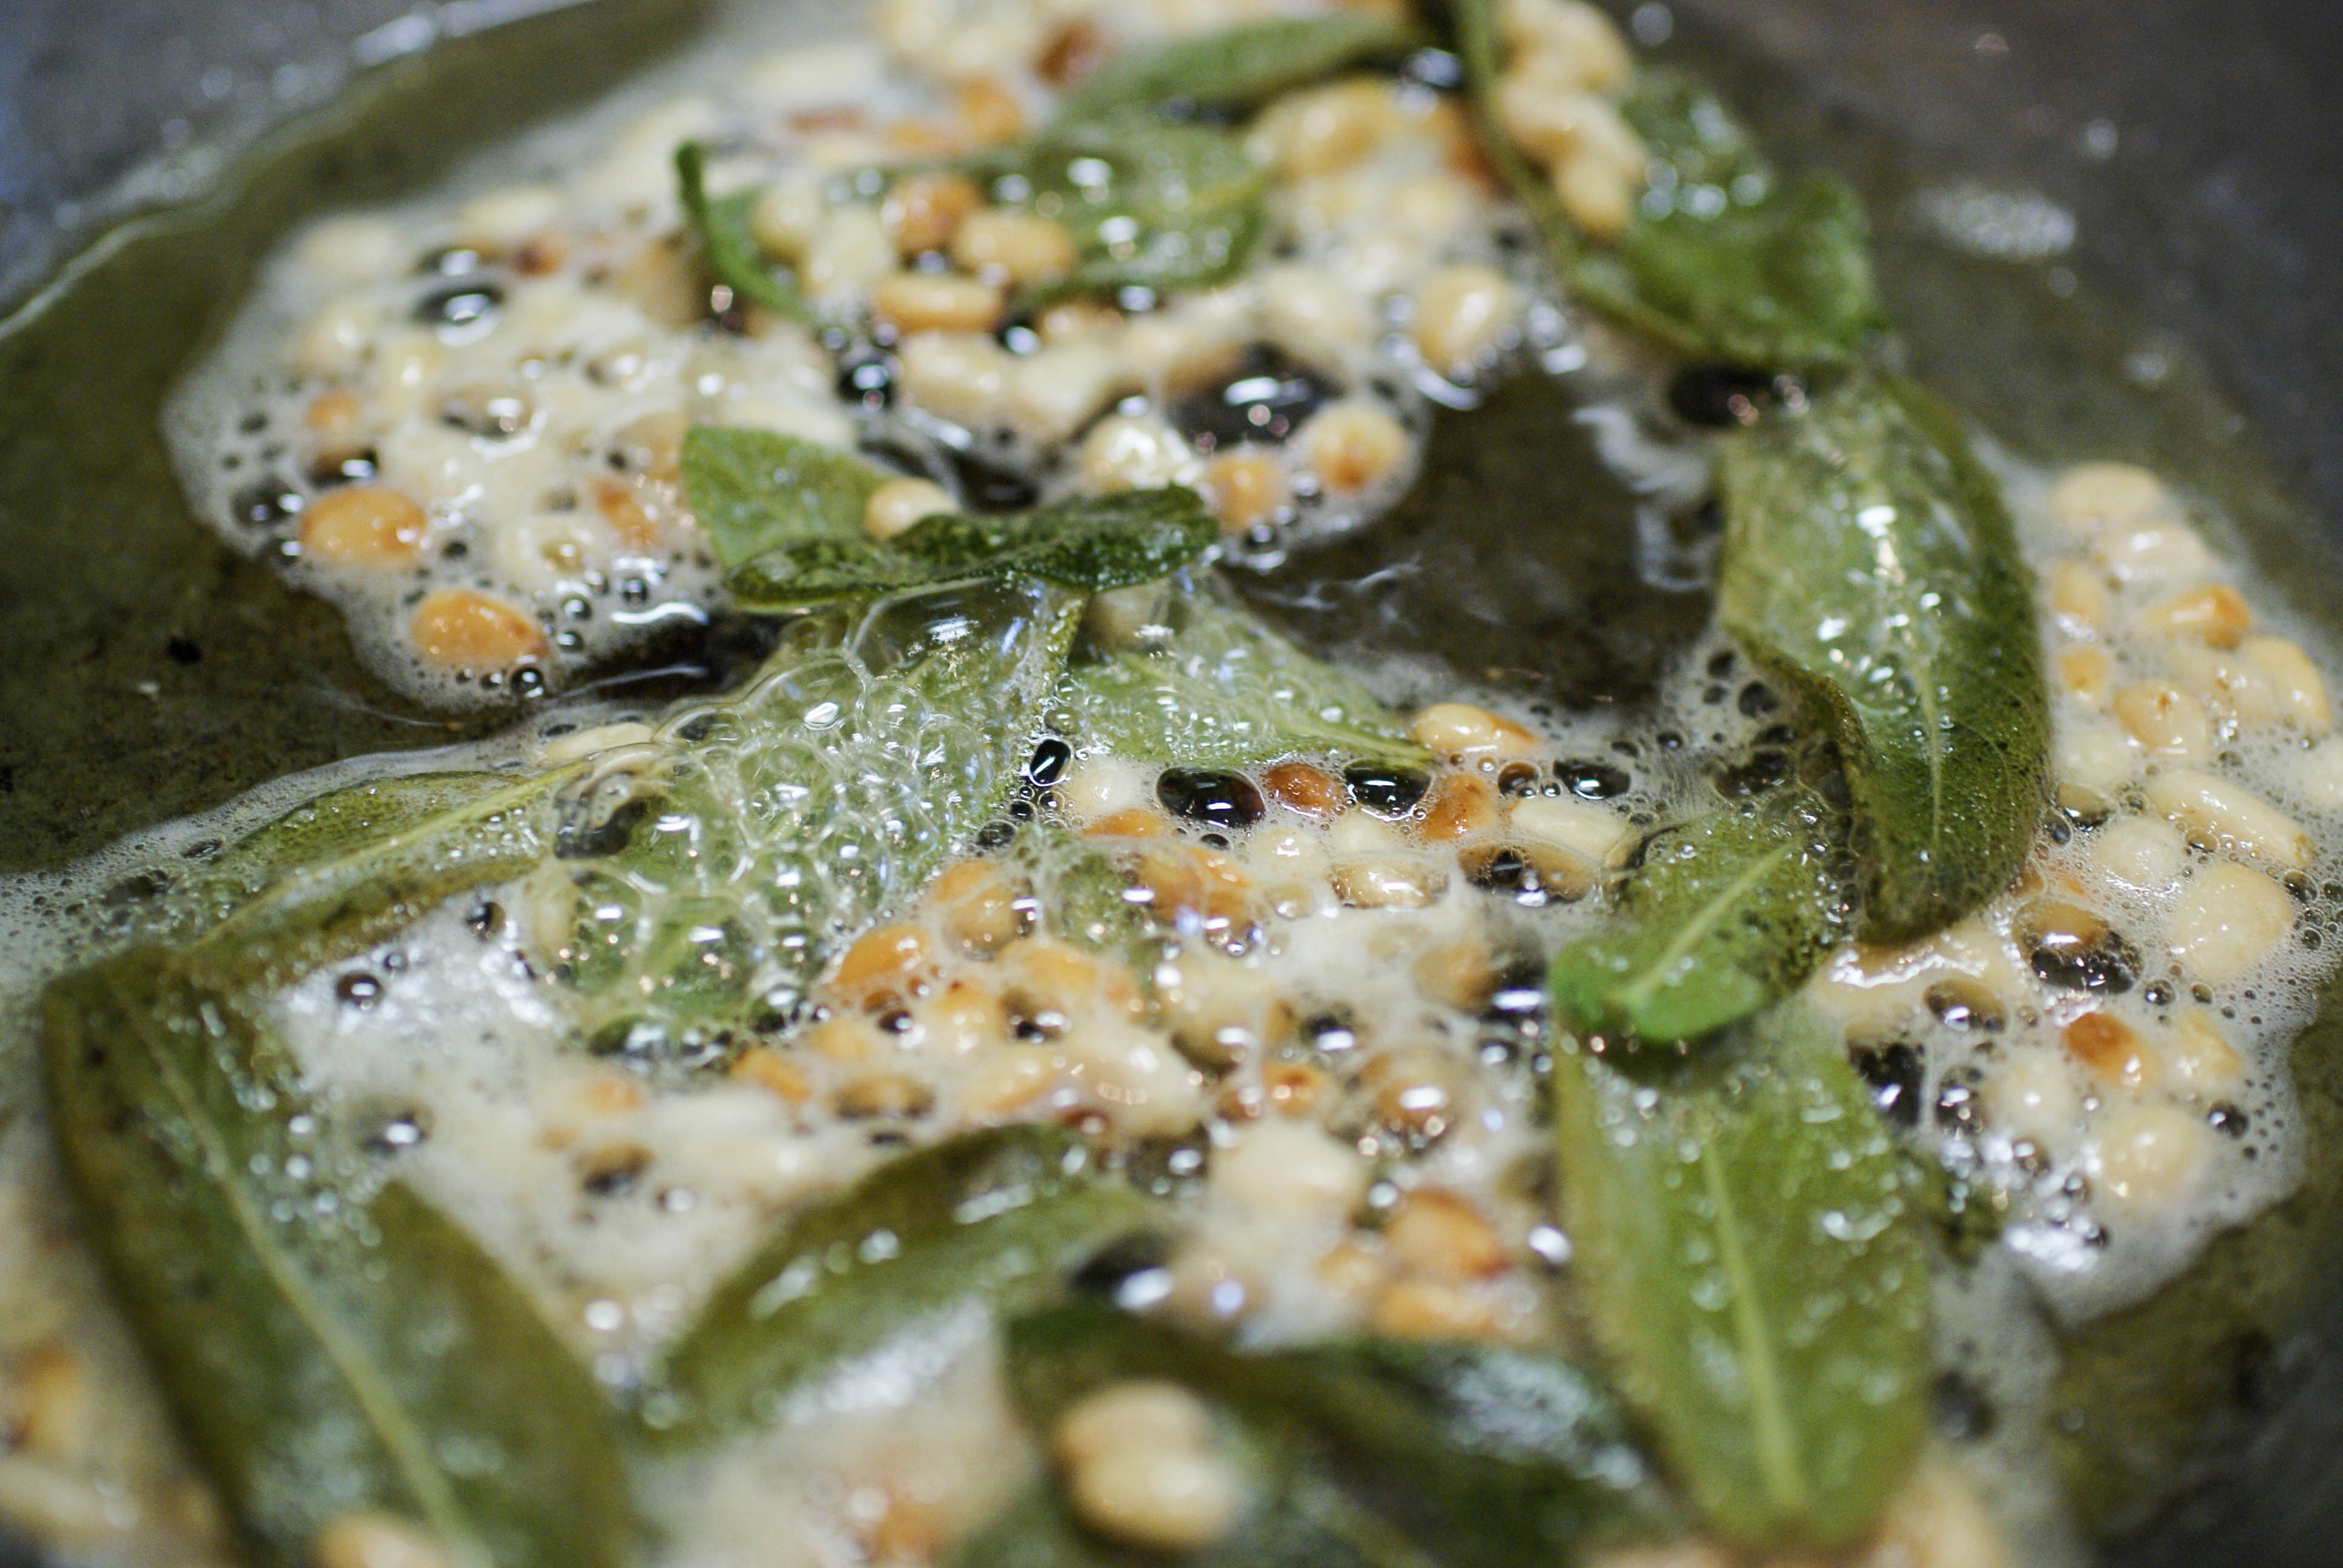
- While the squash is baking, heat the ghee or butter in a small pan and add in the fresh sage leaves and pine nuts.
- Toss until the sage gets crispy and the pine nuts start to brown.

My favorite part
- Once the squash comes out of the oven, pour the sage/butter/pine nuts over the top and serve.
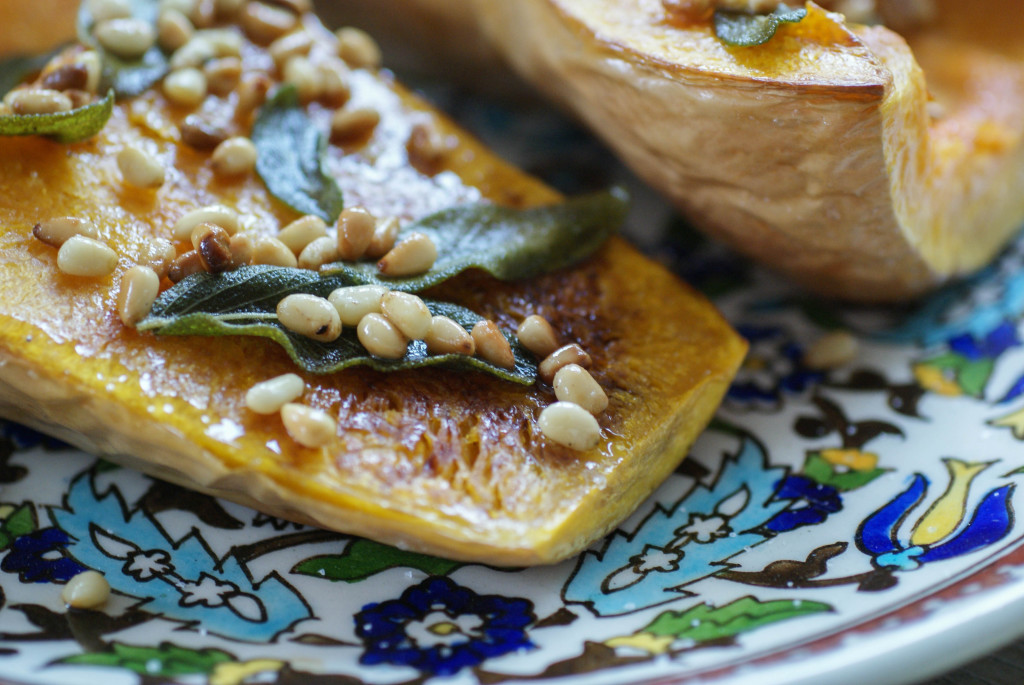
So good


Ingredients
- 1 butternut squash
- 1-2 Tablespoons olive oil
- Salt to taste
- Fresh sage leaves (about a handful)
- 1-2 Tablespoons ghee or grass fed butter
- 2 Tablespoons pine nuts
Instructions
- Cut the ends of your squash off. Hopefully you have better knife skills than I do. I have a heck of time cutting straight!
- Scoop out the seeds with a melon baller or a spoon. You can roast them like pumpkin seeds if you want.
- Apply olive oil with a brush (or your hands) to all of the exposed squash and then salt to taste. Place the squash on a baking tray flesh side down.
- Bake the squash in a pre-heated 350 F (175 C) oven for 1 hour. Start checking for doneness at about 45 minutes. It's done when the skin is browned and starting to look a little blistery and the flesh is soft all the way through when poked with a fork.
- While the squash is baking, heat the ghee or butter in a small pan and add in the fresh sage leaves and pine nuts.
- Toss until the sage gets crispy and the pine nuts start to brown.
- Once the squash comes out of the oven, pour the sage/butter/pine nuts over the top and serve.
Chocolate Pecan Pie Bars and a Dinner Guest

As much as I’d like to be, I am not the “Hostess with the mostest”.

Yeah….only in my dreams!
Having people over for dinner usually sends me into a state of panic. Needless to say, we don’t have many dinner guests. So, I don’t know what possessed me, but a few weeks back I invited a total stranger over for dinner. It all started several months ago when a Swiss Paleo reader (Hi TJ!!) sent me an e-mail to say that her husband was being transferred to Switzerland and that they would be moving here in about a year. We traded a few messages back and forth about living in Switzerland (you know, important things like where to get your hair done), and then I got a message saying that her husband would be in town for business for a few days. I went to crazy town and invited him over for dinner. It’s pretty intimidating to invite somebody for dinner when you are a food blogger. Their expectations of my cooking skills probably far outweigh my actual abilities!

Stellar cooking skills
When I picked up my mystery guest to bring him home, we had a good laugh because it turns out he was a little nervous for this blind date that his wife had set him up on, too. My husband and I had a great time getting to know Dan and we talked his ear off about Switzerland. He was a wonderful dinner guest and he gets bonus points for eating what I cooked (and even having seconds!). I served up a very casual dinner of grilled bratwurst from my favorite farm to give Dan a true taste of Switzerland, my favorite salad (the “Julie Salad”), baked sweet potatoes and roast vegetables. For dessert (because, yes, having company is all the excuse I need to make up a paleo dessert), I tried out something new. I’ve been wanting to make something pecan pie-like for my daughter who loves pecan pie, so this poor dinner guest got to be my guinea pig.
If you are ever coming to my neck of the woods, just let me know and maybe I’ll invite you to dinner, too!
These are super easy
Ingredients
For the Bottom Crust
- 1 3/4 cups almond flour
- 1 egg
- 1 Tablespoon coconut oil
- 1 Tablespoon arrowroot powder
- 1/4 teaspoon salt
For the Top Pecan Pie Part
- 8 oz (225 grams) pitted medjool dates
- 2 eggs
- 1/4 cup maple syrup
- 1/2 teaspoon vanilla
- 1 cup pecans, chopped
- 1-2 oz (25-50 grams) 85% dark chocolate, melted
What to Do
For the Crust
- Put all of the crust ingredients together in a food processor and mix.
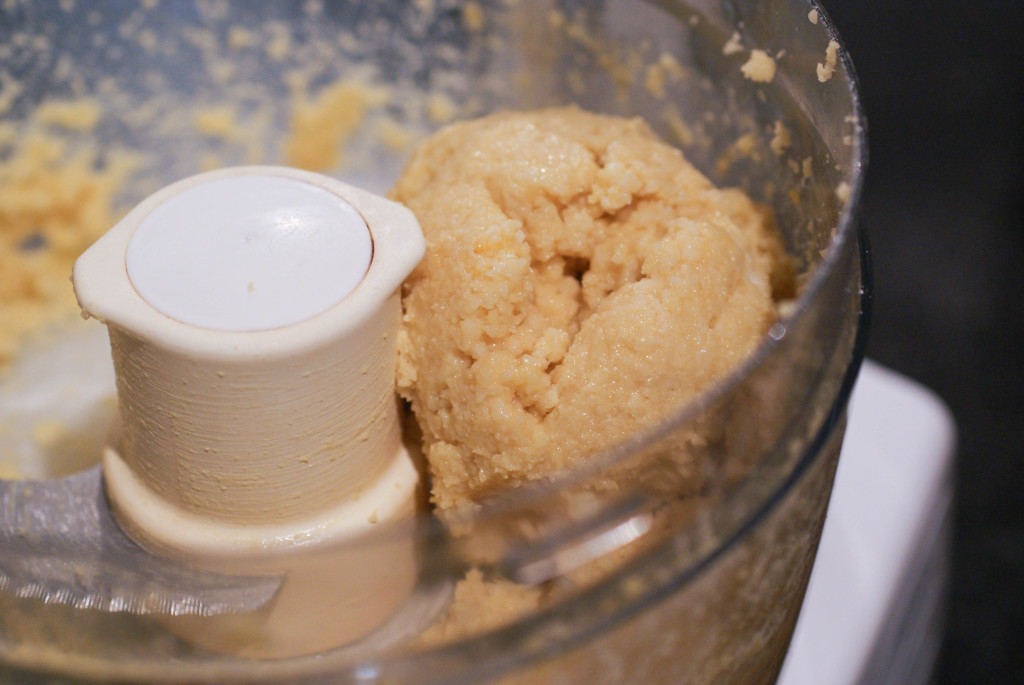
Love my food processor
- Press the dough down into an 8×8 parchment lined pan.

Parchment paper makes for easy removal
- Prick with a fork a few times and bake in a preheated 350 F (175C) oven for 15 minutes.


For the Pecan Pie Part
- Add everything (EXCEPT the nuts and chocolate) together in a food processor and whiz until smooth and creamy.
- Pour this over the crust after it has baked for 15 minutes.
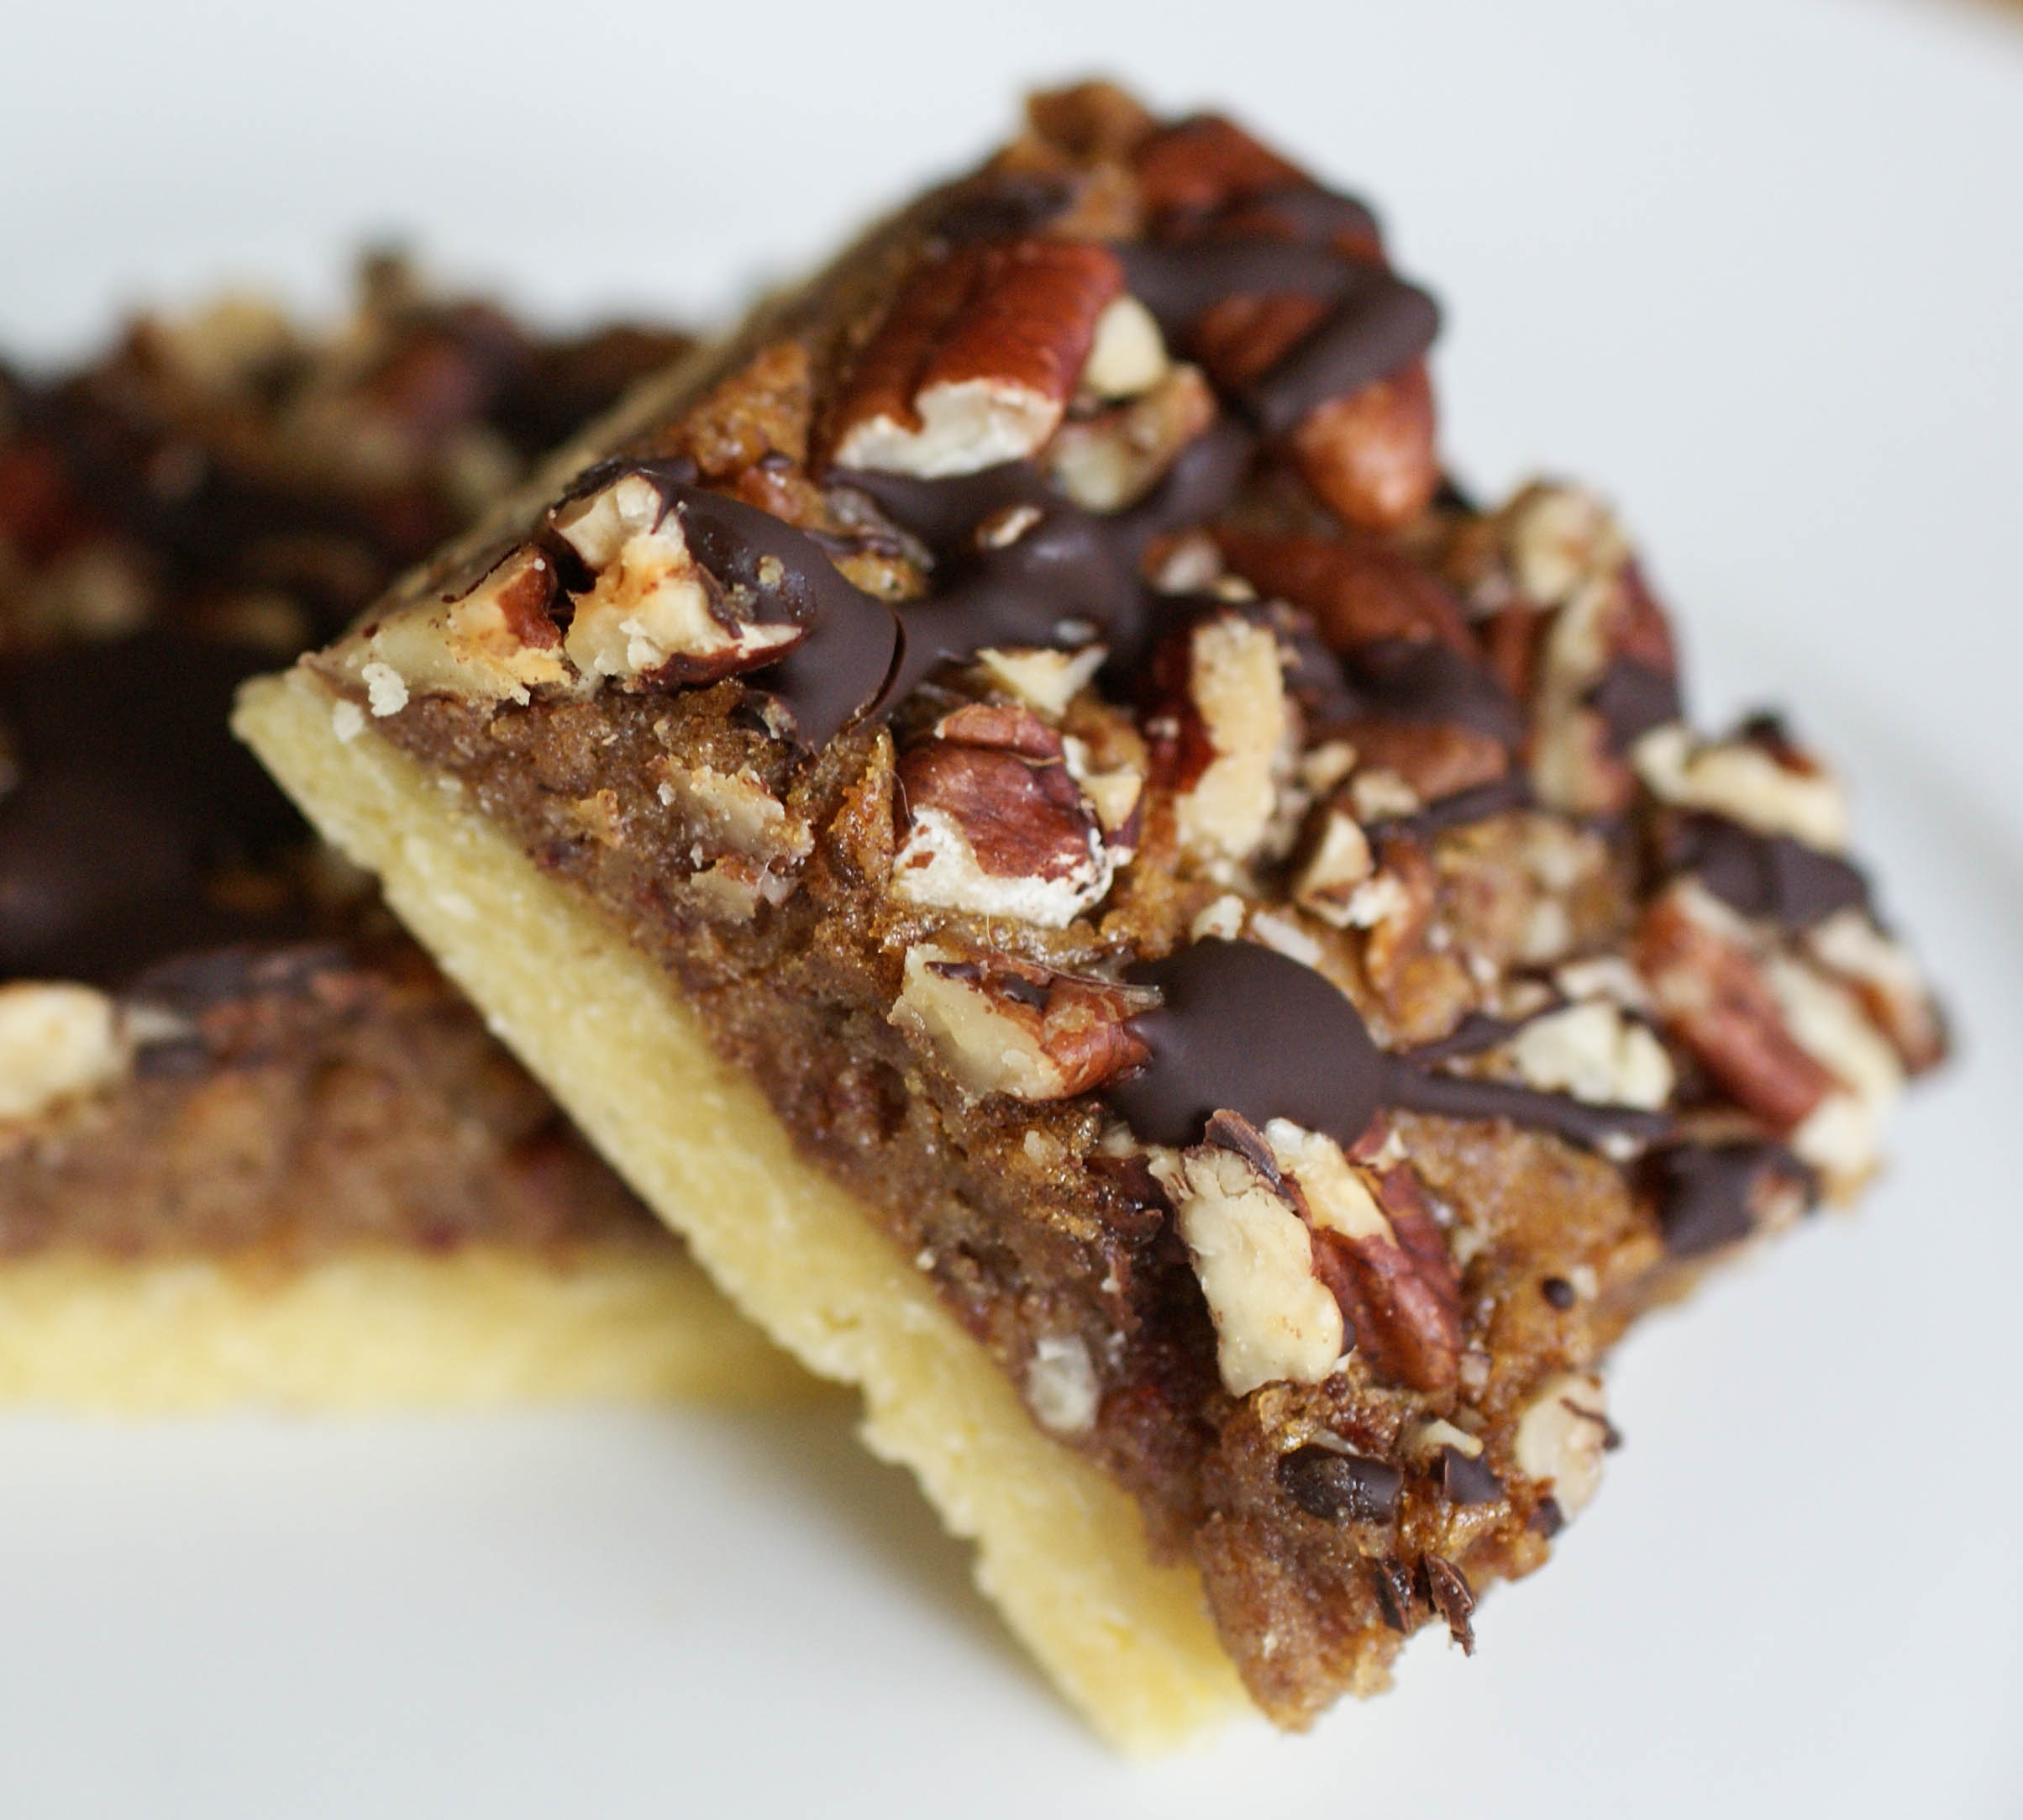
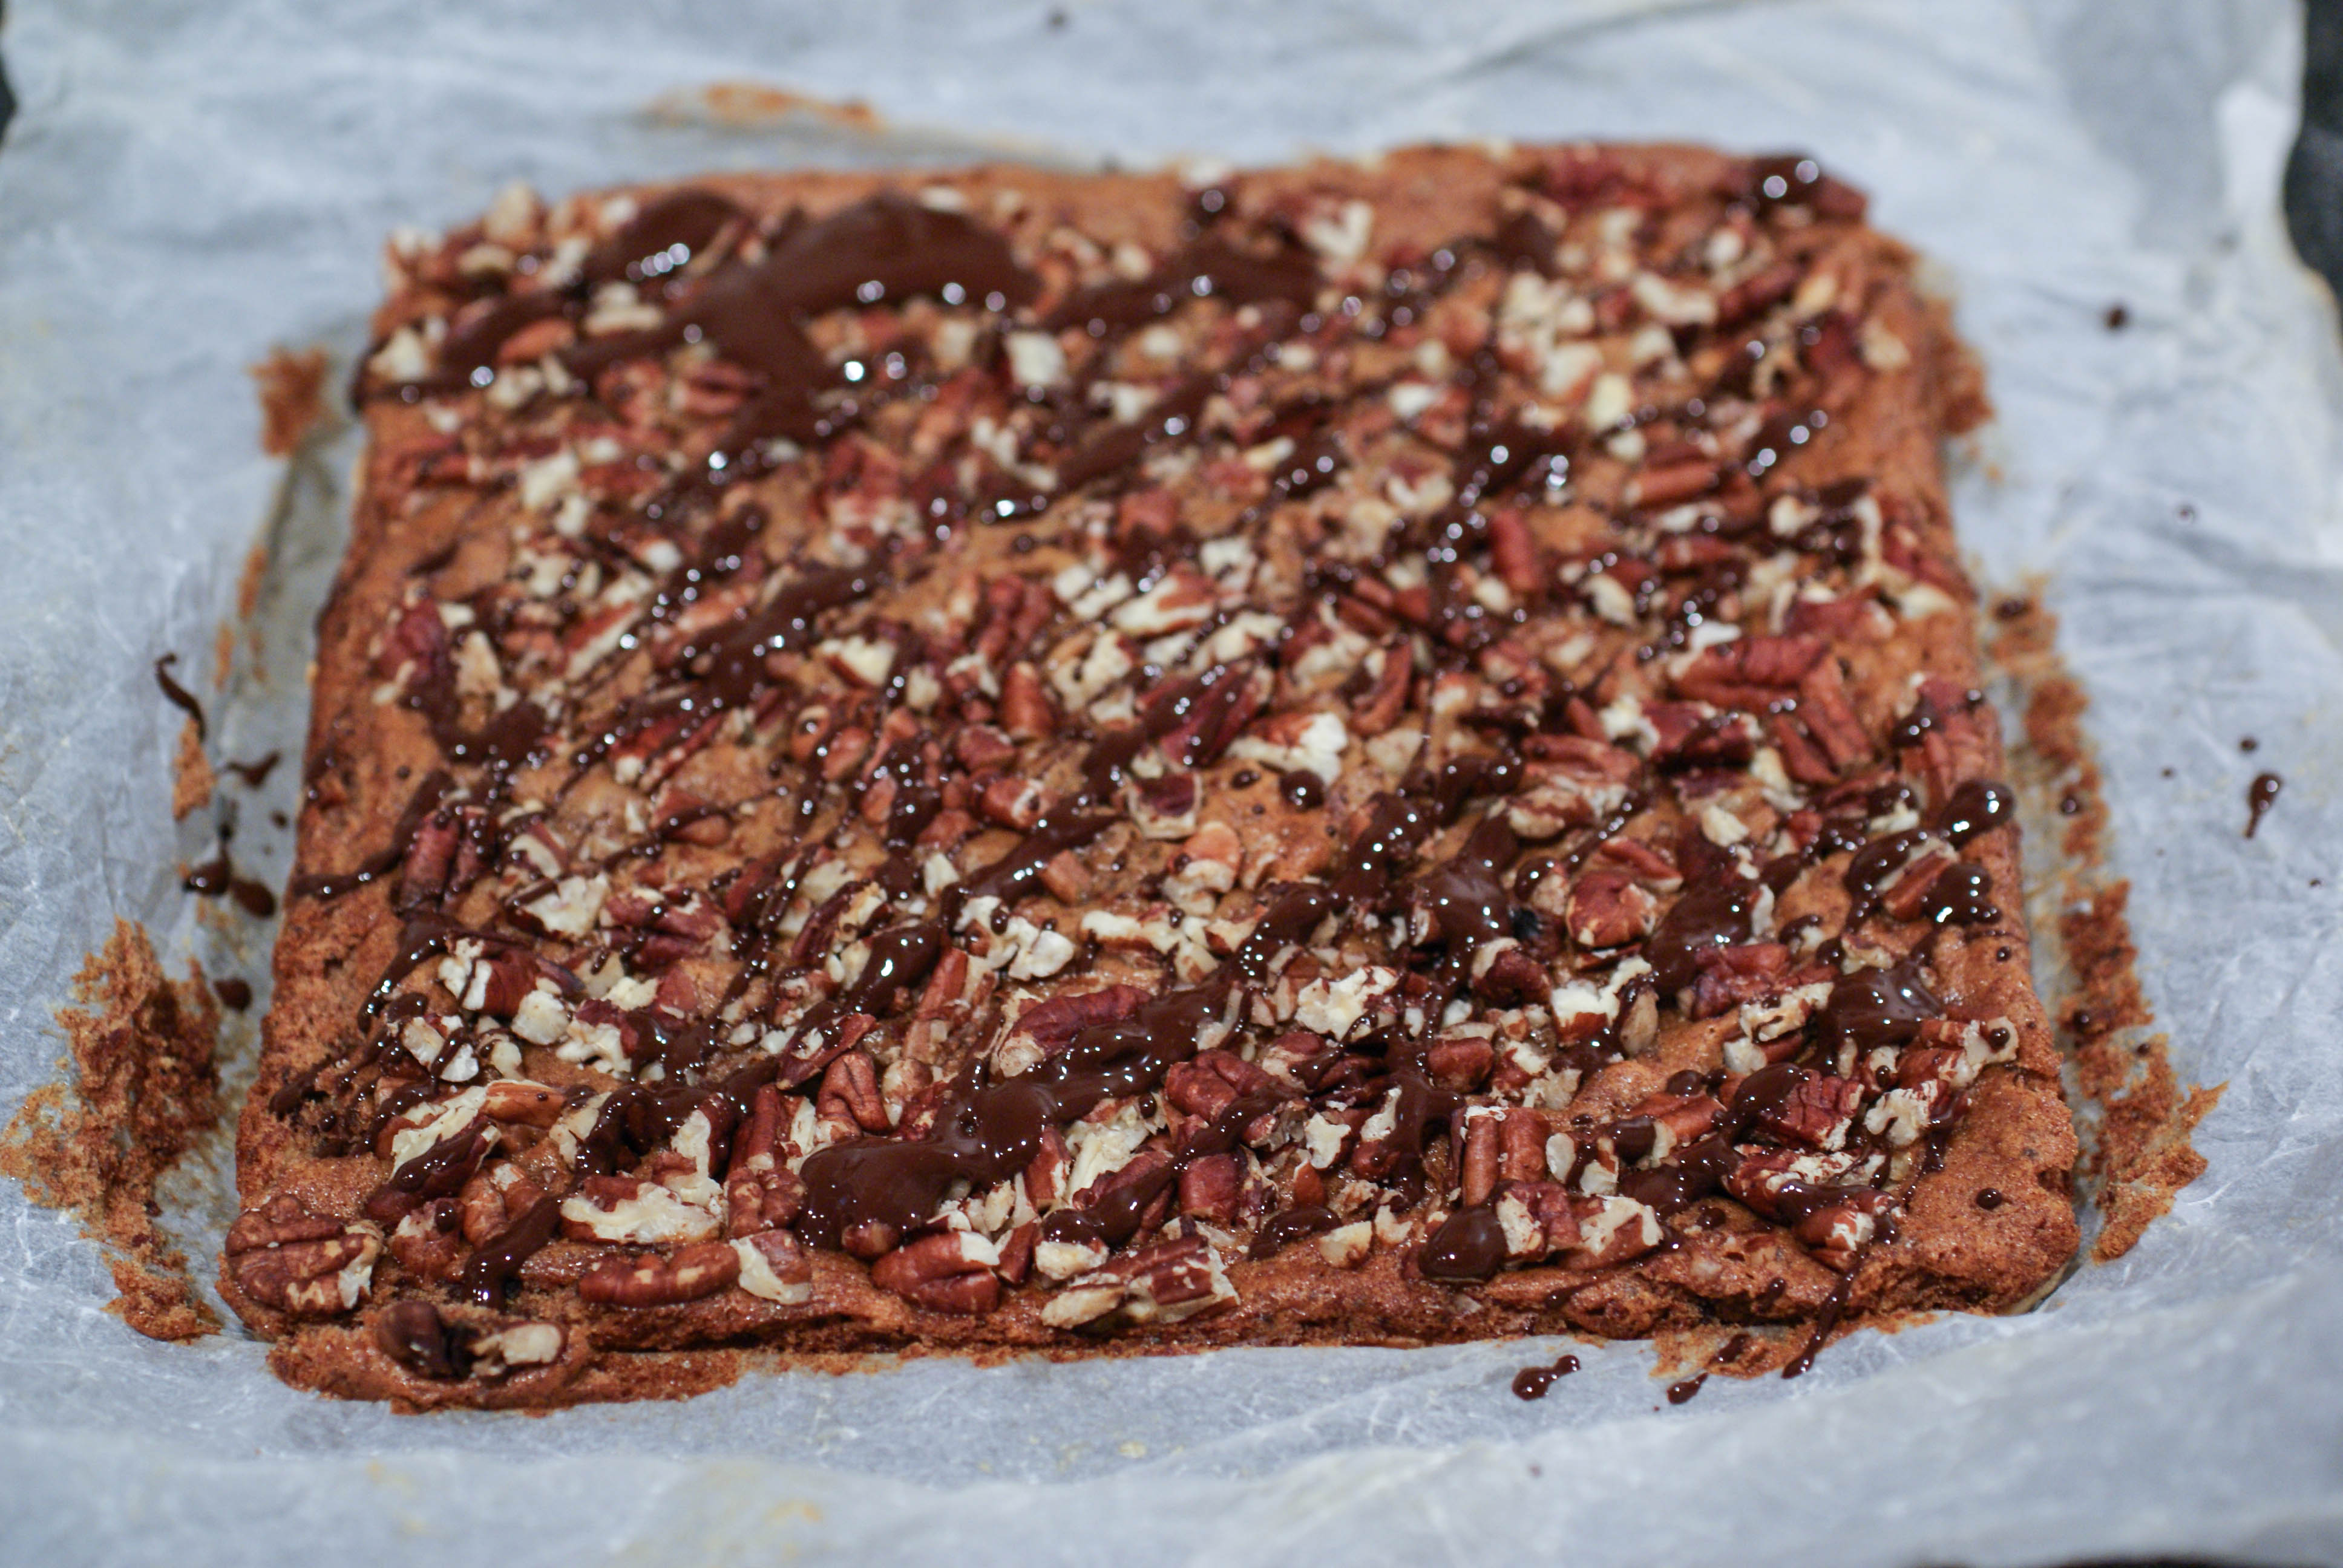
- Sprinkle the cup of chopped pecans over the top and return to the oven and bake for another 30 minutes.
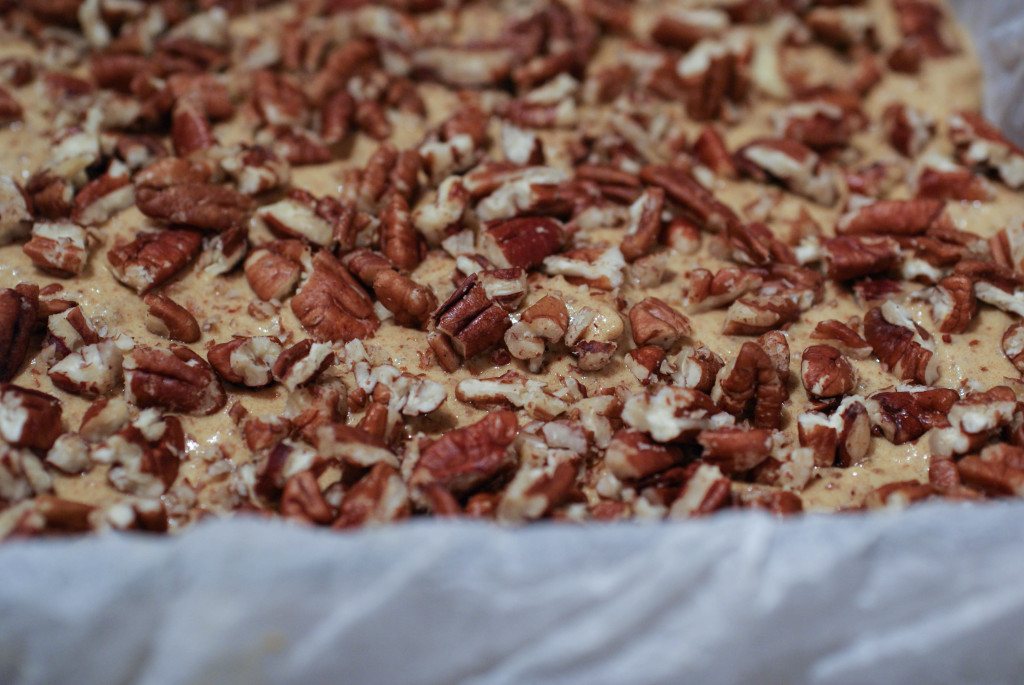
Cover with nuts
- Let it cool on the counter and then drizzle the melted chocolate over the top.

Drizzle the chocolate
- Chill before cutting into squares.
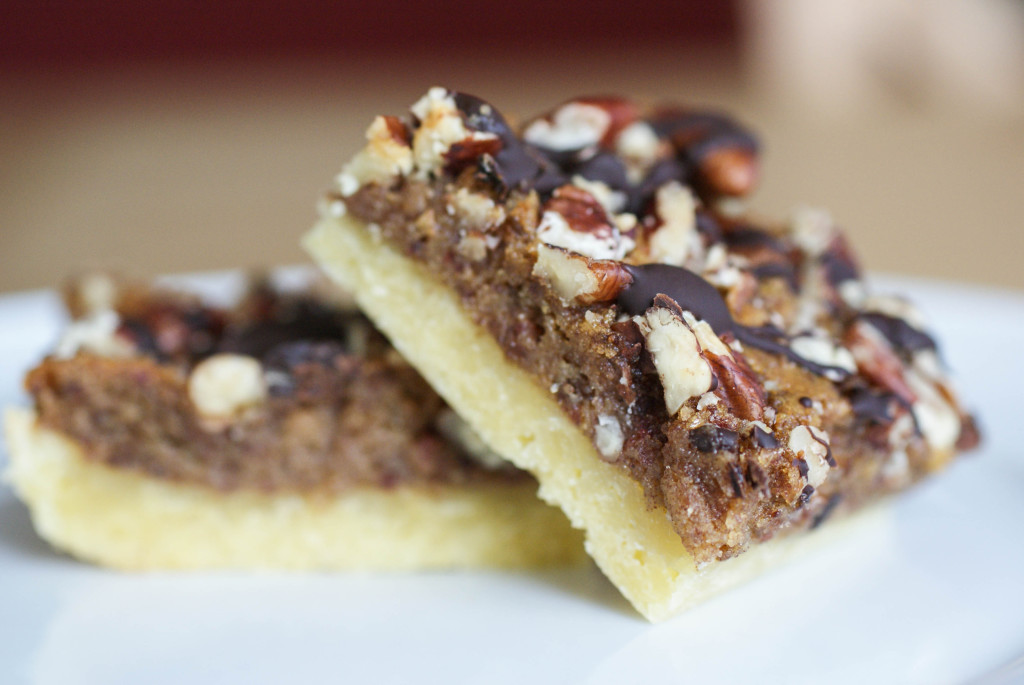
Chocolate Pecan Pie Bars


Ingredients
- 1 3/4 cups almond flour
- 1 egg
- 1 Tablespoon coconut oil
- 1 Tablespoon arrowroot powder
- 1/4 teaspoon salt
- 8 oz (225 grams) pitted medjool dates
- 2 eggs
- 1/4 cup maple syrup
- 1/2 teaspoon vanilla
- 1 cup pecans, chopped
- 1-2 oz (25-50 grams) 85% dark chocolate, melted
Instructions
- Put all of the crust ingredients together in a food processor and mix.
- Press the dough down into an 8x8 parchment lined pan.
- Prick with a fork a few times and bake in a preheated 350 F (175C) oven for 15 minutes.
- Add everything (EXCEPT the nuts and chocolate) together in a food processor and whiz until smooth and creamy.
- Pour this over the crust after it has baked for 15 minutes.
- Sprinkle the cup of chopped pecans over the top and return to the oven and bake for another 30 minutes.
- Let it cool on the counter and then drizzle the melted chocolate over the top.
- Chill before cutting into squares.
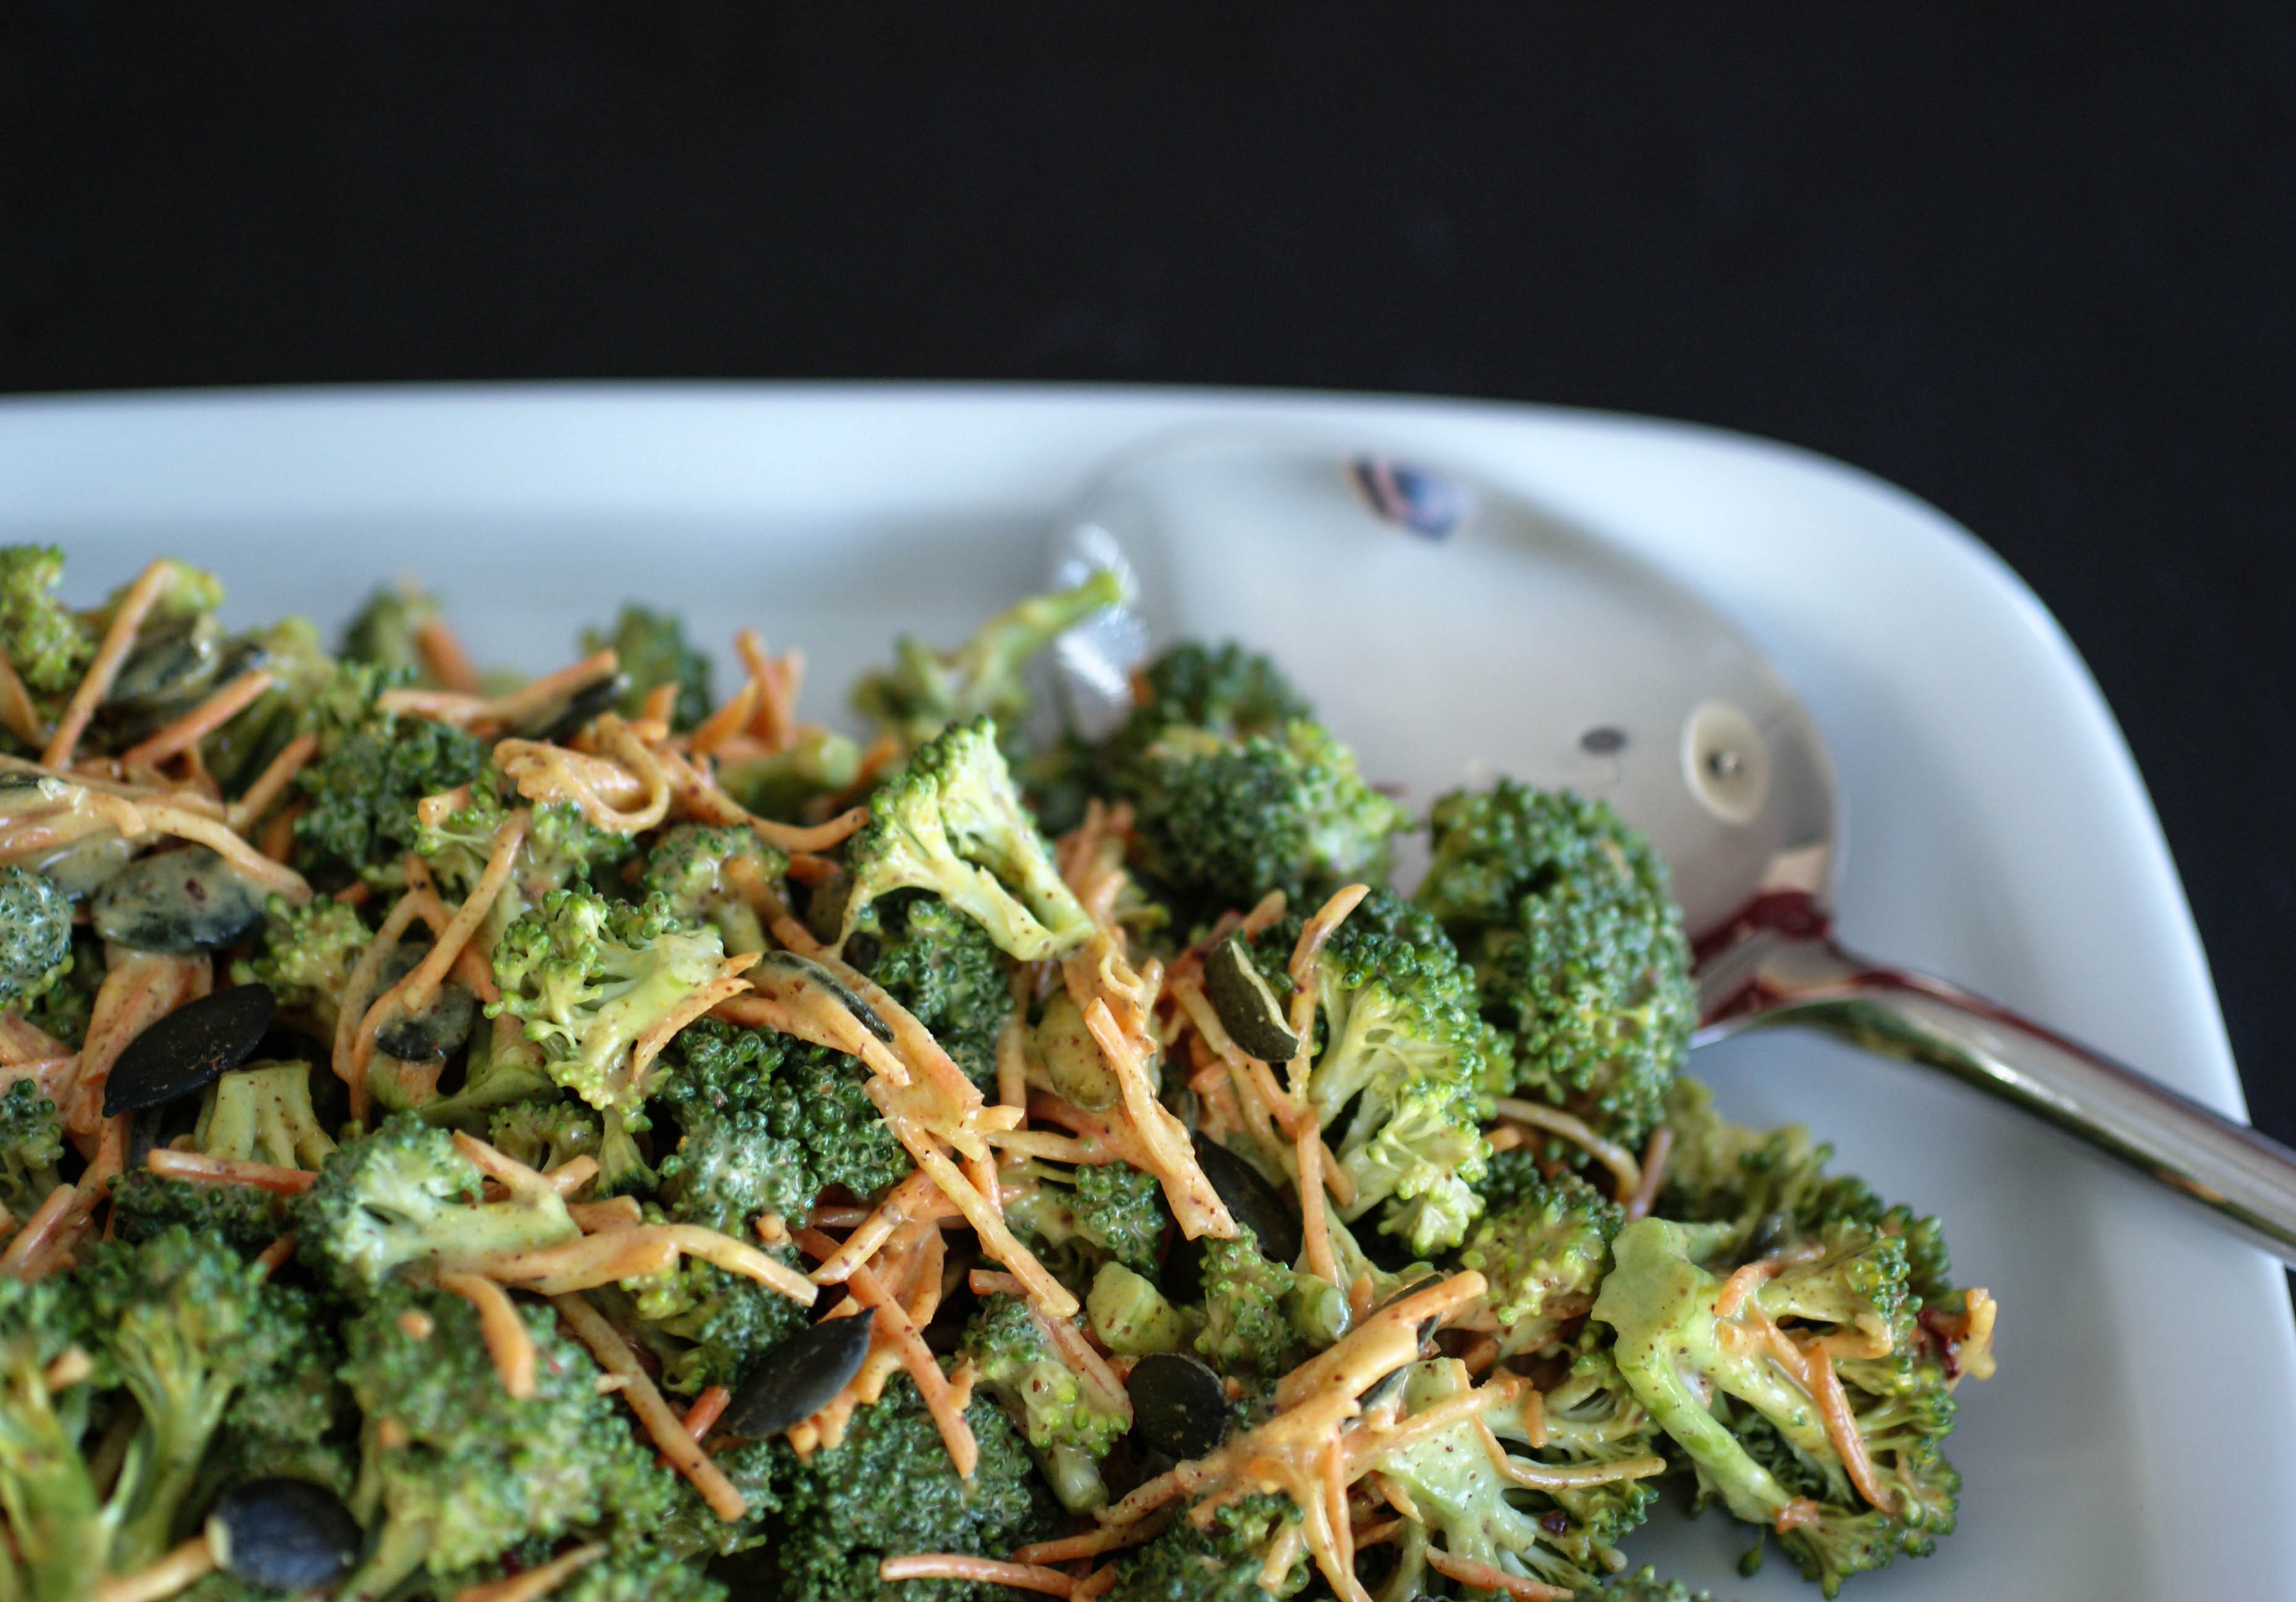
Curried Broccoli Salad
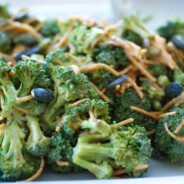
My husband said I should call this ‘Satay Salad’ because the sauce tastes like the peanut satay sauce that goes with chicken. I’m pretty sure I’ll tweek it in a few days to make satay because now that he mentioned it, I’m craving it. This is super adaptable and you could add in anything you wanted. I tossed in some pumpkin seeds, but it would also be delicious with cashew nuts. I think it would be really good with a handful of raisins thrown in, which I probably would have done if I had had any on hand. I almost ran out to get some raisins, but then I would have had a bunch of leftover raisins after making the salad. Leftover, lonely raisins means I would have had to make cookies. And then I would have to eat those cookies. Nope, buying raisins is not a good idea 🙂

Easy nutrient dense salad
Ingredients
- 1 medium to large head of raw broccoli, chopped
- 1/4-1/2 cup grated carrots
- 1/4 cup seeds/nuts of your choice (I used pumpkin seeds)
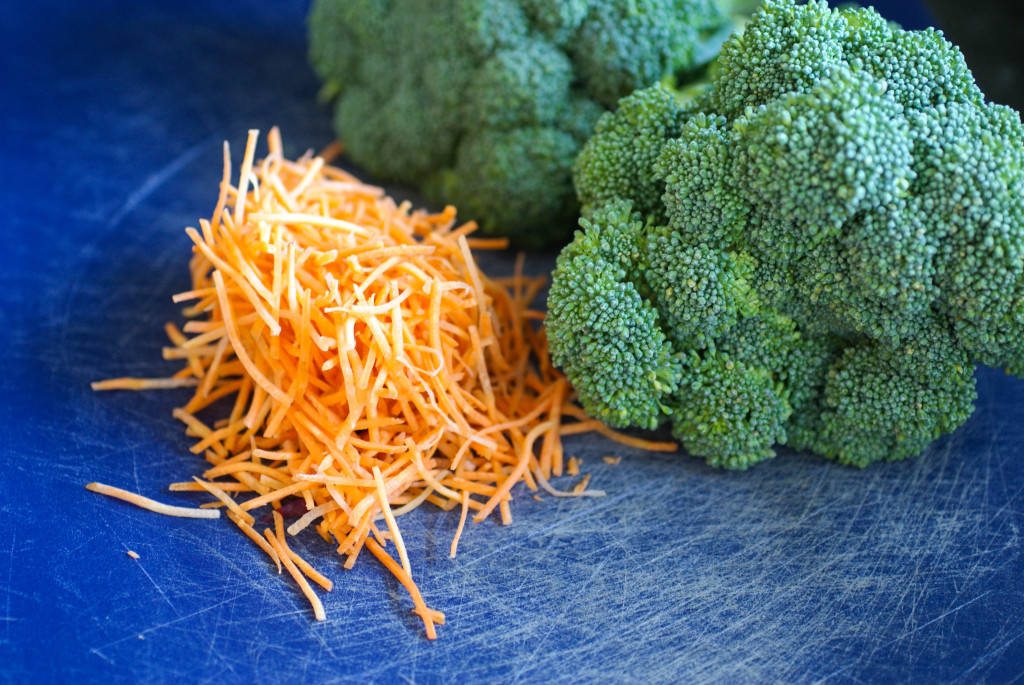
Simple ingredients

For the Sauce
- 1/4 cup almond butter (or nut/seed butter of your choice)
- 1 teaspoon apple cider vinegar
- 1 Tablespoon honey
- 1 Tablespoon mild yellow curry powder
- 1/4 cup coconut milk
- 1 teaspoon olive oil
- 1/4 teaspoon salt
Putting it together
- Mix all ingredients for the sauce together in a bowl until smooth. It should be a thick sauce (not too runny) but you can adjust the thickness by adjusting the amount of coconut milk you add in.
- Throw the chopped broccoli, grated carrots and any nuts and raisins (optional add-in) in a bowl together.
- Pour sauce over the broccoli and toss to coat.
- Refrigerate for awhile before serving.

Goes with anything
Ingredients
- 1 medium to large head of raw broccoli, chopped
- 1/4-1/2 cup grated carrots
- 1/4 cup seeds/nuts of your choice (I used pumpkin seeds)
- 1/4 cup almond butter (or nut/seed butter of your choice)
- 1 teaspoon apple cider vinegar
- 1 Tablespoon honey
- 1 Tablespoon mild yellow curry powder
- 1/4 cup coconut milk
- 1 teaspoon olive oil
- 1/4 teaspoon salt
Instructions
- Mix all ingredients for the sauce together in a bowl until smooth. It should be a thick sauce (not too runny) but you can adjust the thickness by adjusting the amount of coconut milk you add in.
- Throw the chopped broccoli, grated carrots and any nuts and raisins (optional add-in) in a bowl together.
- Pour sauce over the broccoli and toss to coat.
- Refrigerate for awhile before serving.
Notes
You could substitute the pumpkin seeds with any nut or seed you like. It would be delicious to add in a handful of raisins.
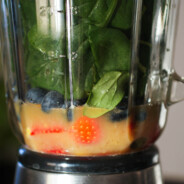
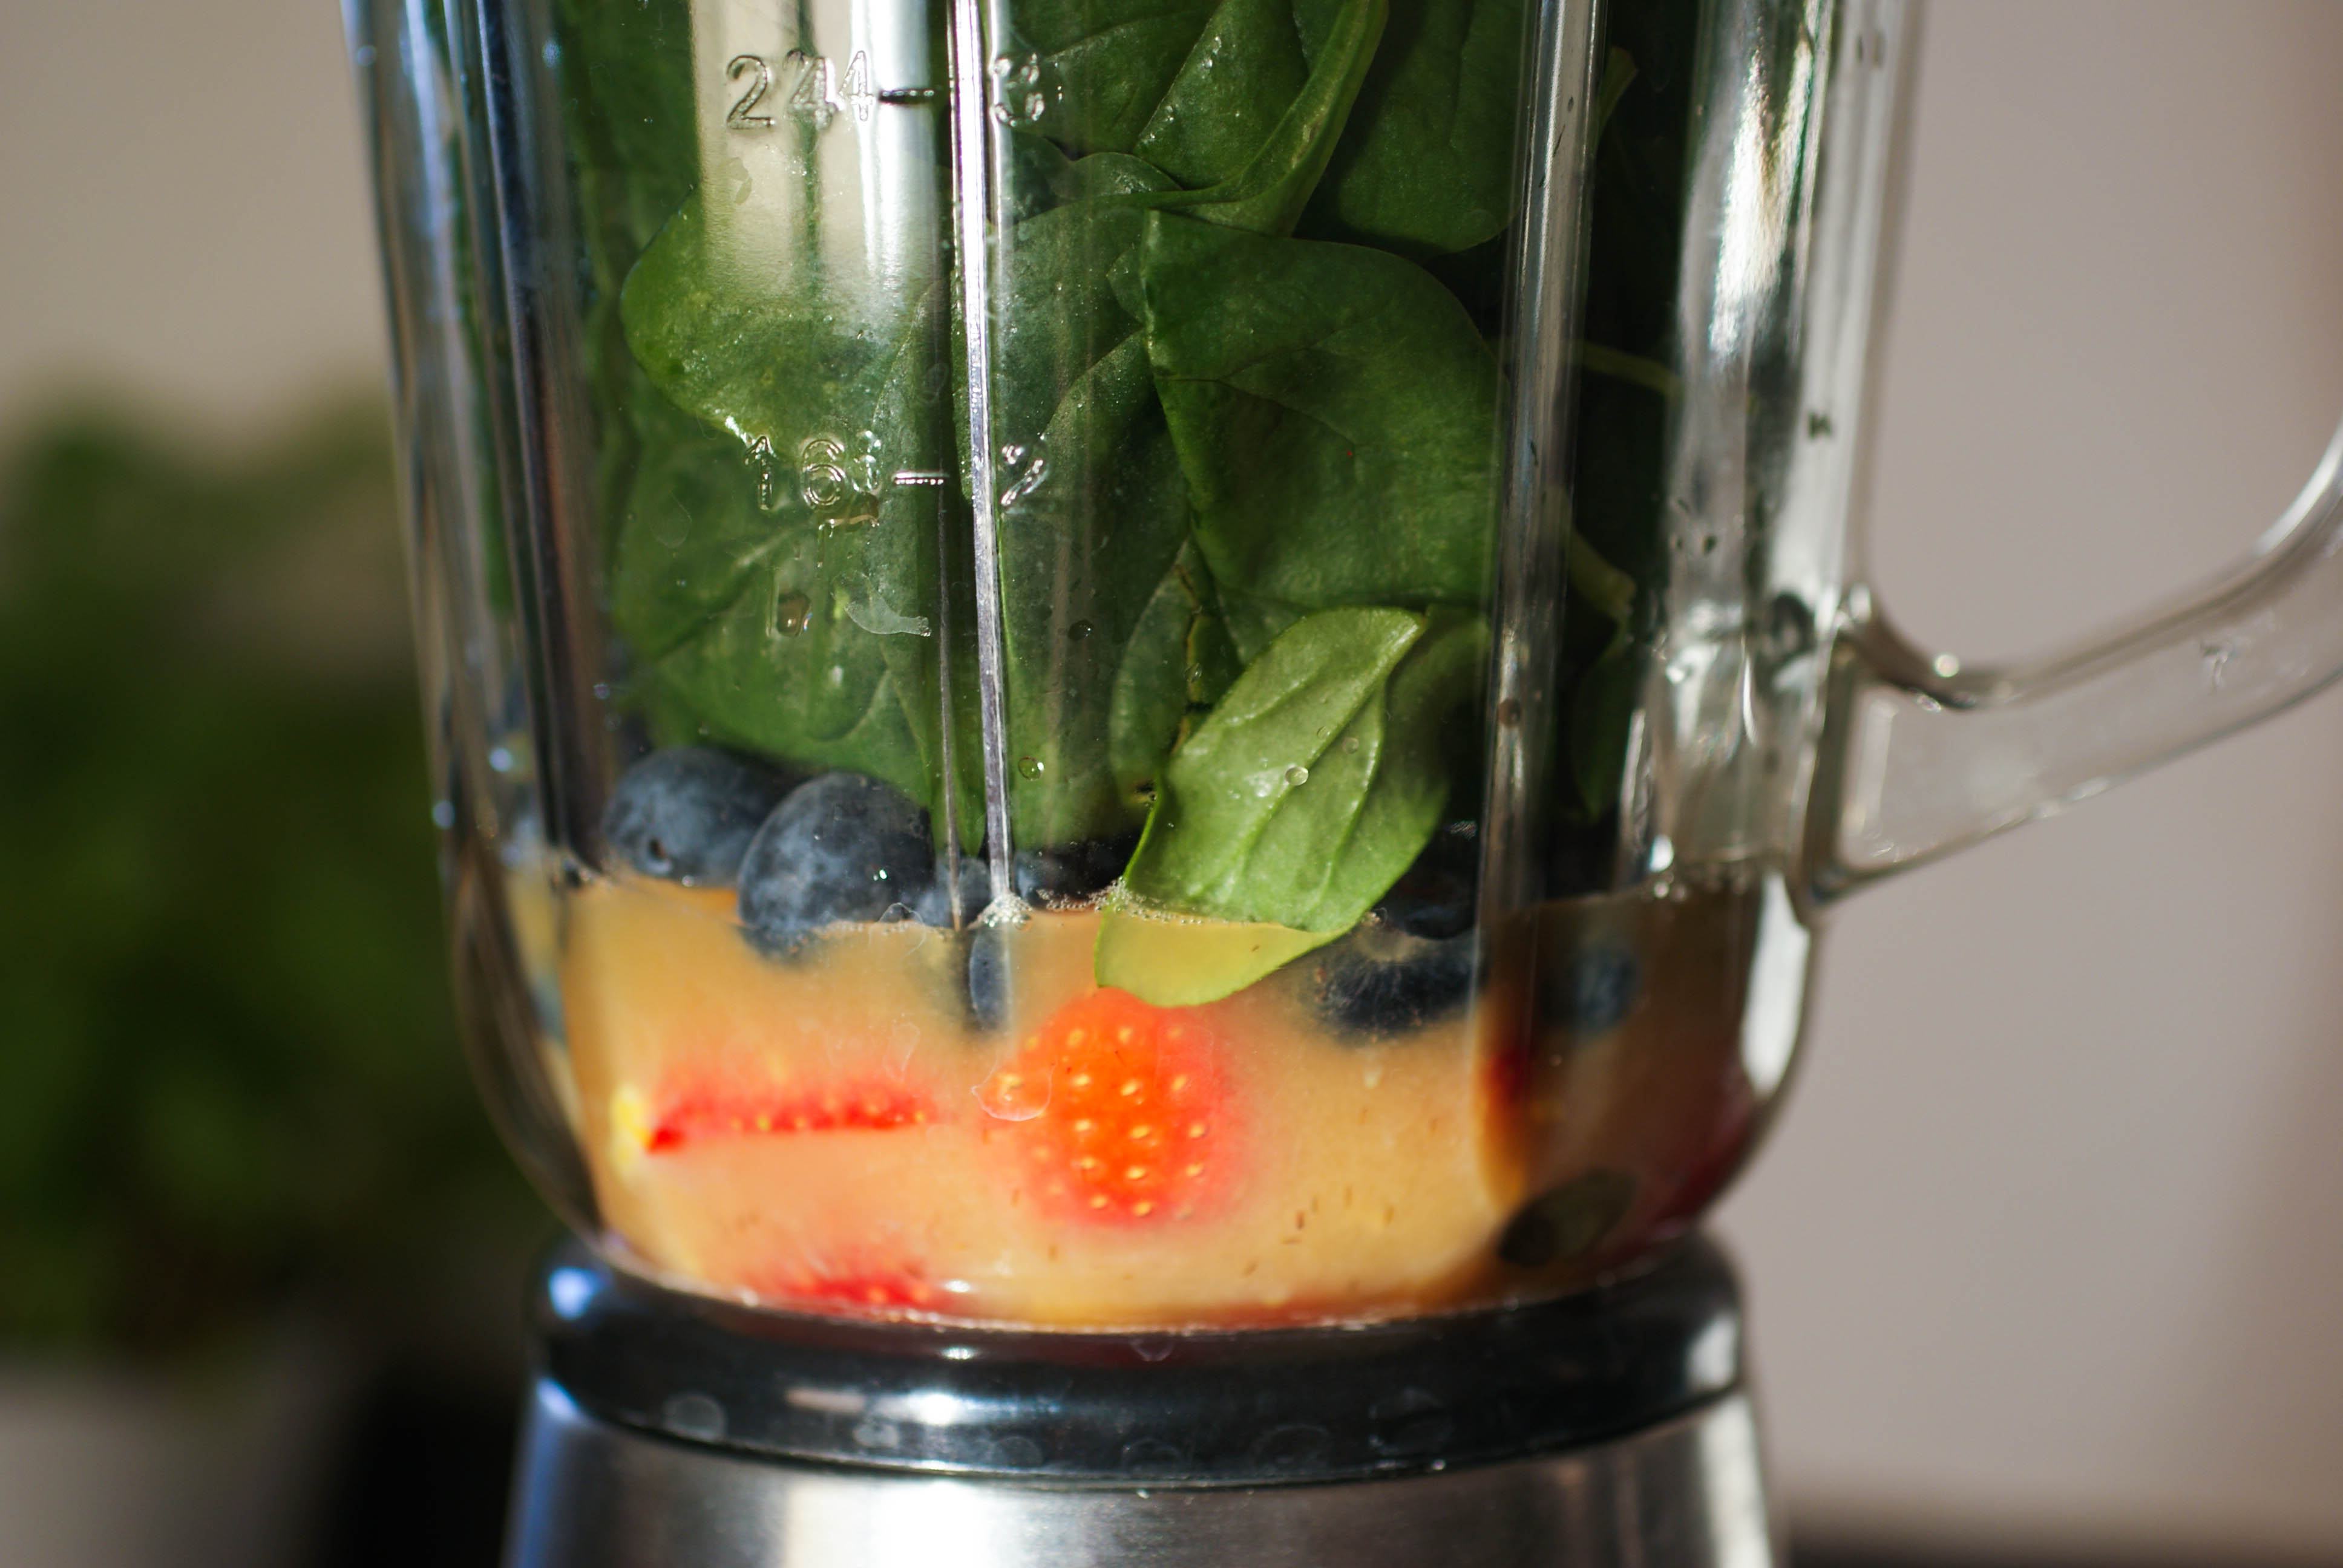
“Sleep In” Smoothie
I’ll do anything to stay in bed as long as I can on the mornings that I have to go to work. I’ll even sacrifice personal hygiene (do I really need a shower?). However, I know better than to skip out on feeding my body or else I’ll be sorry later (and so will everybody who works with me because I’ll get grouchy).
Sometimes, I’m actually up early enough to make eggs and bacon or an omelette. Sometimes I even plan ahead and make a batch of these egg cups. When I’m in a rush, I often grab a few hard boiled eggs and some prosciutto to eat as soon as I get to work. When all else fails and I find myself short on time, this is my go to breakfast. A quickie smoothie. I try to be sure to always have some healthy fat, some protein and some color in my smoothie. I never do just fruit smoothies because they don’t keep me full long enough and they are too much of a sugar hit for me.

Sleep In Smoothie
Ingredients
- 1 raw egg
- 1/4 cup of kombucha (or water or coconut milk or almond milk)
- 1 cup of fruit ( I use a mix of berries)
- 2 cups of fresh spinach
- 1/4 avocado
Instructions
Put everything in a blender together and whiz until well blended and smooth.
Lots of color
Ingredients
- 1 raw egg
- 1/4 cup of kombucha (or water or coconut milk or almond milk)
- 1 cup of fruit ( I use a mix of berries)
- 2 cups of fresh spinach
- 1/4 avocado
Instructions
- Throw everything into a blender together and whiz until well blended and smooth.