
Meat
“Hearty” Stew
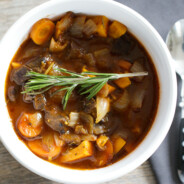
This recipe gives a whole new meaning to the term “hearty stew” because….wait for it….it’s made with veal heart. Before you run away screaming, let me tell you a few of the reasons I’m excited about eating hearts. This is what Mark Sisson has to say:
Because it is a muscle meat, heart is very similar to steak, roasts and ground beef, but is typically less expensive (we blame the “ick” factor for that!) and actually has a higher protein content. In addition, heart is an excellent source of a number of nutrients, including thiamin, folate, selenium, phosphorus, zinc, CoQ10 and several of the B vitamins. In addition, beef heart contains amino acids that are thought to improve metabolism and compounds that promote the production of collagen and elastin.
Heart is super dirt cheap.

Three francs!!
Any other cut of veal would have cost me five times as much. And, what happens in the kitchen stays in the kitchen. You don’t have to tell your squeamish dining partners that you are serving heart. Just call it veal and they’ll never know.
Stew recipes are totally adaptable. I don’t think I ever really make the same stew twice. You can throw in whatever vegetables you have on hand.
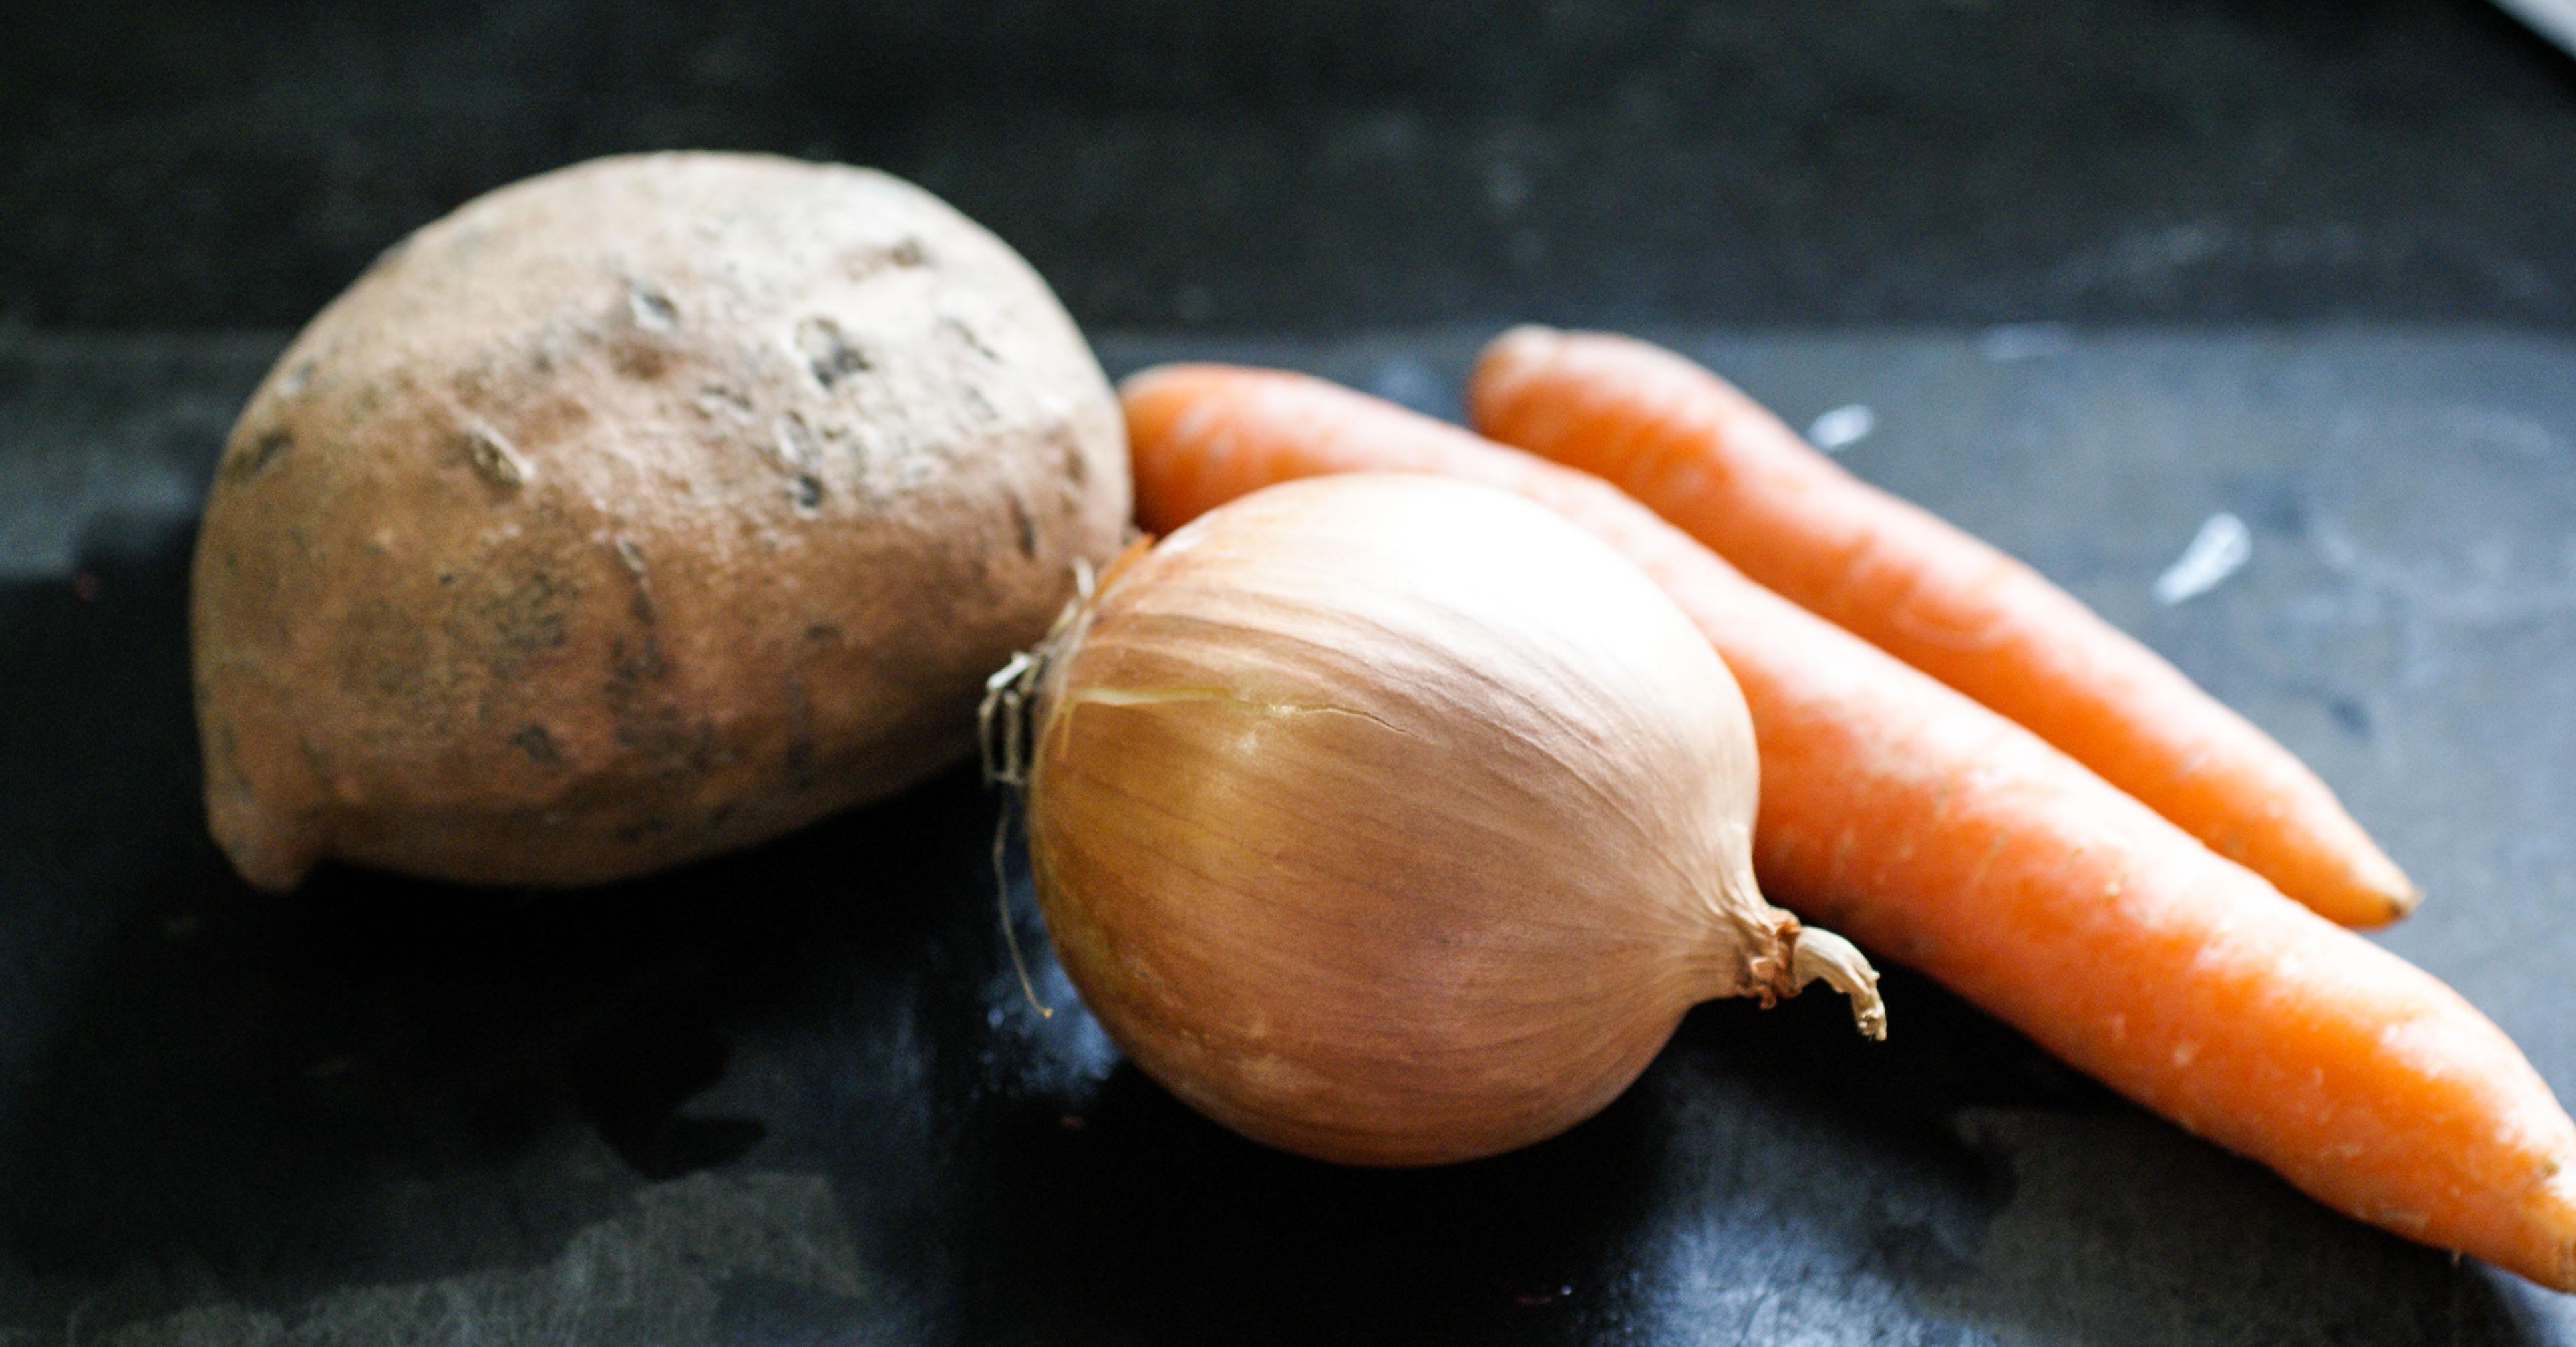
Use the vegetables you have on hand
Ingredients (for 2 people)
- 1 Tablespoon oil of choice (I used coconut oil)
- 200 grams of veal heart
- 1 onion, chopped
- 2 carrots, chopped
- 1 sweet potato, chopped
- 2 1/2 cups of bone broth
- 2 teaspoons of rosemary
- 2 teaspoons of sage
- 1 Tablespoon of tomato paste
- 1 teaspoon salt
What to do
- Melt your fat in a pot over medium high heat.
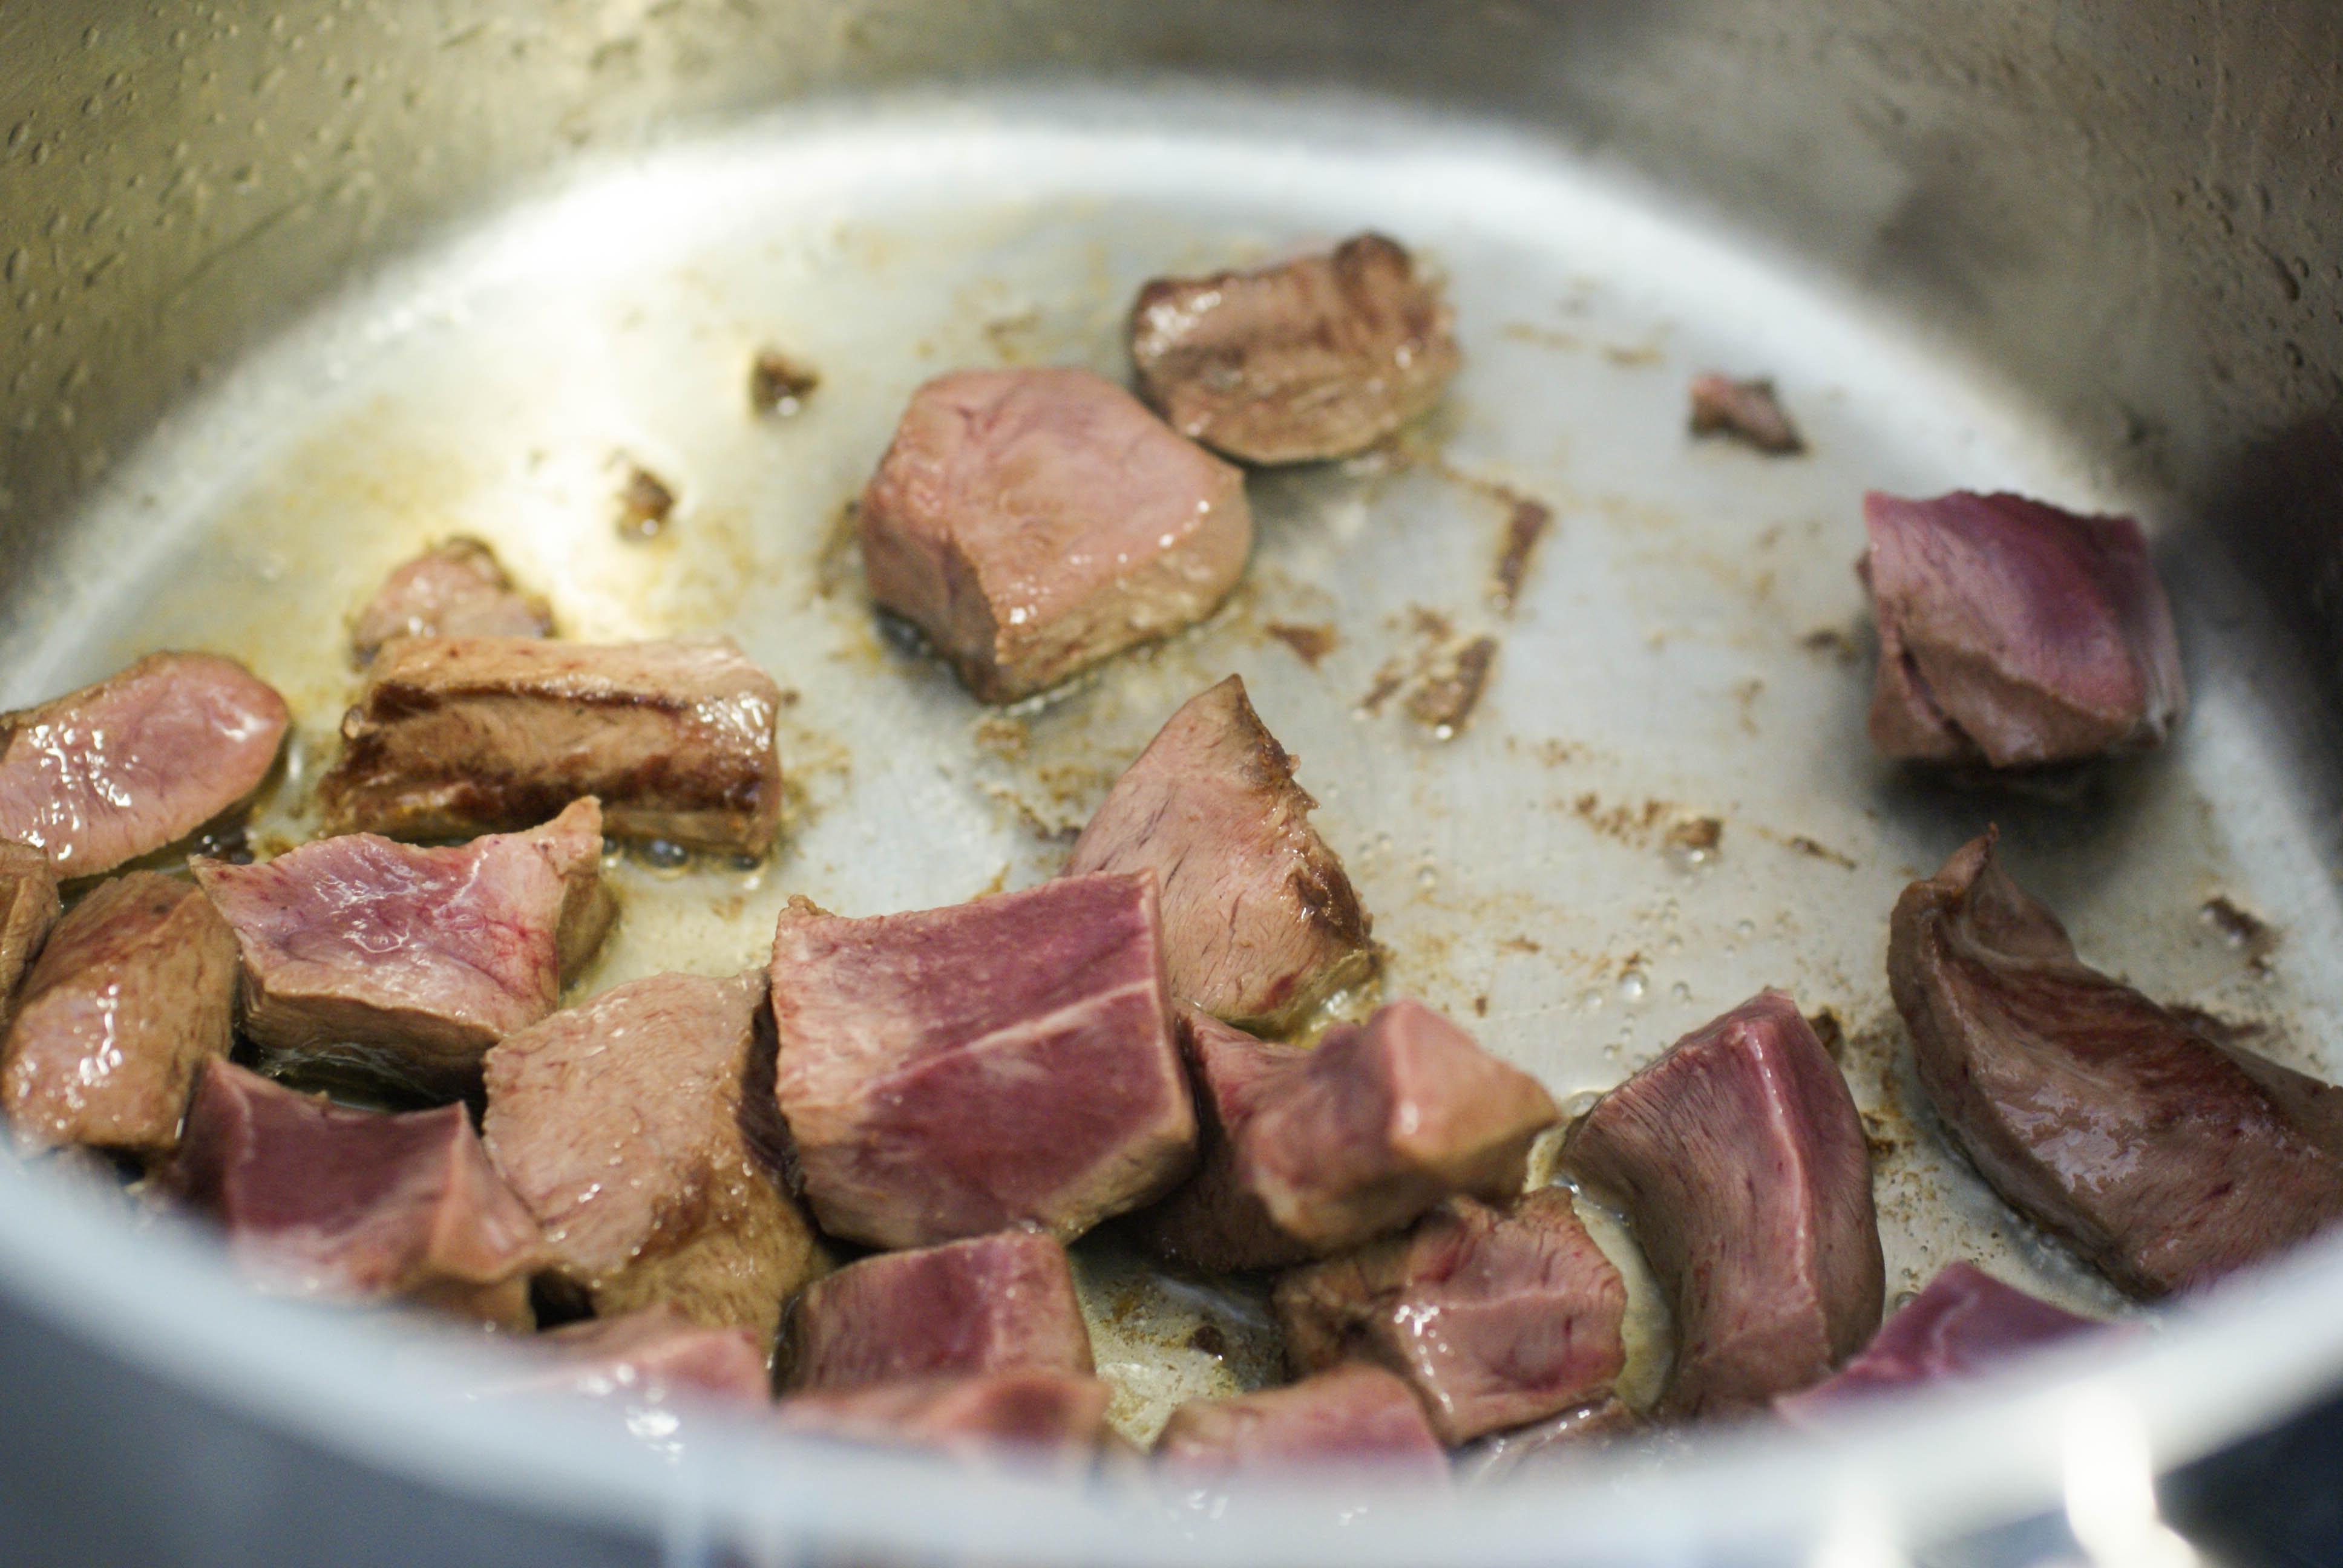
- Toss in the chopped veal heart and brown.

Brown the cubed heart
- Add in the chopped onion and cook until the onion starts to caramelize.
- Throw in the chopped carrots and sweet potato.
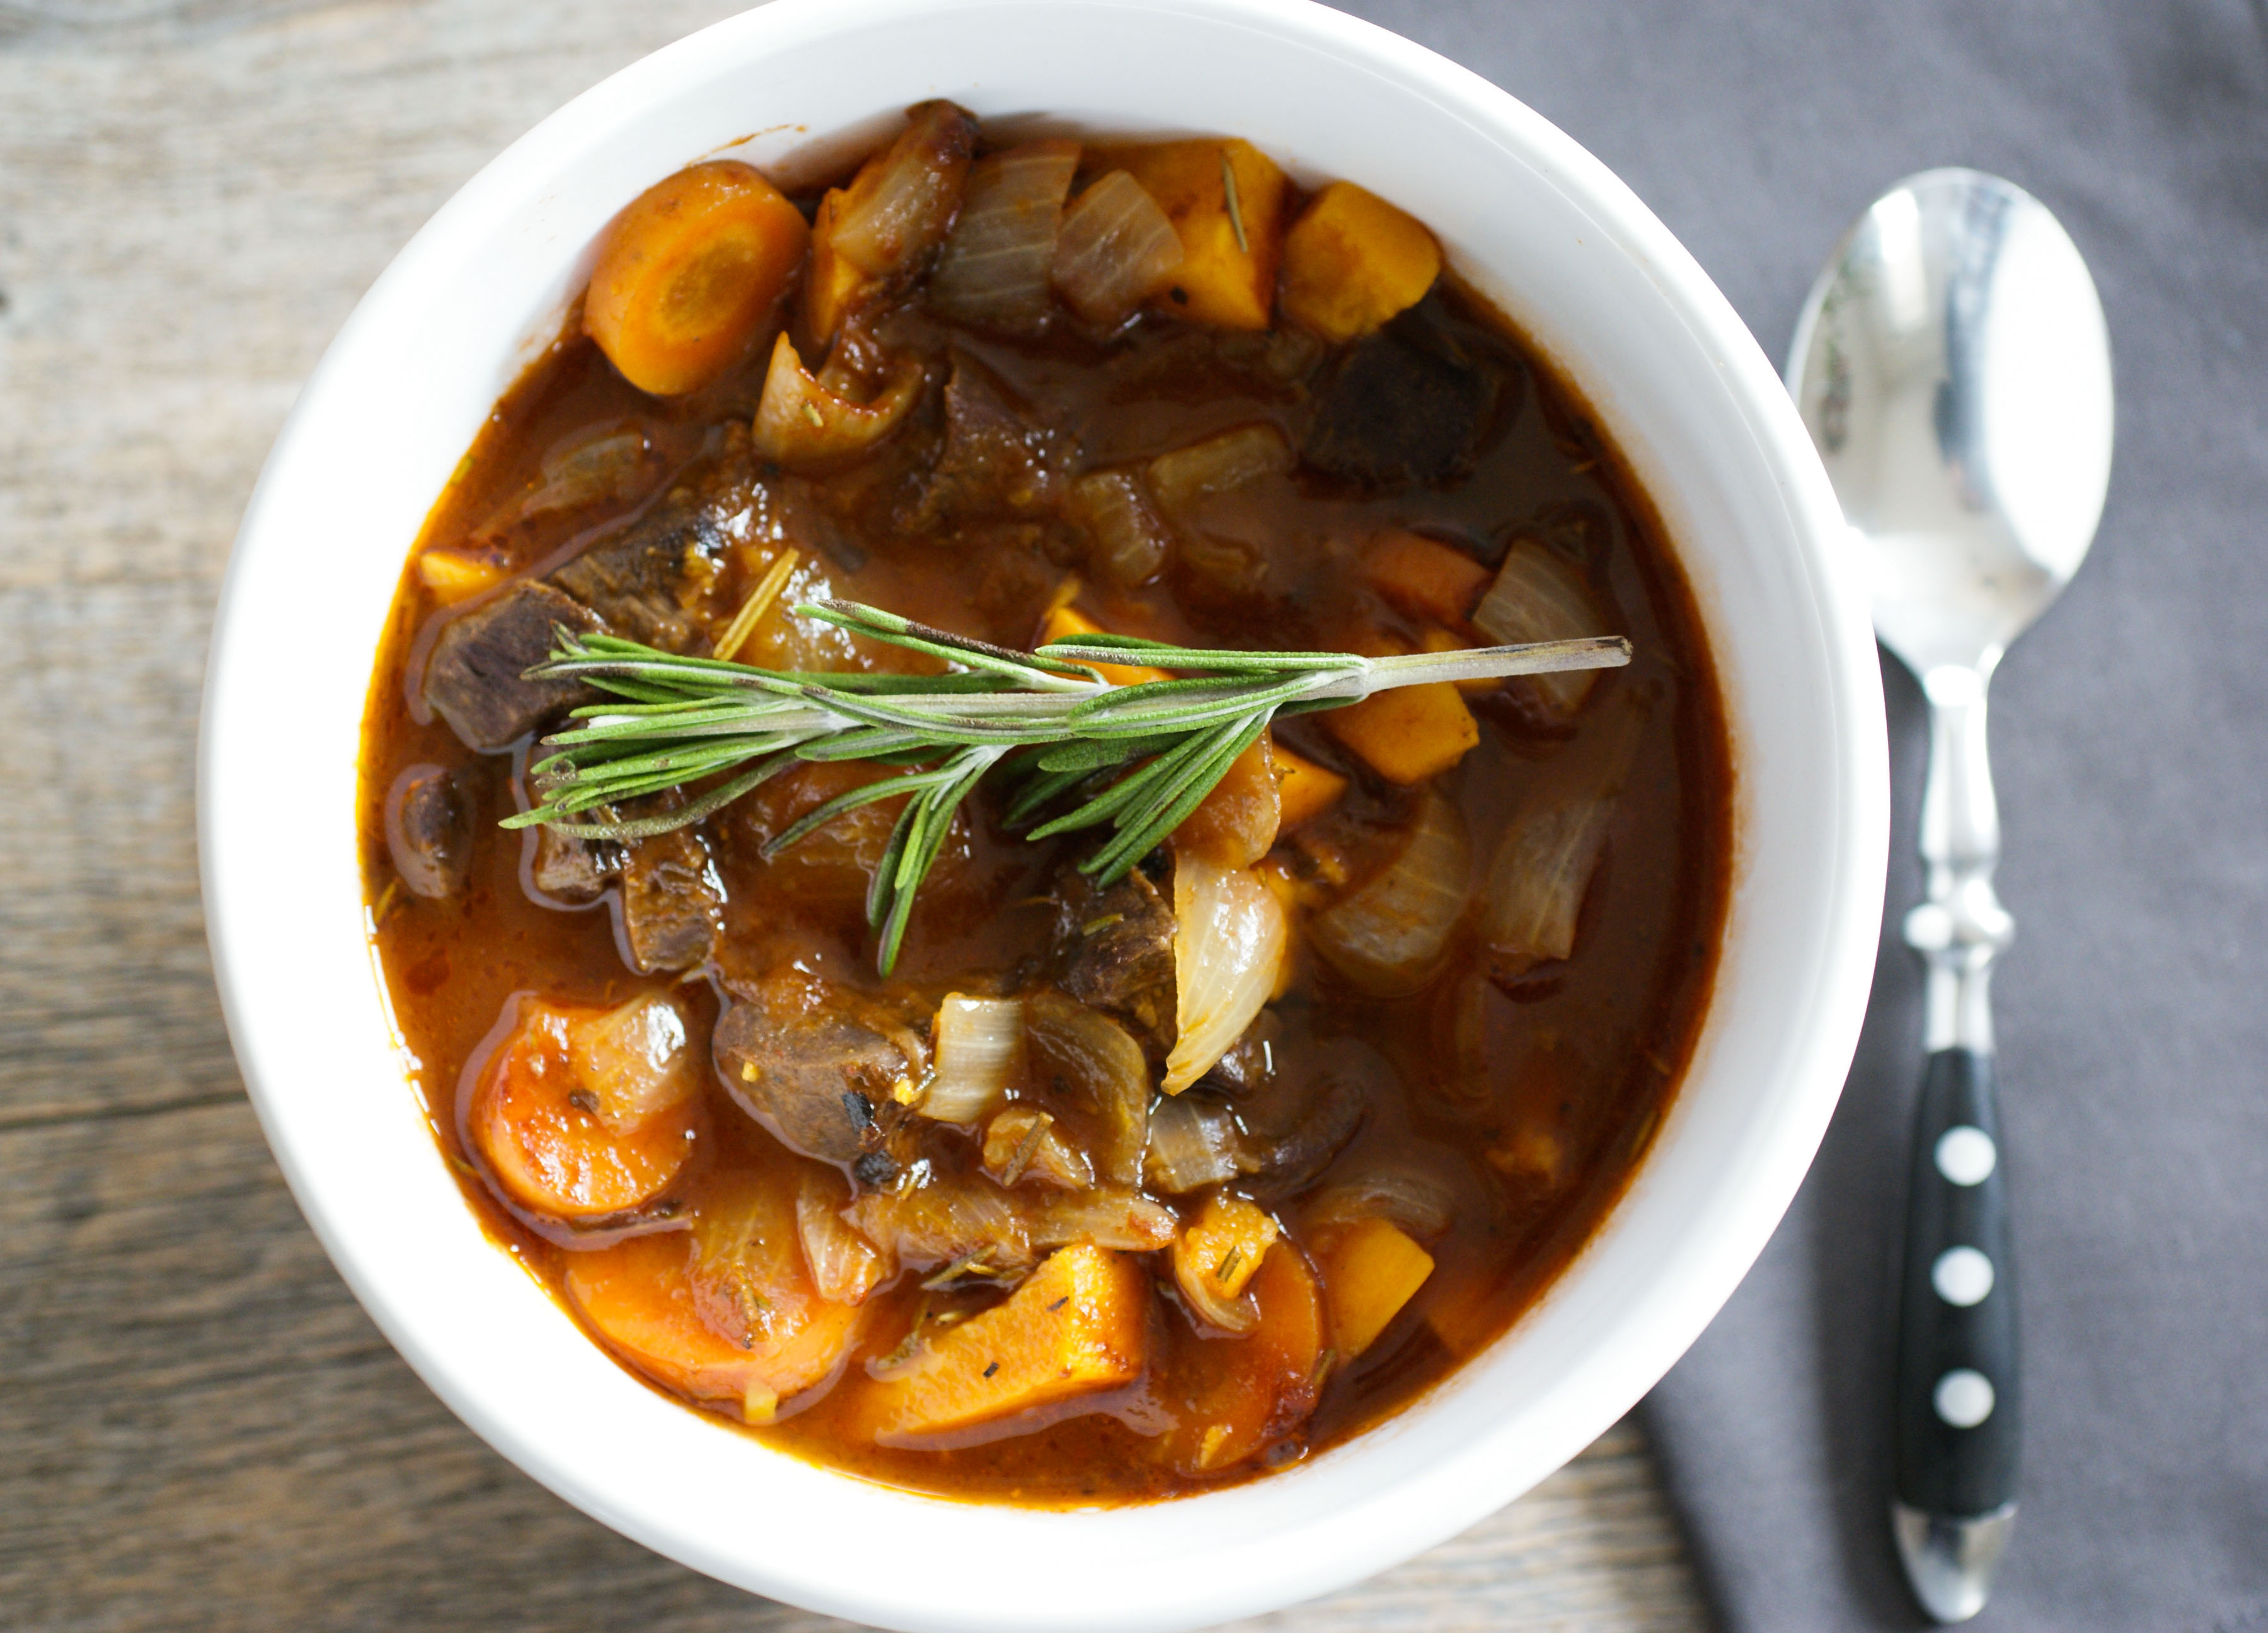
- Add the bone broth and the rest of the ingredients and stir.
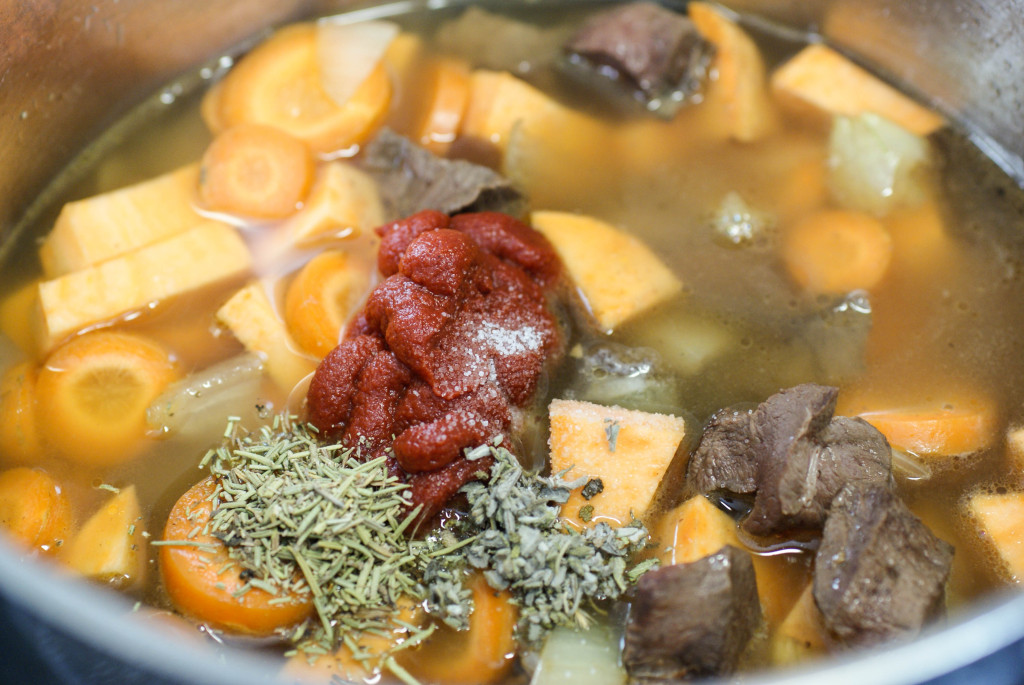
Add the rest of the ingredients
- Bring to a boil and then reduce heat and simmer for an hour (or longer).
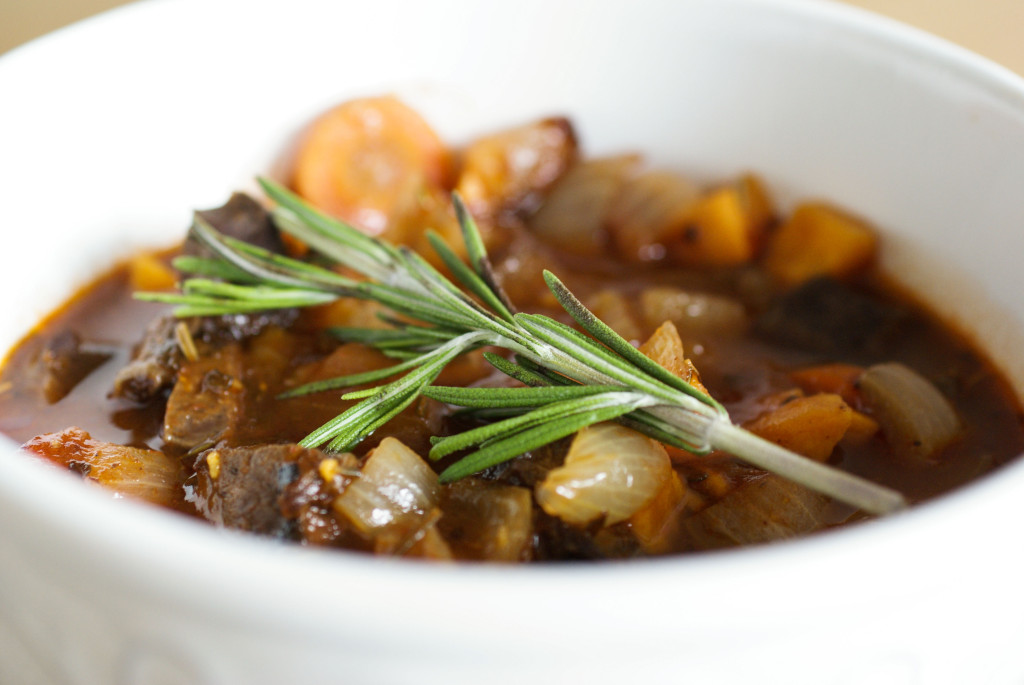
Good and good for you


The Verdict
Veal heart has a texture very similar to beef, the only difference I found was that it wasn’t stringy like stew meat tends to get. It was tender and moist. It didn’t taste any different than other meat to me. I’ll make this again for sure, and I’ll be looking for other ways to cook up some ‘not so awful’ offal.
Eat your “heart” out!
Steak with Classic Bèarnaise Sauce

Classic Bèarnaise sauce is made with egg yolks and lots of butter. Sounds like a paleo dream come true if you ask me! The yolk is the very best part of the egg and it’s absolutely loaded with things that are good for you. Gone are the days of egg white only dishes…if you don’t want your yolks, I’ll take them!
Egg Yolks Versus Egg Whites
| Nutrient | White | Yolk | % Total in White | % Total in Yolk |
| Protein | 3.6 g | 2.7g | 57% | 43% |
| Fat | 0.05g | 4.5g | 1% | 99% |
| Calcium | 2.3 mg | 21.9 mg | 9.5% | 90.5% |
| Magnesium | 3.6 mg | 0.85 mg | 80.8% | 19.2% |
| Iron | 0.03 mg | 0.4 mg | 6.2% | 93.8% |
| Phosphorus | 5 mg | 66.3 mg | 7% | 93% |
| Potassium | 53.8 mg | 18.5 mg | 74.4% | 25.6% |
| Sodium | 54.8 mg | 8.2 mg | 87% | 13% |
| Zinc | 0.01 mg | 0.4 mg | 0.2% | 99.8% |
| Copper | 0.008 mg | 0.013 mg | 38% | 62% |
| Manganese | 0.004 mg | 0.009 mg | 30.8% | 69.2% |
| Selenium | 6.6 mcg | 9.5 mcg | 41% | 59% |
| Thiamin | 0.01 mg | 0.03 mg | 3.2% | 96.8% |
| Riboflavin | 0.145 mg | 0.09 mg | 61.7% | 48.3% |
| Niacin | 0.035 mg | 0.004 mg | 89.7% | 9.3% |
| Pantothenicacid. | 0.63 mg | 0.51 mg | 11% | 89% |
| B6 | 0.002 mg | 0.059 mg | 3.3% | 96.7% |
| Folate | 1.3 mcg | 24.8 mcg | 5% | 95% |
| B12 | 0.03 mcg | 0.331 mcg | 8.3% | 91.7% |
| Vitamin A | 0 IU | 245 IU | 0% | 100% |
| Vitamin E | 0 mg | 0.684 mg | 0% | 100% |
| Vitamin D | 0 IU | 18.3 IU | 0% | 100% |
| Vitamin K | 0 IU | 0.119 IU | 0% | 100% |
| DHA and AA | 0 | 94 mg | 0% | 100% |
| Carotenoids | 0 mcg | 21 mcg | 0% | 100% |
Bèarnaise Sauce Ingredients

Shallots and tarragon
- 1/4 cup dry white wine
- 1/4 cup white-wine vinegar
- 1/4 cup finely chopped shallots
- 2 Tablespoons chopped fresh tarragon, divided
- 3 large egg yolks
- 1/2 cup butter
- 1/2 teaspoon fresh lemon juice, or to taste

Cook your steaks up after the sauce is done

What to do
Boil wine, vinegar, shallots, and 1 tablespoon tarragon in a small heavy saucepan until liquid is reduced to 2 tablespoons (this goes pretty quickly so don’t put your heat up too high), then strain through a fine-mesh sieve set into a medium metal bowl, pressing on and then discarding solids.
Whisk yolks into vinegar mixture, then set bowl over a pan of barely simmering water and cook, whisking constantly, until yolks have thickened slightly (if your heat is too high, you’ll end up with scrambled eggs).

Whisk, whisk, whisk!
Whisk in butter 1 spoon at a time, adding each spoonful before previous one has melted completely. Remove from heat and whisk in lemon juice, remaining tablespoon tarragon, 1/2 teaspoon salt, and 1/2 teaspoon pepper (or to taste). Serve steaks with sauce. Lick your plate 🙂

Totally classic
Wild Boar Steaks with Balsamic Cranberry Compote
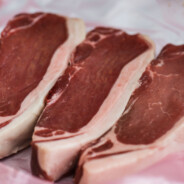
I picked up some wild boar at the farmer’s market a few days back. I bought them because they just looked beautiful, even though I really had no idea what I’d do with them.

My wild boar steaks from the farmer’s market
I think food is a lot more fun to eat when you know some history behind the particular recipe you are using or if you know fun things about the food. Consider it like ‘playing with your food’ for grown-ups. So here you go:
Fun Facts
- Wild boar is the wild ancestor of the domestic pig and it is native across much of Northern and Central Europe.
- In Germany, boar meat ranks among the highest priced types of meat.
- In certain countries, such as Laos and parts of China, boar meat is considered an aphrodisiac.
- The hair of the boar was often used for the production of the toothbrush until the invention of synthetic materials in the 1930s.
- A boar is a long-standing symbol of the city of Milan, Italy.
- Folklore, in the Forest of Dean, England, tells of a giant boar, known as the Beast of Dean, which terrorized villagers in the early 19th century.

My dinner plate

Ingredients
- 1 T olive oil
- 2 T butter or ghee, divided
- 1 tsp freshly ground black pepper
- 1 tsp salt
- Wild Boar tenderloin or steak
- ½ cup chopped onion
- 1 T chopped fresh rosemary, or ½ T dried rosemary
- 1 cup of bone broth
- 2 cups fresh cranberries
- 1 T balsamic vinegar
What to do
Preheat oven to 425 F (220 C).
Heat oil and 1 T butter in heavy oven proof pan over medium-high heat until butter is melted. Sprinkle wild boar with salt & pepper. Add wild boar to your pan and sear on all sides. Place pan in oven and cook for an additional 20 minutes. Transfer wild boar to plate, loosely cover & set aside . Do not wash pan.
Melt remaining 1 T butter in same pan over medium-high heat. Add onion & rosemary; sauté until onion softens, about 2-3 minutes. Add broth, fresh cranberries and balsamic vinegar. Simmer until sauce has reduced and thickened and the cranberries have ‘popped’.

mmmm….fresh cranberries
Slice wild boar, and serve with sauce.
The Verdict
I know why Asterix and Obelix were always eating wild boar. Wild pig is just as tasty as normal pig and it didn’t taste gamey or wild to me at all. The tartness of the cranberry balsamic compote complimented the meat very well. We served this up with roasted fennel and spinach for a delicious meal.

Wild Venison Fillet with a Rich Wine Sauce
I was at the farmer’s market the other day and I got some beautiful looking venison. I bought it, but I didn’t expect to like it. I don’t like gamey tasting meats very much…not even lamb. I was, however, determined to try something new and get a new set of nutrients (I even bought some liver!). The friendly farmer gave me tips about how to cook the venison to prevent it from ending up tough and dry. Let me tell you! This was moist and tender and delicious. I actually licked my plate (yes, I have terrible table manners in the privacy of my own home).

No “gamey” taste here!
Ingredients
- Venison fillets (we cooked 4 fillets, each weighing 100 grams or about 3.5 oz)
- 3 Tablespoons olive oil
- 4 Tablespoons ghee
- 1 shallot, chopped
- 1 clove of garlic, minced
- 4-5 medium mushrooms, sliced
- 4 Tablespoons Gin
- 50 ml (1/4 cup) red wine
- 250 ml (1 cup) bone broth
- 1 teaspoon honey
- 1 Tablespoon red wine vinegar
What to do
- Season the venison in salt and pepper.
- Brown the venison in the olive oil and the ghee over medium high heat. It needs to still remain pink inside, so don’t over do it on the cooking time.

Browning nicely
- When your fillets are nicely browned, remove from pan and keep them warm in a low oven (they will continue to slowly cook).
- Now cook the mushrooms, shallots and garlic in the pan drippings (there should be quite a bit of ghee and olive oil left in the pan).

Caramelizing
- Once the onions and mushrooms have caramelized, add in all of your liquid ingredients.

Now reduce by half
- Cook on high heat until your liquid reduces by half. This takes about 10 minutes.
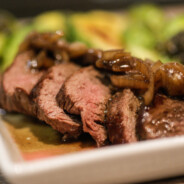
- Plate your venison and slice it.
- Spoon the sauce over the top.

Moist and tender


We served this with a side of roasted Brussels sprouts. I will definitely be buying venison again!
Bacon Wrapped Stuffed Steak
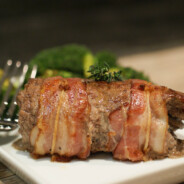
Bacon and steak all at the same time. Yes, life is good. The end result of this recipe looks really fancy pants, but it’s actually really quick and easy to make. You could serve this to guests and they would think you had been slaving away in the kitchen for hours.
This steak would have also been great without the bacon, but the Ancestral Health Society just released the video of Mat Lalonde’s presentation the other day. I saw this presentation live and in person and you can read all about my experience here, here, here and here.I have a huge paleo crush on Mat, and if he says bacon is okay, then I am totally going to do like he says and wrap everything in it. If that’s not enough to convince you, you can read what Mark Sisson has to say about bacon here or what Chris Kresser thinks here. Diane Sanfilippo, author of Practical Paleo, weighs in with her thoughts about bacon here.
Now that I’ve convinced you to eat bacon (yeah, I’m sure that took a lot of arm twisting!)…let’s get on to the recipe!
Ingredients

Simple, fresh ingredients
- 4 minute steaks (Rinds Plätzli) about 100 grams (3.5 ounces) each
- 8 strips of bacon
- 250 grams of mushrooms, chopped
- 3 cloves of garlic, finely chopped
- 1 tablespoon of fresh thyme, finely chopped
- juice of 1/2 a lemon
- 1 tablespoon of ghee
- salt and pepper to taste
- 8 pieces of kitchen string
What to do
- Heat ghee in a frying pan.
- Add garlic and saute 1 minute then add mushrooms.
- When mushrooms are cooked, add thyme, lemon juice, salt and pepper and saute another minute. Remove from heat.

The stuffing for the steak
- Preheat oven to 200 C.
- Pound steaks until they are about 1/4 inch thick.

Pound your steak…it’s fun
- Then spread your cooked mushrooms over each piece of steak.

Spread out the mushrooms
- Roll jelly-roll style.
- Wrap two strips of bacon around each roll and then secure the rolls near each end (over your bacon) with the kitchen string.

Bring on the bacon!
- Sprinkle with salt and pepper then, quickly brown.in frying pan on all sides over very high heat.

Brown on the stove top
- Place your frying pan directly in the oven for 8-12 minutes depending on how you like your steak.

Hot out of the oven
We served this up with some delicious roasted broccoli. You could easily add a little arrowroot powder and white wine to the pan drippings to make a gravy. I, however, was in too big of a hurry to eat!

Delicious and easy


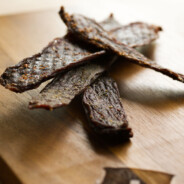
Beef Jerky
You can tell how into the paleo lifestyle we are at my house if you look at what we gave each other for Christmas this year. I gave my hubby a new set of cast iron pans, various other little kitchen gadgets, a 24 kg kettlebell and lifting gloves. He gave me a scoby and kombucha brewing jar, a new lens for the camera so I can get better food pictures and a dehydrator. Last year wasn’t much different…we got his and hers sandbags and a dip station for our workouts 🙂 Yes, we are foodie fitness nerds.
We’ve been having a lot fun dehydrating all kinds of things. So far we’ve done beets, sweet potatoes and beef jerky. I’ll talk about the beet and sweet potato chips in another post, and today we’ll do the jerky. I have never found any beef jerky in a package here that doesn’t contain lots of sugar and other questionable ingredients, so that led me to try making my own. We made some in the oven last year, but I think the dehydrator worked better. If you don’t have one, you could still do this is the oven.
I’m currently doing a Whole 30 so we made two varieties. One has a teriyaki sauce that contains honey, which my husband ate, and the other is just sprinkled with spices for me.
Ingredients
The amount of meat you use will depend on how many trays you have in your dehydrator. We currently only have two trays. If you have more, you could double this recipe.
- 400 grams (just under a pound) of thin minute steaks
- Teriyaki marinade
- salt, pepper and garlic salt for Whole 30 jerky
- Pound your steak between 2 pieces of parchment paper or saran wrap until it’s thin (1/8″).
- Slice into 2″ strips.
- For the teriyaki jerky, we used our teriyaki marinadeand marinated the steak overnight in the fridge before laying it out in the dehydrator.

Marinating teriyaki jerky
- For the Whole 30 jerky, we just sprinkled on salt, pepper and garlic powder. If you like it spicy, you could add red chili flakes.

Whole 30 jerky: just spices
- Lay your meat out on your dehydrator trays.

I need more trays!
- Dehydrate at 145 F (70C), setting 6 on our machine, and dehydrate for 4 hours.


Cheaper, tastier and healthier
Killer Pork Carnitas
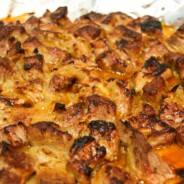
This recipe turned out so good! We tried making some wraps to put the pork in, but they turned out more like crepes (so we filled them with fruit and ate them after dinner instead).
Ingredients
- 2 pounds of pork shoulder or pork roast, cubed
- 1 tsp salt
- 1/2 tsp pepper
- 1 onion, cut into large chunks
- 1/2 tsp dried oregano
- 1 Tablespoon fresh lime juice
- 1 cup of bone broth (or water if you don’t have any)
- 1/2 of an orange (juiced and save the spent orange)

Everything, including the orange

What to do
1. Preheat your oven to 300F /150 C. Combine all the ingredients in a large sauce pan, including the spent orange half and it’s juice. Bring the mixture to a simmer over medium-high heat, uncovered. Once it simmers, transfer everything to a casserole dish, cover with foil and transfer it to the oven. Cook until the meat falls apart when prodded with a fork, about 1 1/2 hours.

Ready to be pulled apart
2. Remove from the oven and turn on the broiler. Use a slotted spoon to remove the meat from the dish and place it on a large foil-lined baking sheet. Remove and discard everything else from the casserole dish except for the cooking liquid. Return the liquid to your sauce pan and cook on high heat on the stove and boil until thick and syrupy, about 20 minutes.
3. While the liquid is reducing, use two forks to pull each cube of pork into smaller pieces. Once the liquid has become syrupy, gently fold in the pieces of pork into the pot. Try not to break up the pork any further. Taste and add additional salt and pepper.
4. Spread the pork and the syrupy juice back onto the foil lined pan and evenly spread the meat around so there is a single layer of meat. Place the baking sheet back in the oven and broil until the top of the meat is well browned and edges are slightly crisp, about 5 to 8 minutes. Using a wide metal spatula, flip the pieces of meat and broil the other side until well browned and edges are slightly crisp, 5 to 8 minutes.

Smells so good
And, since our wraps failed, we just served it with a side of avocado and tomato salad. Seriously good stuff.

Dinner is served
Curried Meatballs
I love meatballs and we’ve already featured a few versions here at Swiss Paleo. We’ve had bacon wrapped meatballs with sun-dried tomato, basil and walnut pesto and we’ve had venison meatballs. This time, we tried out curried meatballs with a tropical twist. I’ve got loads more ideas for meatballs, so this won’t be the end of the great meatball meal experiments.
Ingredients (for 15 medium meatballs)
- 600 grams (about a pound) of ground beef (or a ground pork and beef mix)
- 1 Tablespoon fish sauce (I use Red Boat)
- 1 Tablespoon Gluten free Tamari sauce (or coconut aminos)
- 1 Tablespoon mild yellow curry powder
- 2 spring onions, chopped
- 1 Tablespoon fresh cilantro, chopped
- salt and pepper to taste
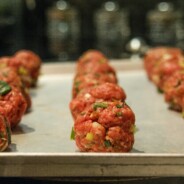
Mix all of your meatball ingredients together in a mixing bowl. I used my hands to do the mixing. Roll into medium sized meatballs and place on a baking sheet. Place into a preheated oven (400 F/200 C) and bake for about 30 minutes.

Ready for the oven
Making the Sauce
- 1 cup coconut milk
- 1 cup chicken broth (we made our own)
- 1 teaspoon fish sauce
- 1 teaspoon tamari sauce
- 1 teaspoon curry powder
- 1 Tablespoon arrowroot powder
- 1 spring onion, chopped
- 1 red Thai chili, finely diced (or 1 Tablespoon red chili flakes)
- 1 Tablespoon lemon juice
- 1 Tablespoon lime juice
- Optional: 1/4 cup chopped pineapple and 2 Tablespoon pineapple juice
- Cilantro, chopped for garnish
Put everything together in a saucepan and bring to a boil. Reduce heat and simmer until sauce thickens. Add cooked meatballs to your thickening sauce.

Cook until sauce starts to stick to your meatballs
We served this over cauliflower rice, but it would also work well over zucchini spaghetti or spaghetti squash.

Bacon Wrapped Meatballs with Sun-Dried Tomato, Basil and Walnut Pesto

I love meatballs. My Italian father-in-law used to always make us meatballs with marinara sauce when he was visiting. I loved that man and boy, could he cook. Tonight we decided to make meatballs, but I wanted to try something new. These turned out even better than I thought they would and I’ll be making this variation again. They even look special enough to serve at a dinner party. You’ll just have to trust me on that one because my food photography skills are seriously lacking. Natural light is the best when taking food pictures and I just don’t get much of that here. It’s totally dark when I get home and start making dinner. My wish list for Christmas includes a prime lens for my camera and Lightroom 4 photo editing software. I’m hoping those two things will make me look like I know what I’m doing (even though I don’t).
Meatball Ingredients (for 12 meatballs)
- 600 grams (about a pound) of grass- fed ground beef
- 1 medium onion, finely chopped
- 4 large mushrooms, finely chopped
- 2 eggs
- 1 tsp salt
- 1 tsp garlic powder
- 1/2 tsp oregano
- 12 pieces of bacon
- Put all of your ingredients (except the bacon) into a large mixing bowl. Now dig in and get your hands dirty! Combine it all by hand until well mixed.
- Roll into balls. Ours were slightly larger than golf balls.
- Wrap each meatball with a piece of bacon and secure the bacon in place with a toothpick.
- Place your meatballs on a baking tray and bake in a pre-heated 200C (400 F) oven for about 30 minutes.
- Remove from the oven and spoon 1 tsp of pesto on top of each meatball.
- Return to oven for another 5-10 minutes.

Pesto on and ready to go in the oven again

Pesto Ingredients
This pesto recipe is loosely based on this one over at Everyday Paleo.
- 2 cups of fresh basil leaves
- 1 cup of walnuts, unsalted
- 2 cloves of garlic
- 1/2 cup of olive oil
- 1/2 tsp salt
- 8 sun-dried tomatoes, chopped
- 2 Tablespoons lemon juice
- Put everything in your food processor and pulse until you reach a pesto consistency. If it seems too thick, just add in a little more olive oil.

Pesto
- This pesto would be good on just about anything (chicken, steak, inside an omelette, on celery or on paleo walnut crackers). You’ll have extra pesto, so now you know what to do with it!

Meatballs!


These meatballs were awesome. We served them with grilled eggplant and a cabbage/carrot salad. I was pretty full after

Almost elegant
The Holy Grail…a good paleo pizza

We’re all searching for it. A paleo pizza that will come close to the cheesy bliss we remember. I’ve searched high and low and seen loads of interesting ideas for how to make a paleo pizza crust. I’ve seen crust made from cauliflower, eggplant, pureed chicken, ground beef, portobello mushrooms and of course almond flour and coconut flour. These are all tasty in their own right, but do they taste at all like pizza?
I recently got a new cookbook called Paleo Indulgences. I expected it to only have decadent dessert recipes, but it actually has a lot more than that. Which is a really good thing. I’ve got to stop making desserts. My current excuse is that I need to experiment with recipes so that I can blog about them. Really, I just like to eat.
This cookbook has a recipe for paleo pizza crust that I decided I just had to try. What caught my eye, was that the author said it doesn’t just taste like a bunch of nuts. It also has an ingredient that you don’t usually see in paleo recipes. Yeast. Yes, like the stuff you make bread with. This caused me to do a bit of research to see if yeast was really ok. I’m not a paleo perfectionist (what shade of paleo are you?) but I do keep it pretty clean. I ran across this post by Sarah at ThePaleoMom and decided that yeast was okay. I love reading the science side of things and Sarah is a scientist so I was satisfied with her explanation.
Paleo Pizza Crust
Yeast Mixture
- 1/4 cup (60ml) warm water
- 2 tsp honey
- 2 tsp active dry yeast
Dry Ingredients
- 3/4 cup (90 grams) almond flour
- 3 Tbsp coconut flour
- 2/3 cup (80 grams) arrowroot powder (called Pfeilwurz in German and available at reform hauser and bio ladens)
- pinch of sea salt
Wet ingredients
- 1 egg
- 2 tsp olive oil
- 1 tsp apple cider vinegar
How to:
- Preheat your oven to 425 F (220 C).
- Place the yeast ingredients in a small bowl and mix. Let it sit for 4-5 minutes until it gets all foamy.
- Place the dry ingredients in a medium bowl and whisk together.
- Add the yeast and the wet ingredients to the dry ingredients and mix with a hand mixer.
- Scoop your dough out onto a parchment-lined baking sheet and use a spatula to spread it evenly into a circle. Ours made a 9 inch crust.
- Bake for 9-10 minutes. Remove from the oven, carefully flip the crust over with a spatula, top with sauce and your favorite toppings and then bake for 5-10 minutes more.
Pizza Sauce
Ingredients
- 5 plum tomatoes cut in half
- 2 Tbsp olive oil
- dried basil
- 1-2 cloves of garlic
- salt, pepper and dried basil to taste
How to:
- Place your tomatoes, cut side up, on a foil-lined baking sheet.
- Drizzle with olive oil and sprinkle on salt, pepper and basil.
- Throw your garlic cloves (unpeeled) onto the baking sheet as well.
- Optional: you could also throw on a red or green bell pepper and some onions to roast as well.
- Throw into your pre-heated oven. We cooked our tomatoes on the broiler setting for about 20 minutes because we are impatient. You could cook them slower in a 200 C (400F) oven for 45 minutes.

Oven-roasted tomatoes
- After removing from the oven, peel your garlic and throw the garlic and tomatoes into a food processor or blender and whiz it up. Taste and adjust seasonings if needed.

Ready to whiz
- This made about 2 cups of sauce. Left over sauce is wonderful in an omelette the next morning or over chicken breasts the next night. Just sayin’.


Toppings
Here’s where you can get creative and put whatever you like on your pizza. We made a homemade spice blend (Italian sausage flavor) and mixed it into ground beef/ground pork and made sausage patties that we crumbled onto our pizza. We also added onions, red peppers and some raw buffalo mozzarella (we occasionally eat dairy, but not much). Other things that would be good: prosciutto, grilled eggplant, bacon…the possibilities are endless.

Pizza!
And the verdict….
We thought it was really good and we ate the whole pizza. The yeast did give it a more authentic taste. Was it the same pizza of old? No, but we weren’t expecting it to be. There was no processed cheese, there was no gluteny crust and there was no greasy pepperoni. There were also no stomach aches, no bloating, no waking up in the night dying of thirst and no regrets 🙂
Enjoy!
We shared this recipe at Slightly Indulgent Tuesdays, Gluten Free Fridays